Setup WhatsApp forms
WhatsApp (WA) forms are predefined structured interactions in WhatsApp AI-agents. The forms are designed to guide users through specific tasks or conversations. These forms facilitate various actions, including:
- Scheduling and confirming appointments: Users can easily confirm bookings through guided steps.
- Collecting user feedback: Businesses can gather valuable feedback by displaying users with structured questions.
- Collecting user information: Businesses can collect required user data, such as contact details, preferences, or other relevant information.
Here is how a sample WhatsApp form look in a chatbot:

Create a form
To set up a form for WhatsApp, you should have a WhatsApp Business Account (WABA). Each form is assigned a unique flow ID, which can be found next to the flow name or within the flow URL. For detailed instructions, refer to Facebook's documentation.
To create a form, follow these steps:
-
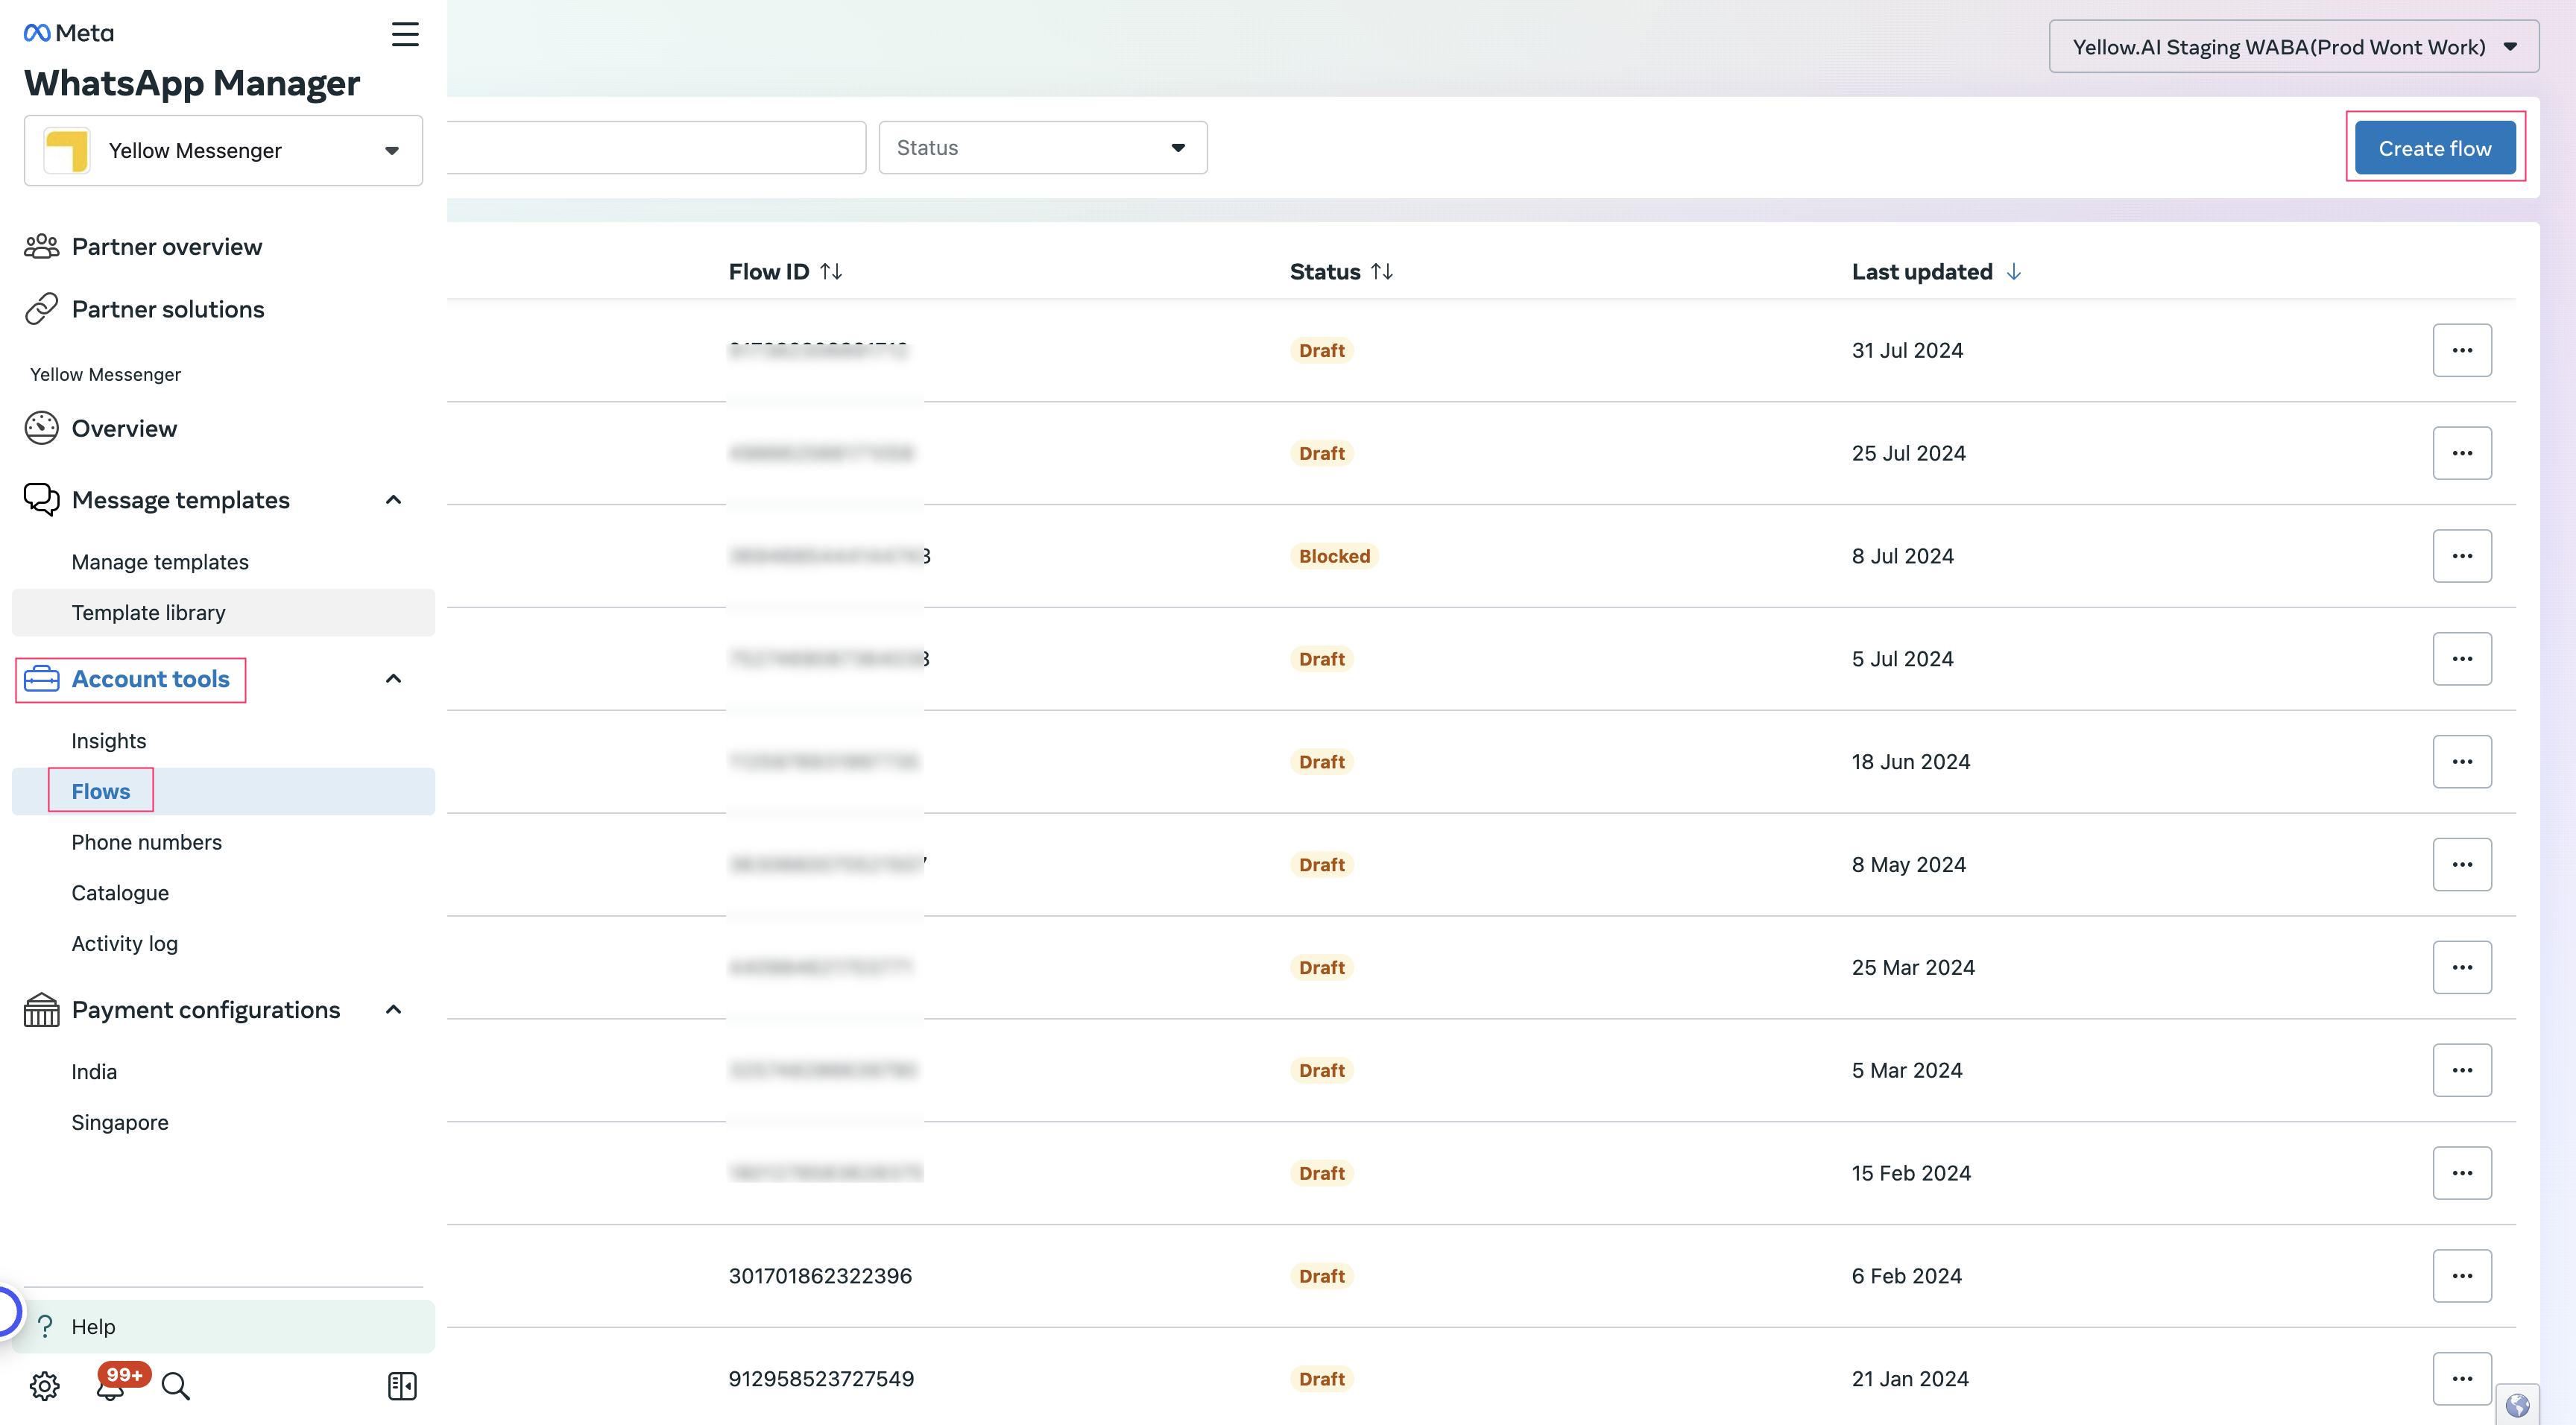
Log on to Facebook Business Manager (FBM).
-
Navigate to Account tools > Flows.
-
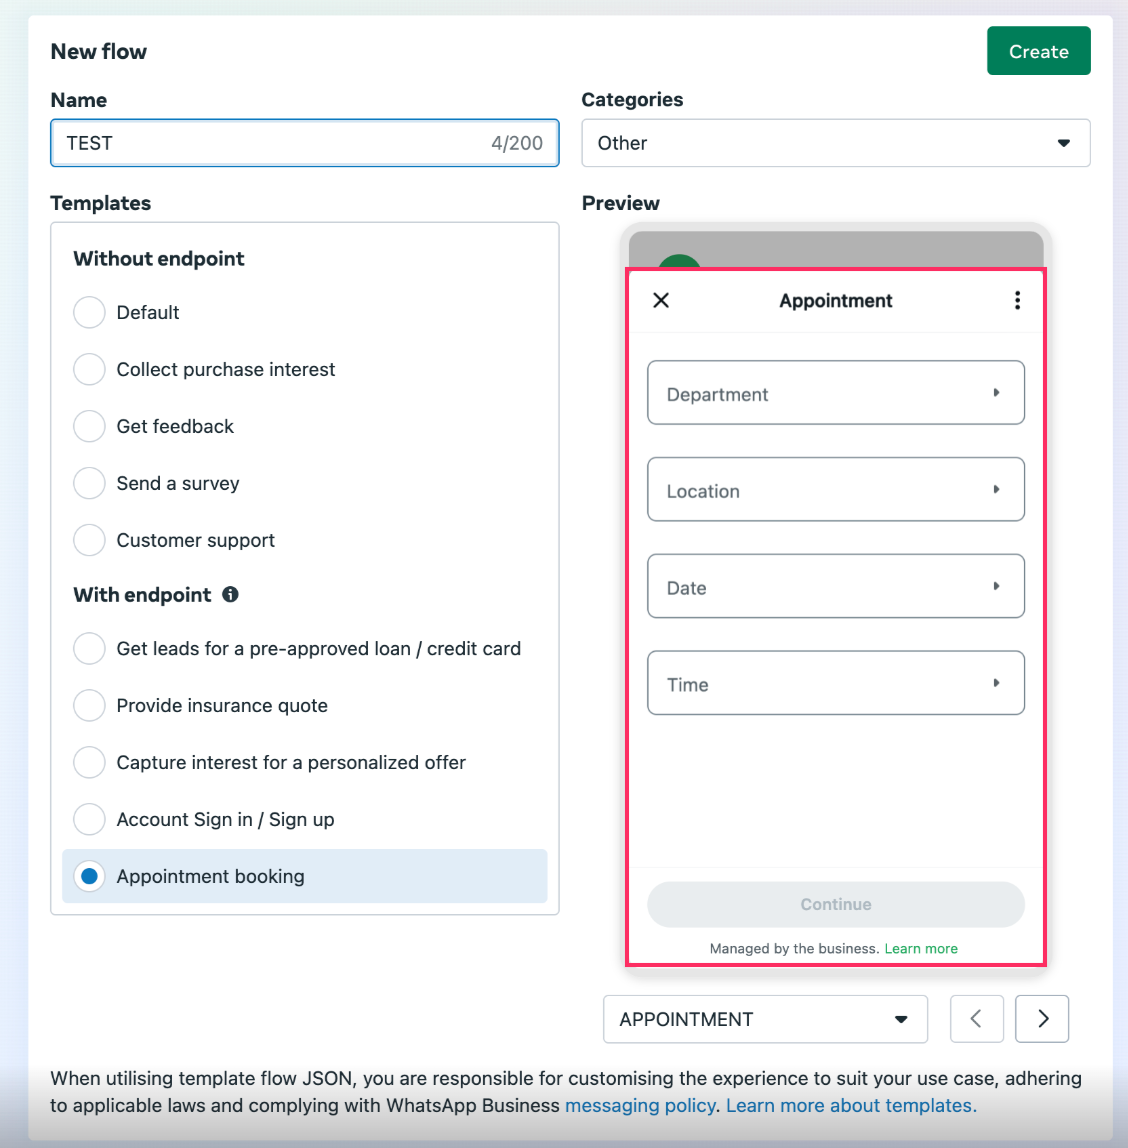
In Create flow section, enter the Name of the flow
-
Select your preferred template. Choose either with endpoint or without endpoint, depending on your use case.
-
Choose a category based on your business use case.
-
Click Create.

-
You can view the selected endpoint URL under the Preview section.
-
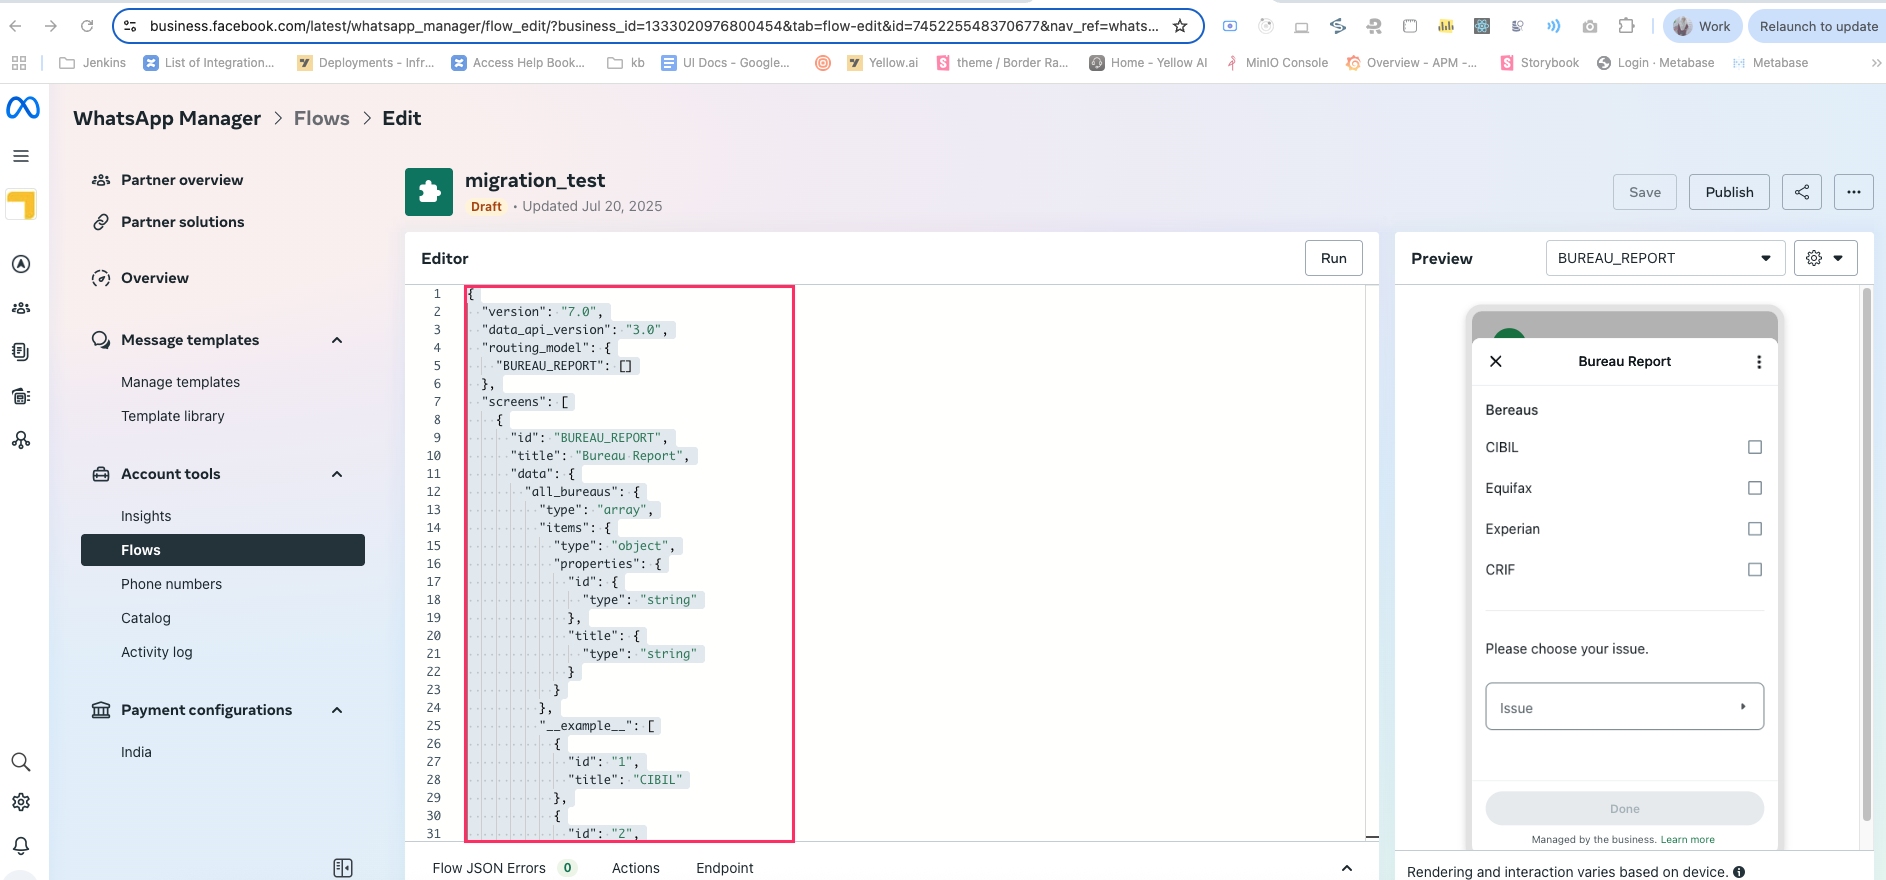
This will create a form in draft mode. You can modify this form as required by editing the JSON script. Refer to the Facebook documentation to learn more about the syntax as well as the components to build the Form.
-
Under Edit flow, click the Setup icon. Ensure that the flow version is set to
Version: 6.0and thedata_api_version: 3.0.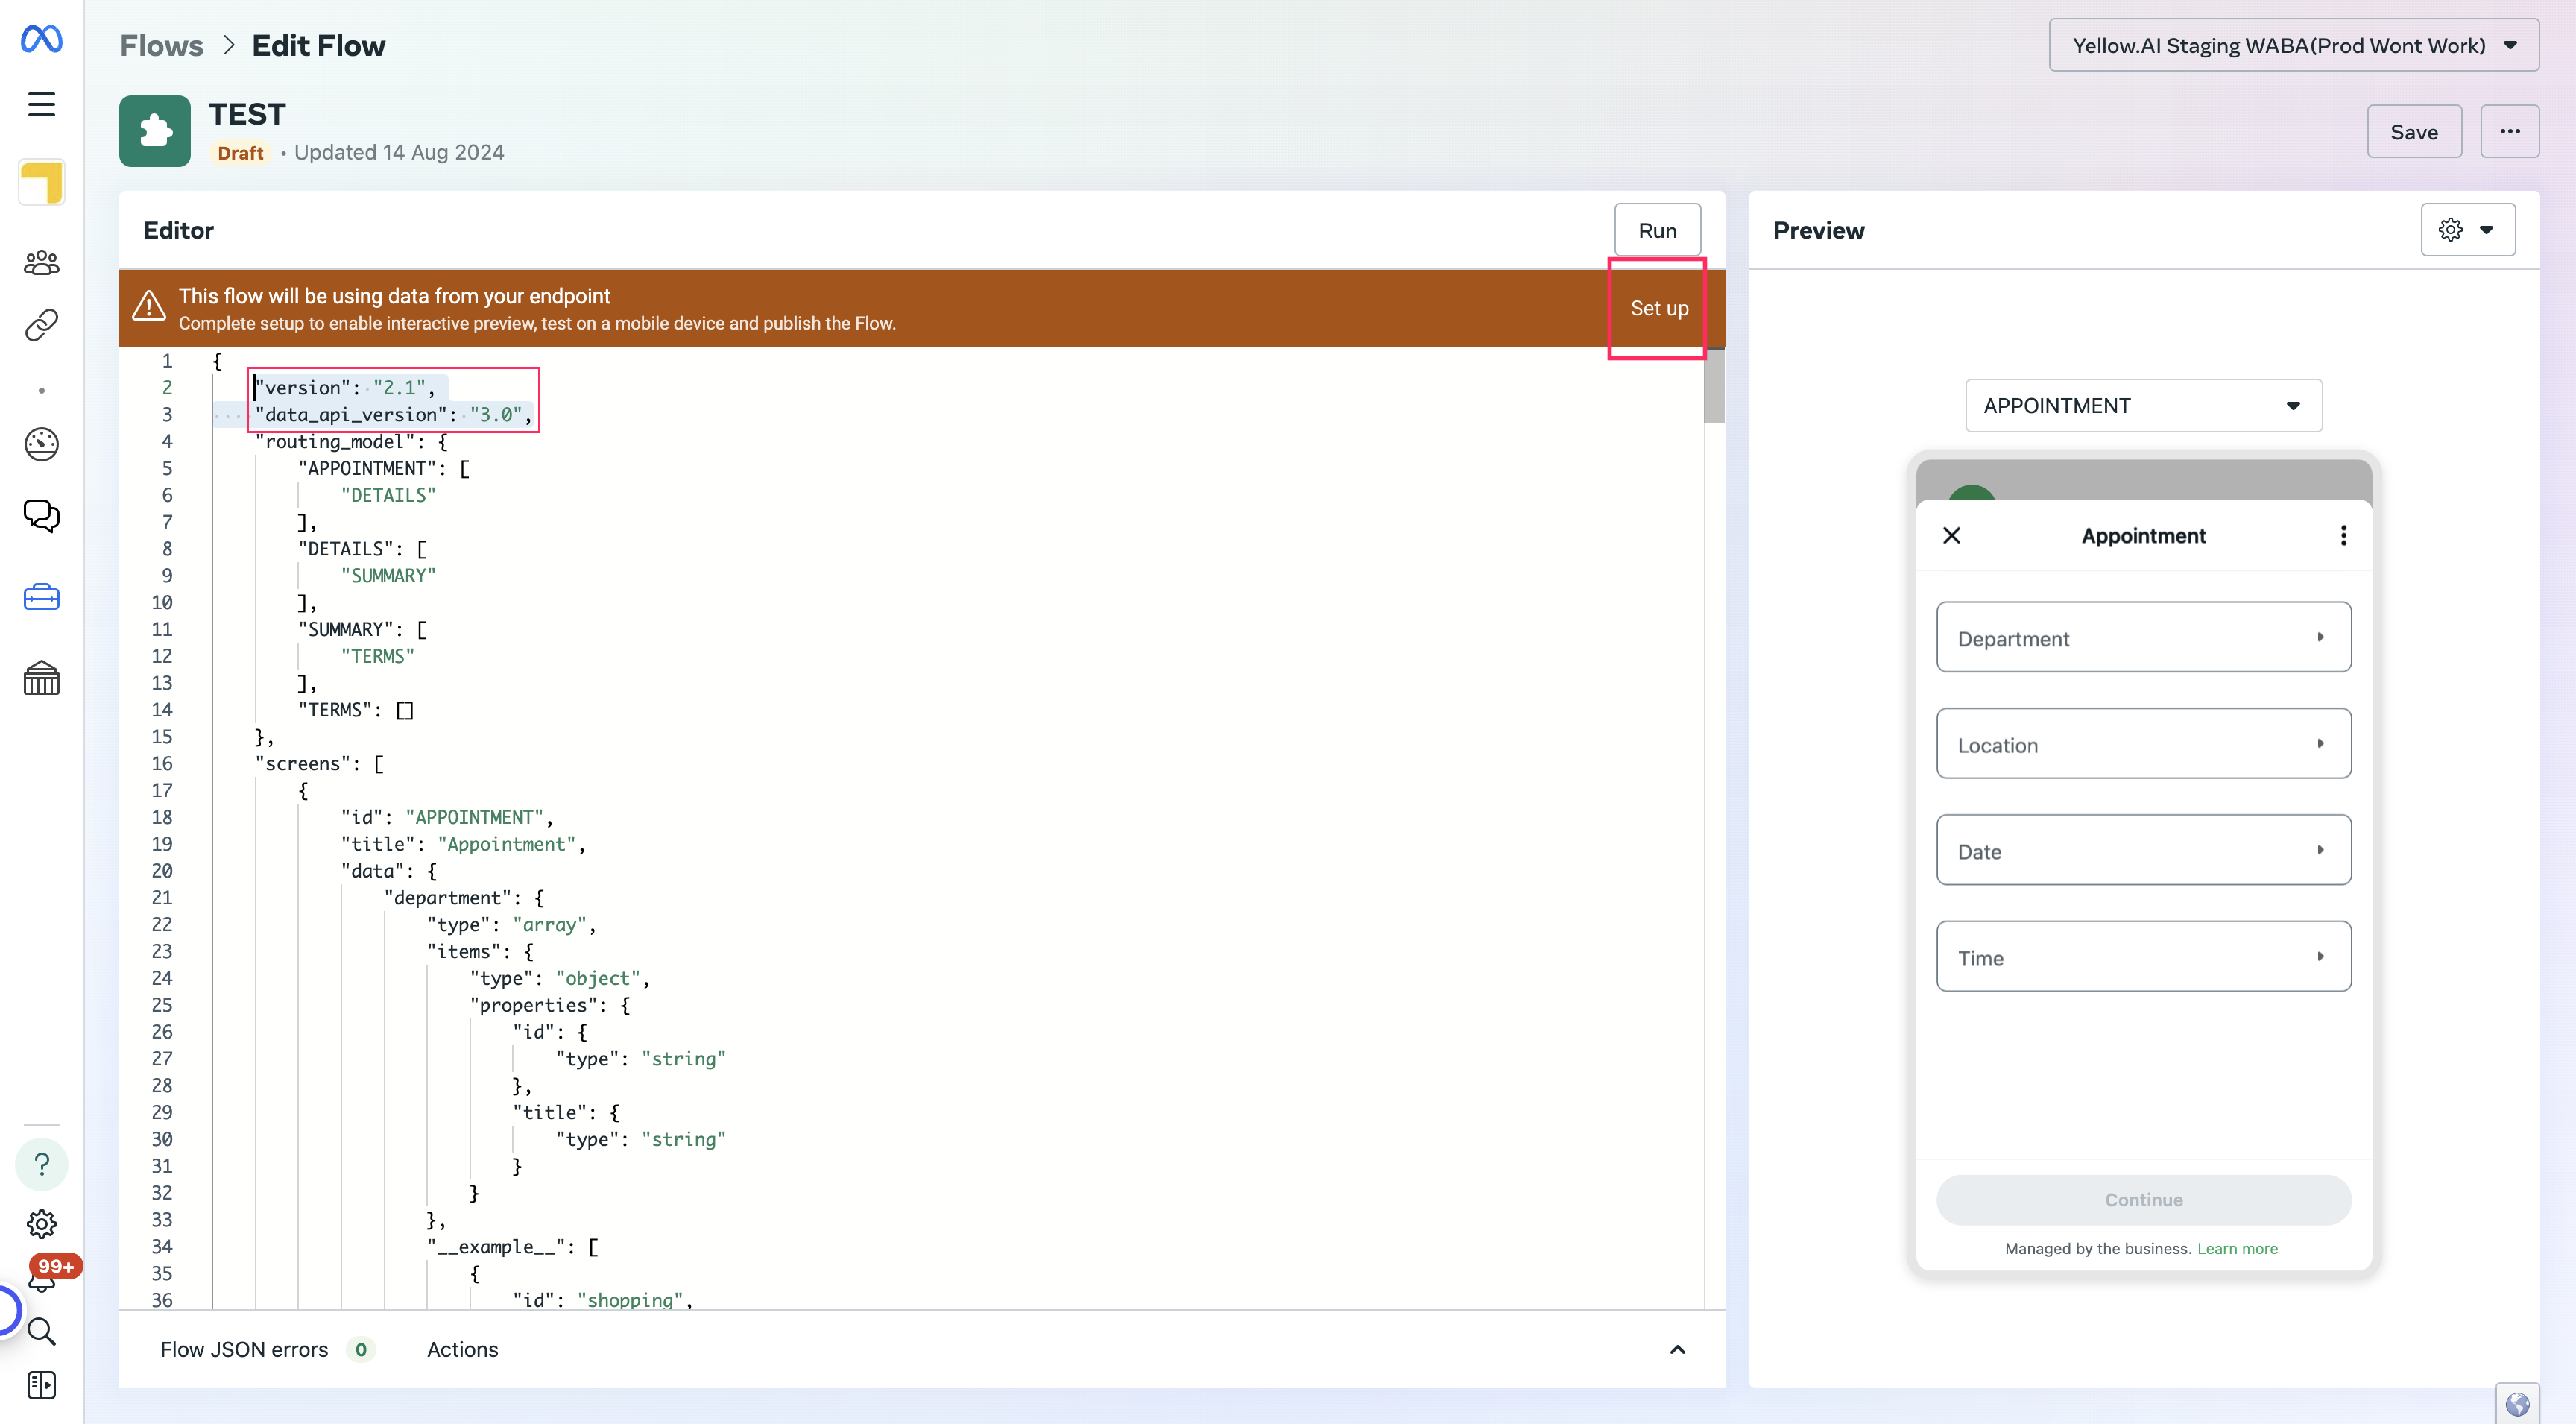
- Once you have finished modifying the script and running successfully, you need to set up the endpoint.
-
To set up the endpoint URI, use the following Node.js script to generate an encrypted key.

-
Setup the endpoint URI as explained below:
-
Login to Yellow.ai platform.
-
Go to Channels > WhatsApp messenger > Meta flow.
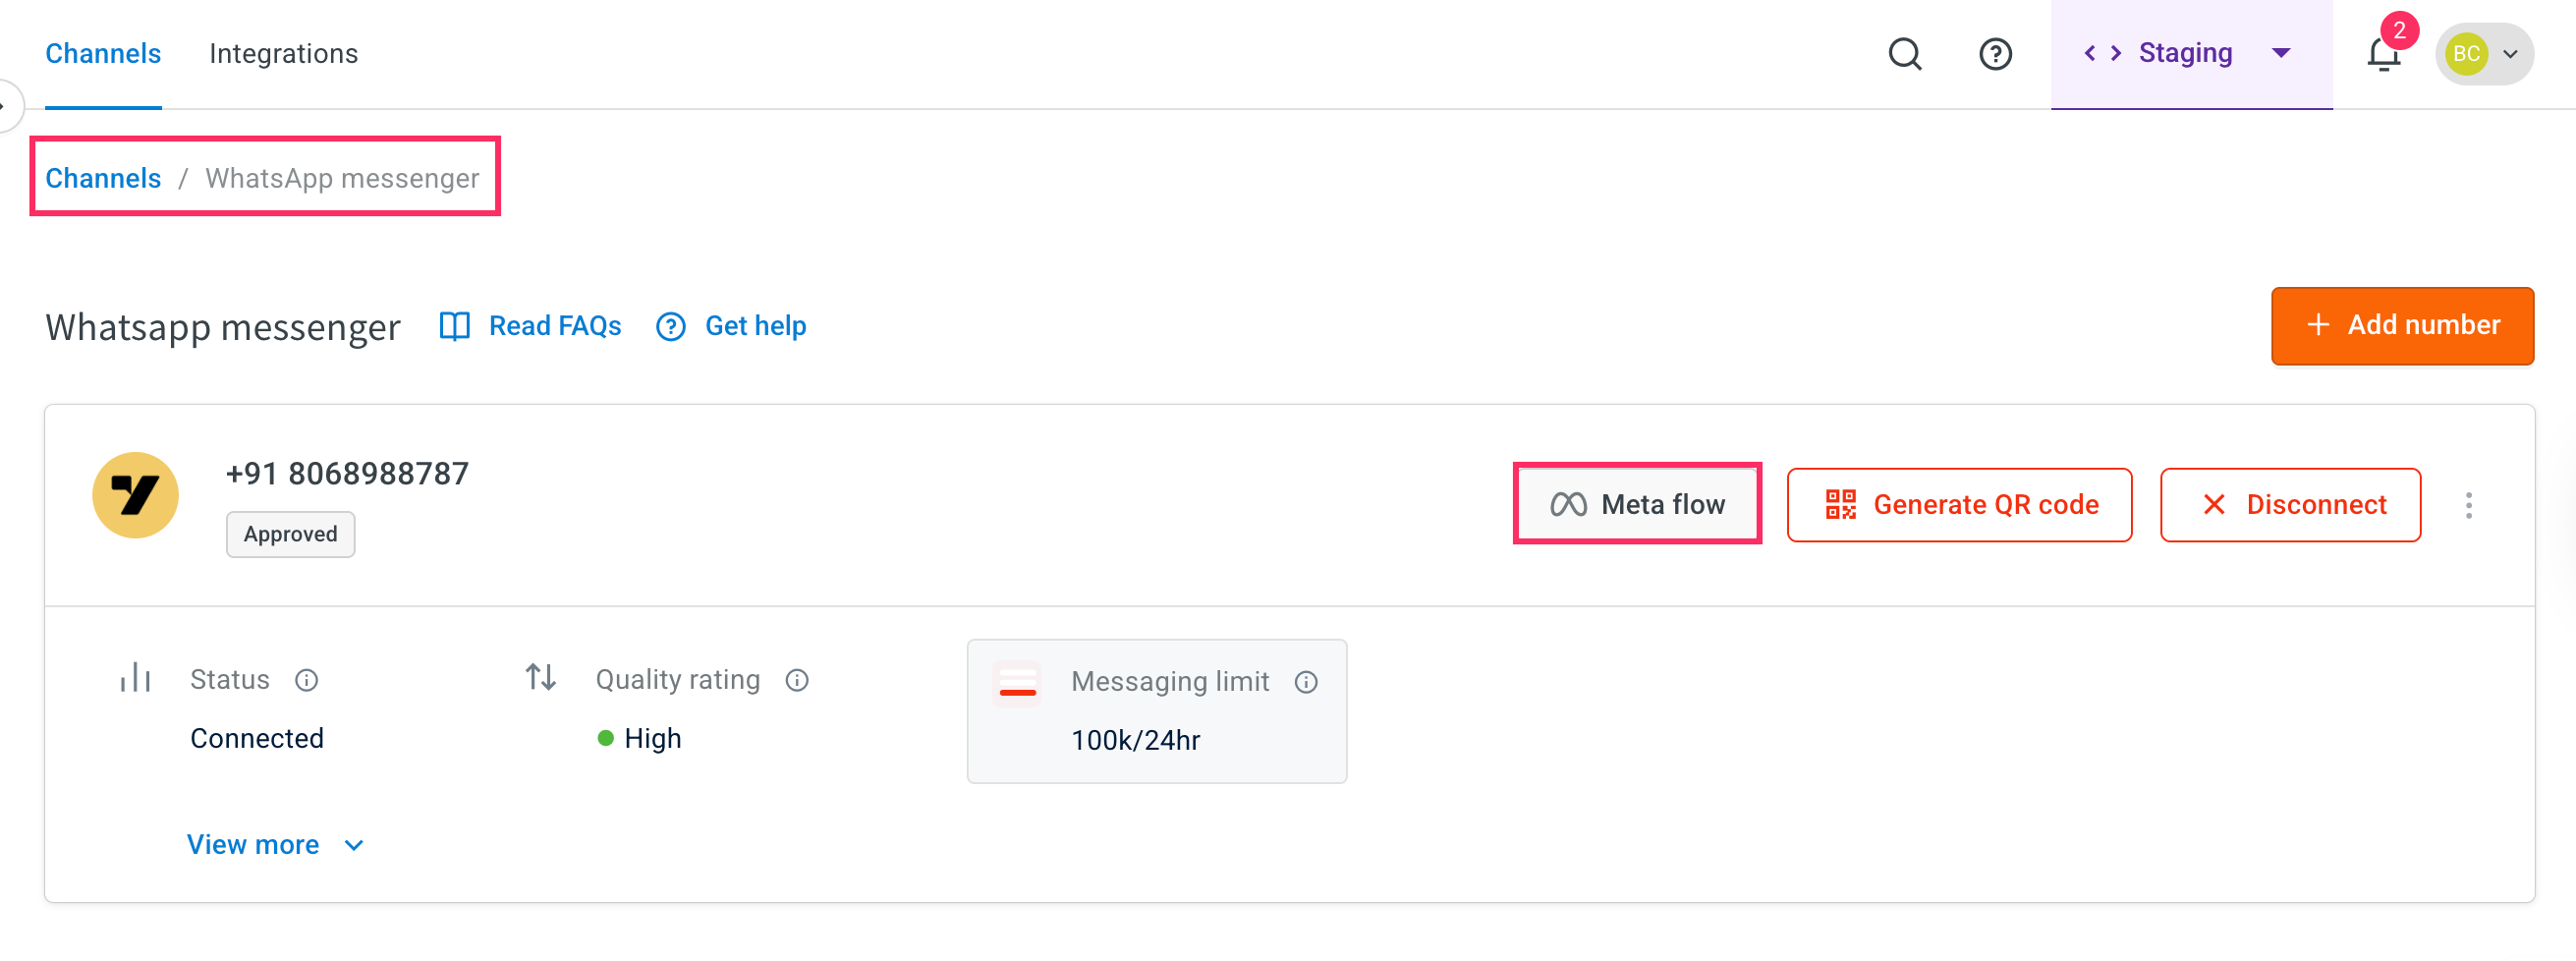
-
In the Meta flows section, copy the Endpoint URL. Sample endpoint URL:
https://{{host_name}}/integrations/whatsapp/extension/channel/{{encryted_key}}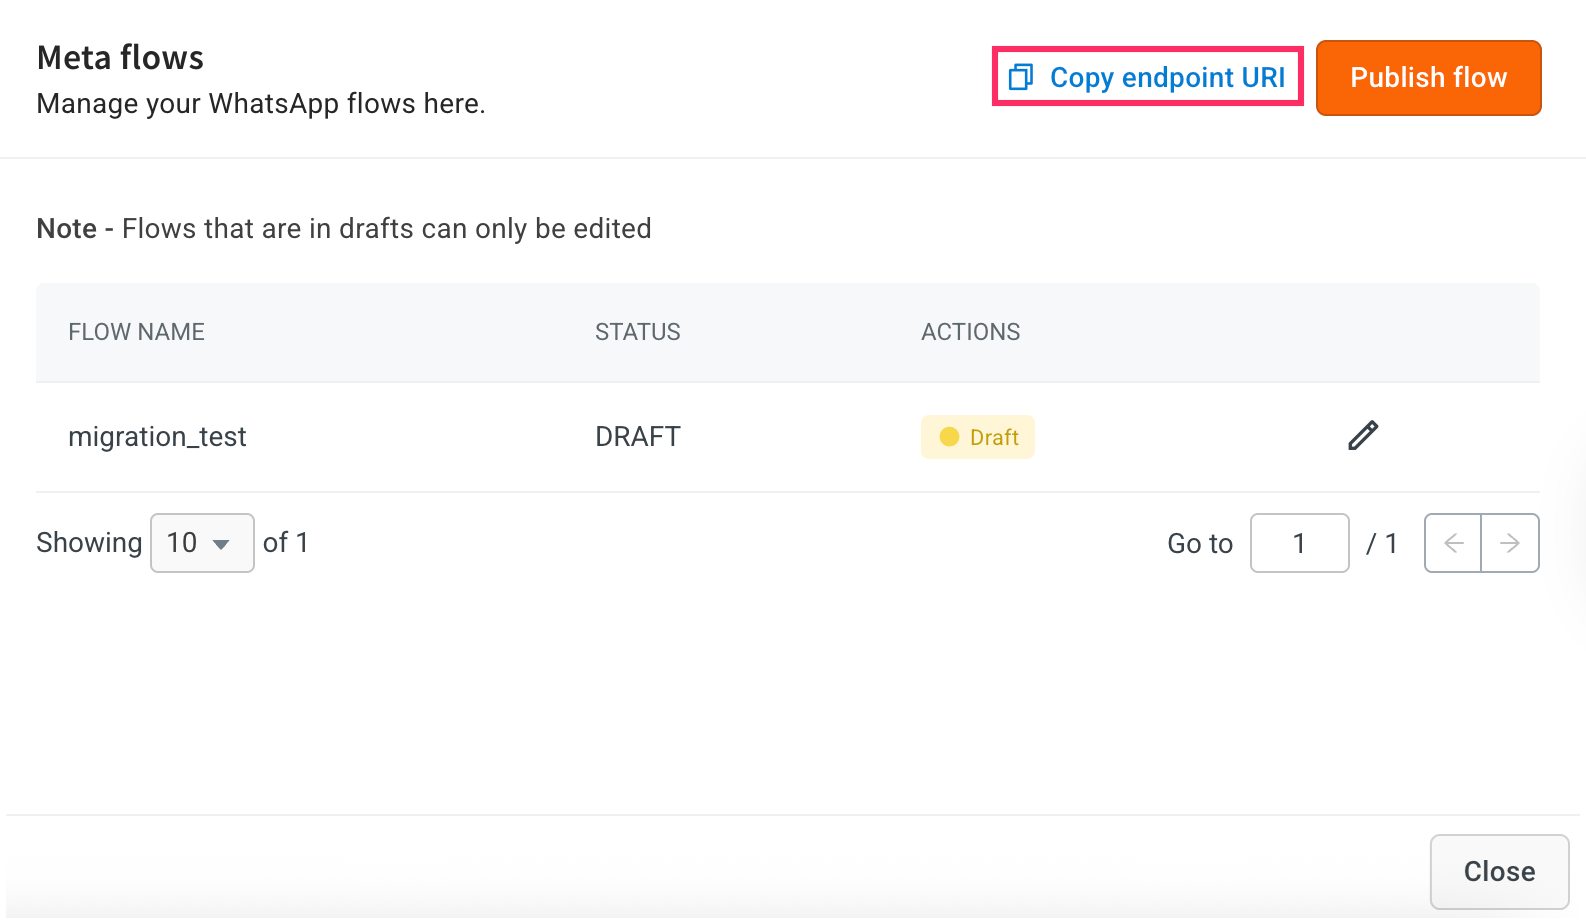
-
Go to Facebook Business Manager, paste the copied Endpoint URL in the Set Endpoint URI field and click Submit.
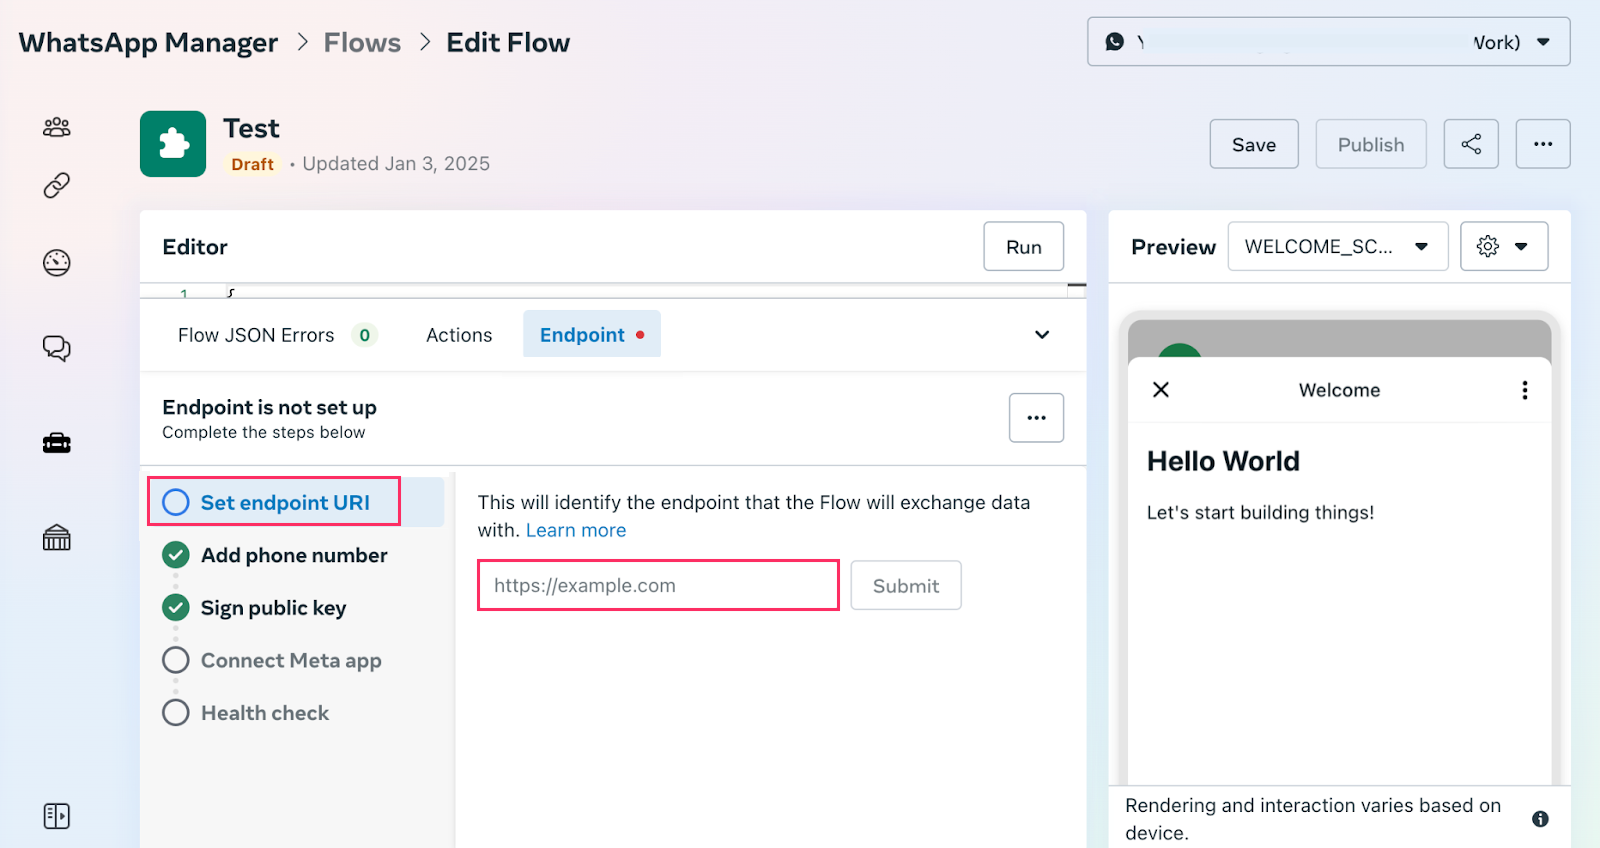
-
After configuring the endpoint URL, contact the platform support team to connect the Meta App. Provide the Flow ID, Bot ID, and the associated WhatsApp number. Note that once submitted, the Meta App cannot be changed.
-
In Add phone number, enter the phone number for which you want to create the form and test it.
-
In Sign public key, enter the Endpoint URI provided by the delivery team. Contact the delivery team to obtain the URI.
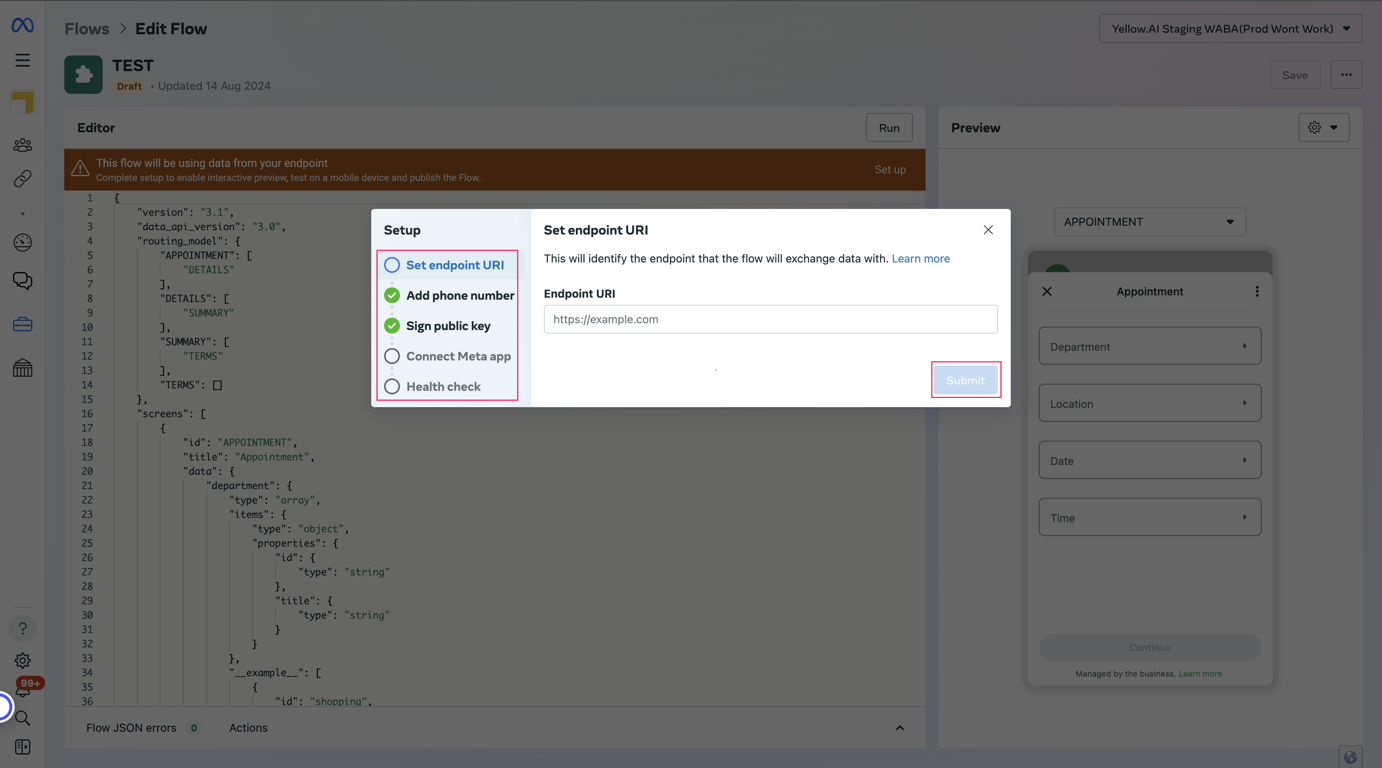
-
Select Connect Meta app to enable communication between the flow and your endpoint.
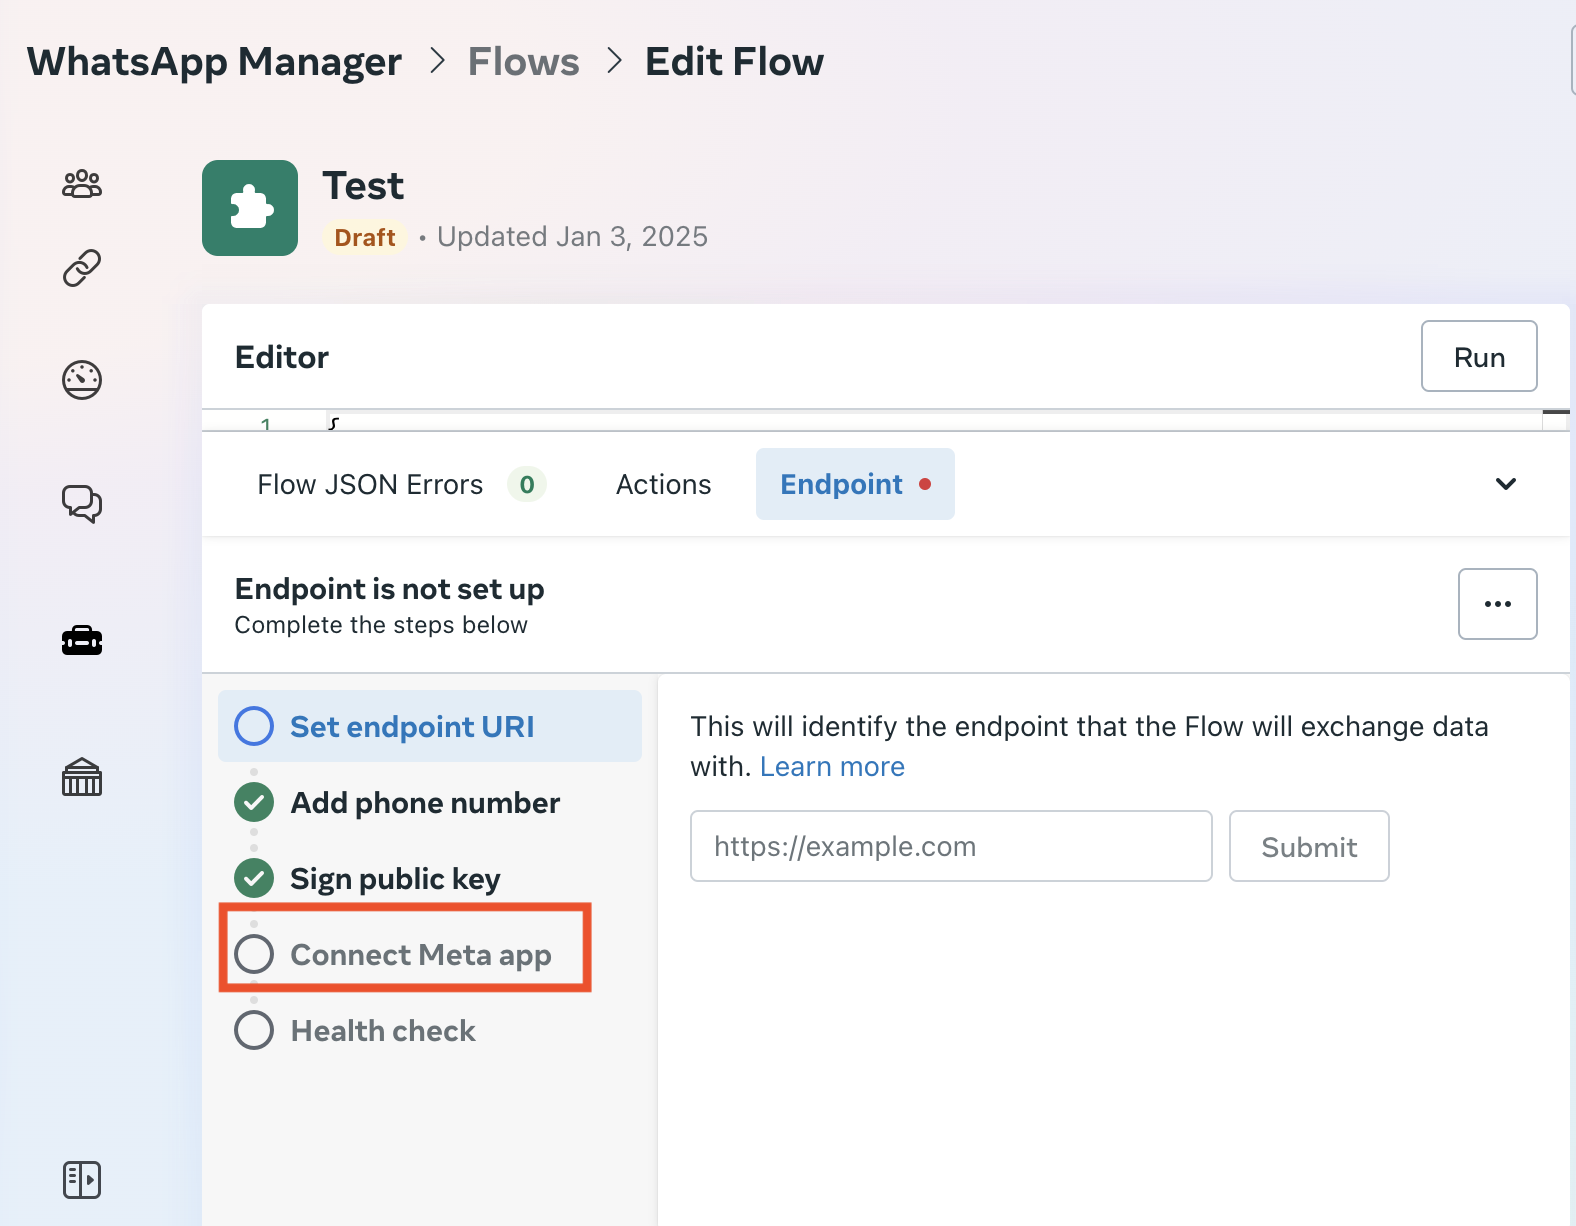
-
In Health check, verify if the endpoint URL is responding correctly.
-
Click Submit.
-
Integrate WhatsApp form with your Bot
Once you have created your WhatsApp forms, you can use them in your AI agent's (bot) flow as explained below:
- Create an
initExtensionWAon the bot by adding the following function to the bot:
return new Promise(resolve => {
   let payload = {
       finalData: {}
   }
   console.log("==logging initScreen 1st function==", payload)
   resolve({ data: payload });
});
- To log the data from the Whatsapp form, create another function called
leadGenFunction. You need to use this function in your bot journey after executing step 5.
return new Promise(resolve => {
   // Step 1: Construct the payload for extension_message_response
   console.log("logging Data from WA Form", data)
   // Step 2: Create a wrapper object for the payload
   let val = {
       finalData: {}
   };
   resolve({ data: val });
})
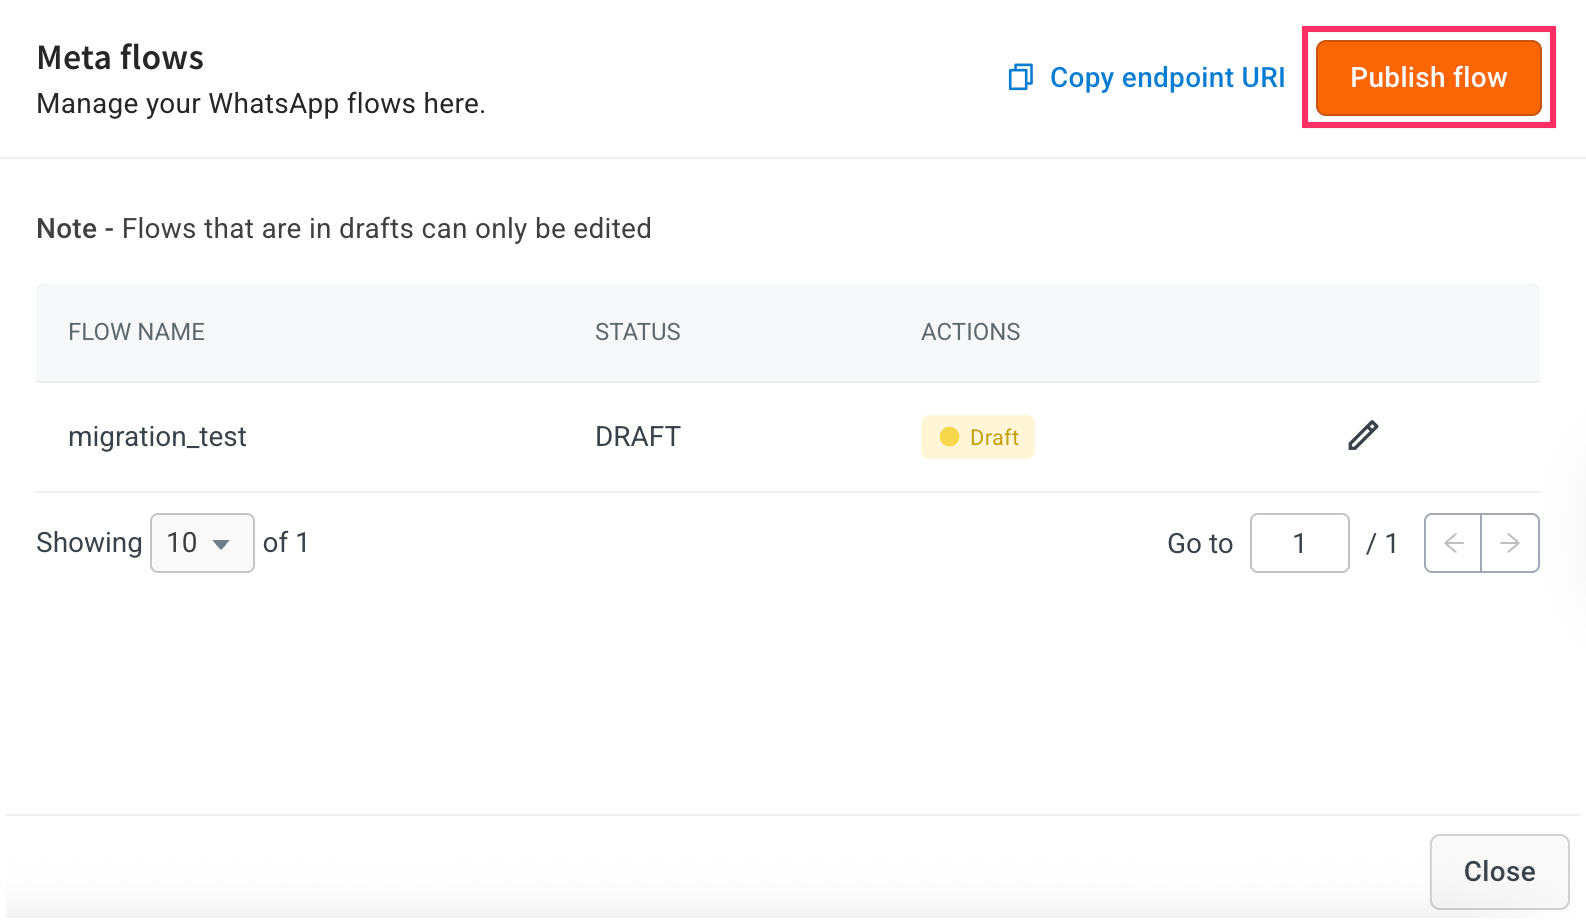
-
Navigate to Channels > WhatsApp messenger > Meta flow > Publish flow.
-
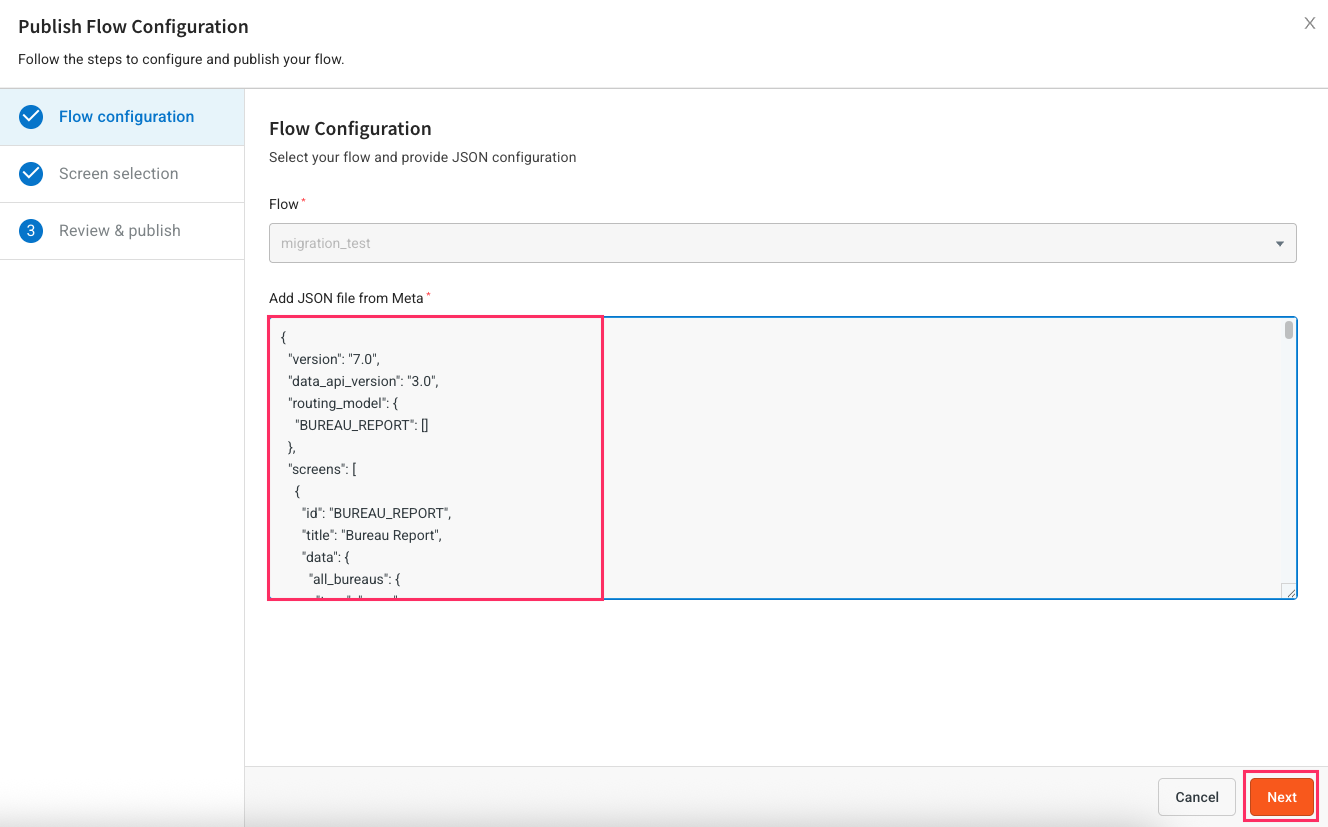
In Flow configuration, choose the flow that you have created in Facebook Business Manager(FBM).
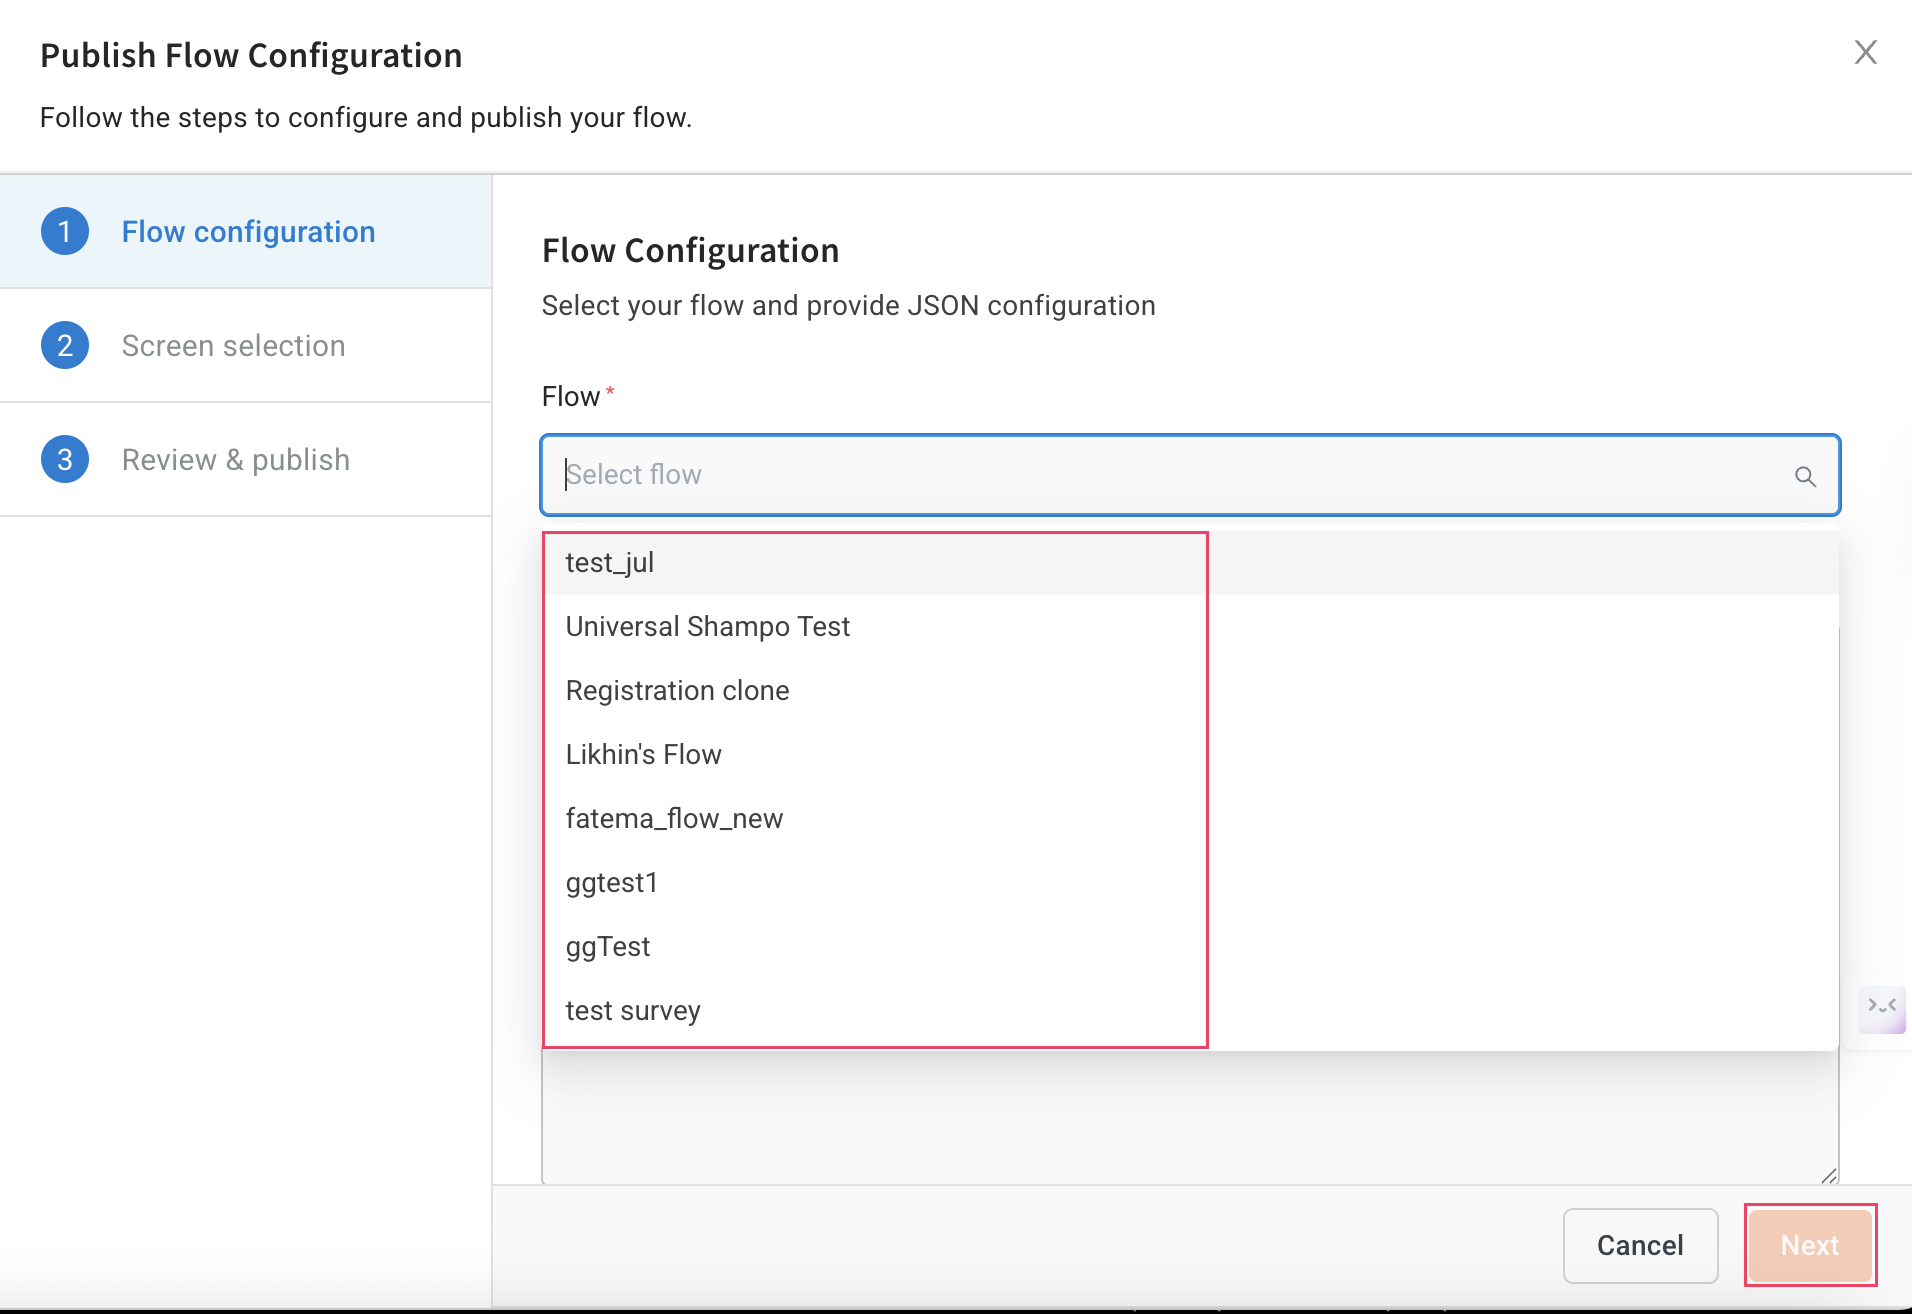
-
Open your selected flow in FBM and copy the JSON from the Meta Flow builder.
-
Go to Flow configuration section, paste the copied JSON in Add JSON file from Meta, then click Next.
-
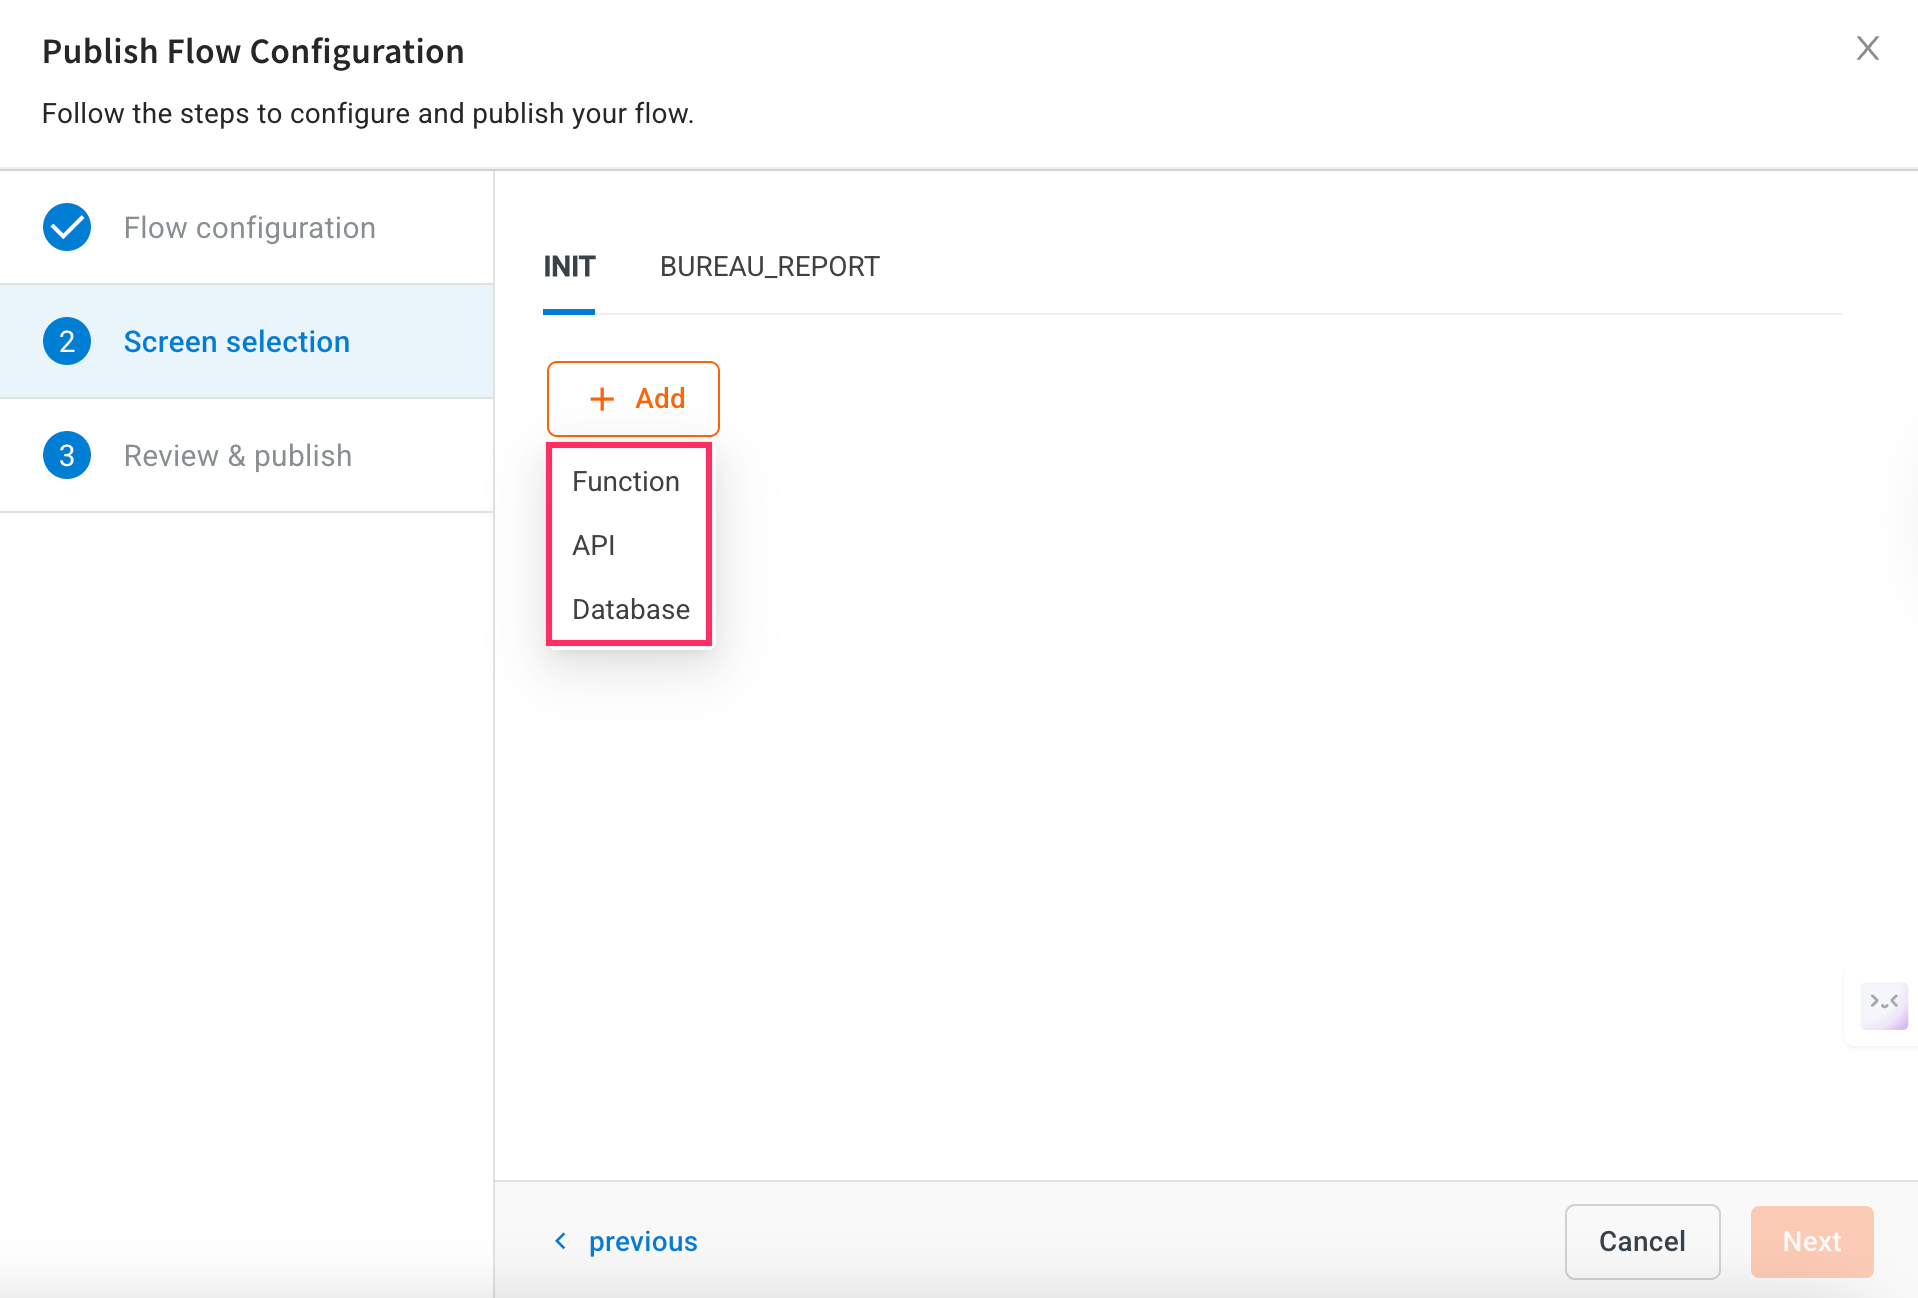
In INIT section, click + Add and choose a Function, API, or Database depending on what action your flow needs.
-
Click Next to continue.
-
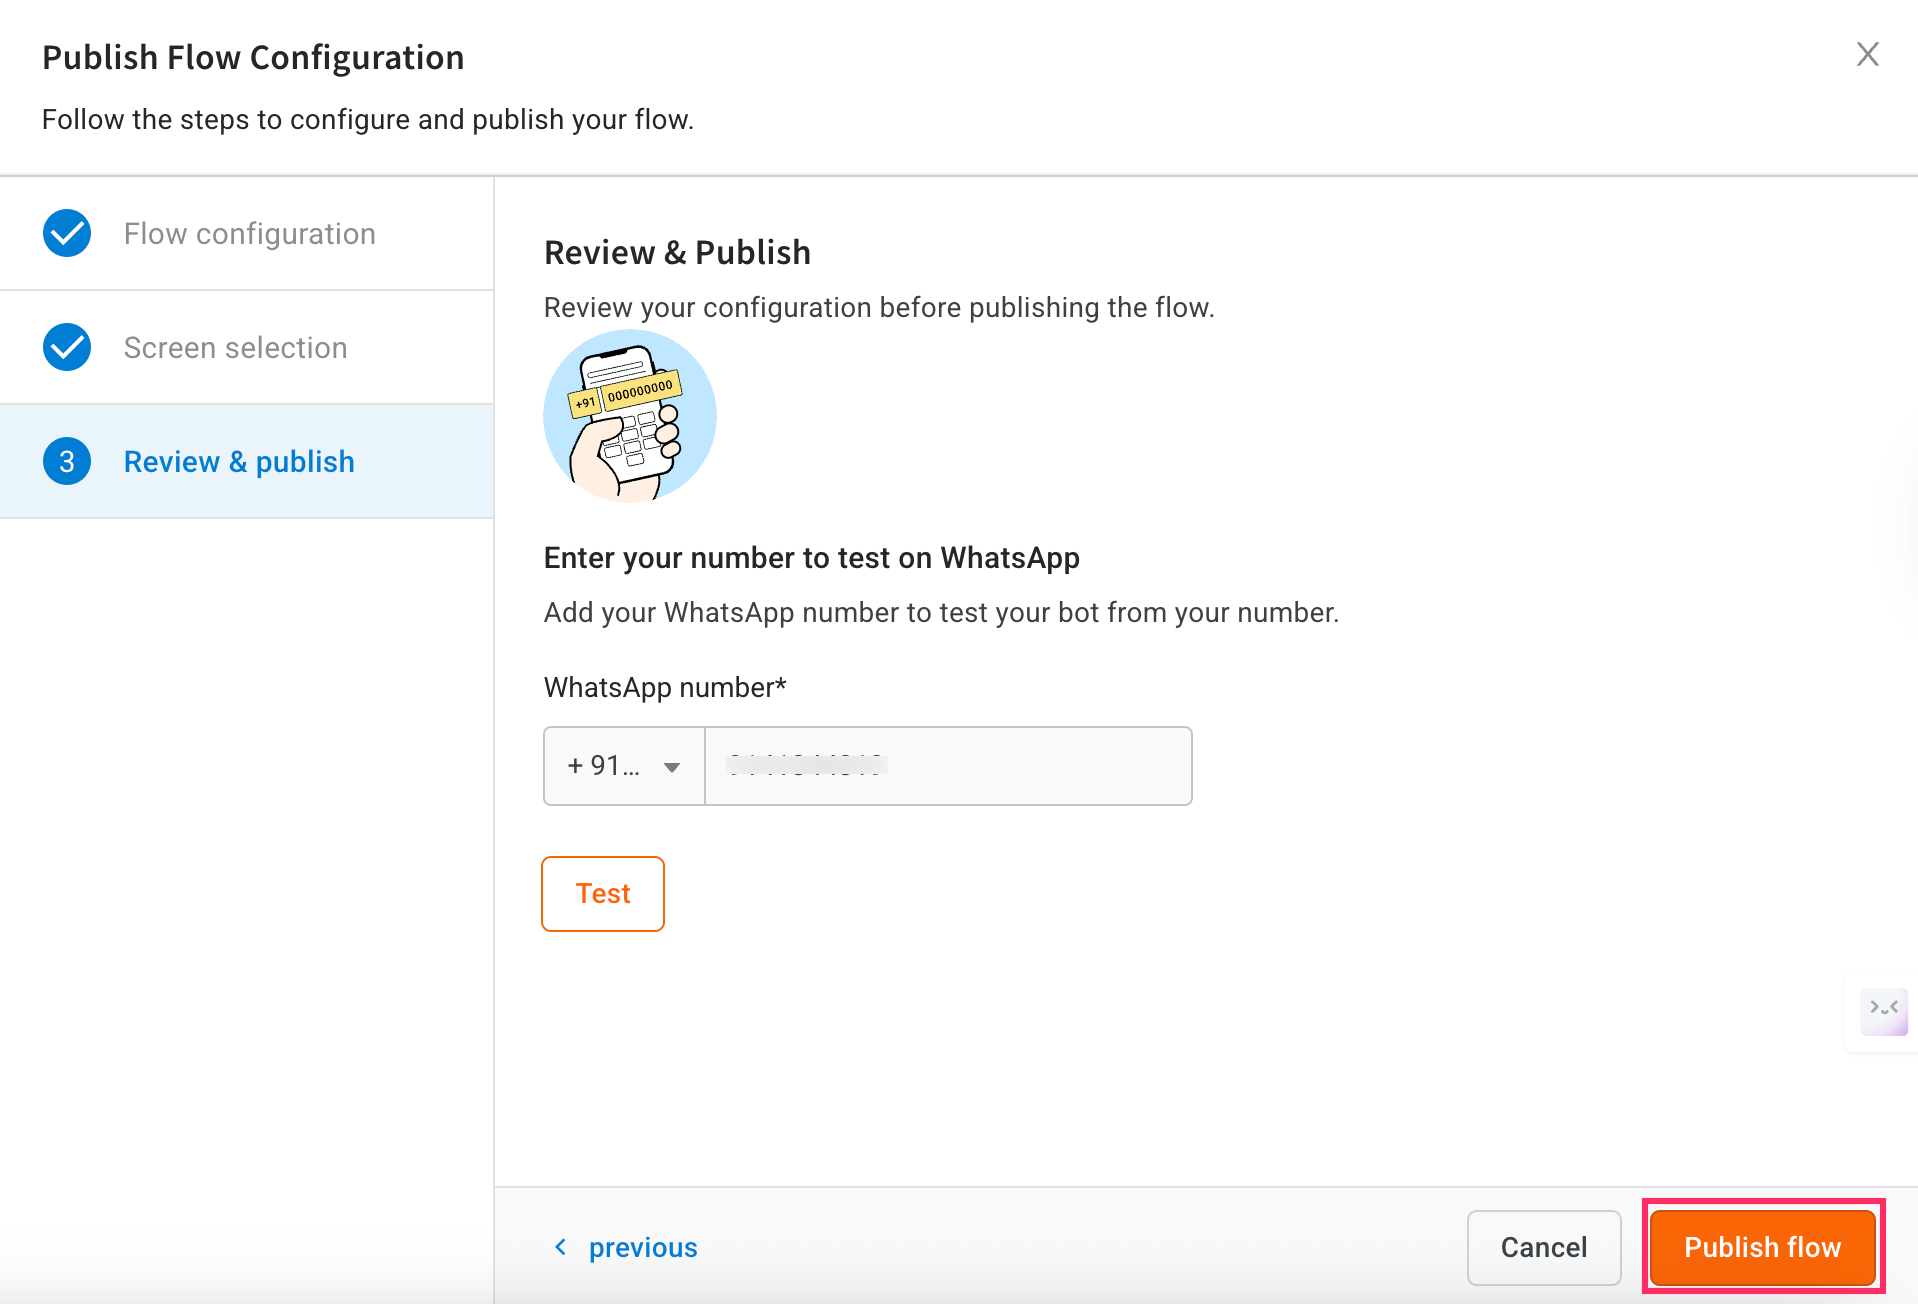
In Review & publish, enter your phone number to test the bot and click Test.

-
After testing, click Publish flow to make your bot live.
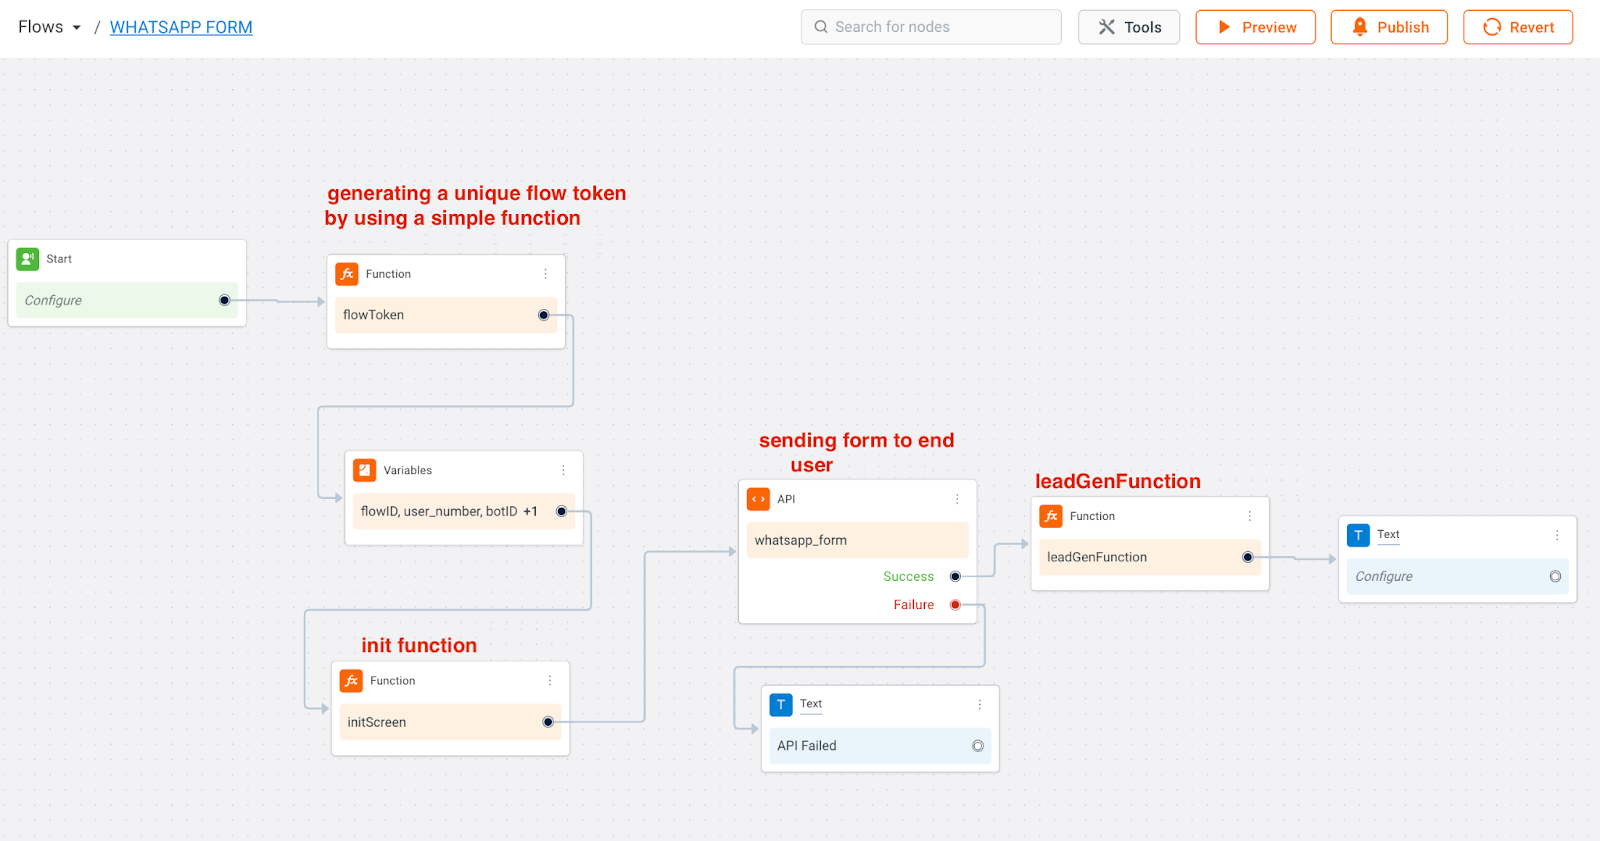
A sample whatsApp form bot flow: