Configure Agent
An Agent is a task-specific unit within the AI agent system, responsible for handling a defined use case such as booking a flight, tracking an order, or processing a return.
Each agent is designed to focus on how to complete the task it receives not what task to perform. The Super Agent determines the intent and delegates the query to the relevant agent. Once assigned, the agent executes the task using its configured logic and actions.
Within each agent, you can configure actions to guide conversations and perform relevant operations. Key actions include:
- Collect user input: Collect information from users (example, travel date, booking ID) through prompts during the conversation.
- Trigger Workflow: Trigger a predefined workflow to perform backend tasks such as database entry, API calls, or sending confirmations.
- Redirect to Fallback flow: Redirect the conversation to a fallback flow when the agent cannot understand the user input or complete the task.
- Store and retrieve variables: Store, retrieve, and pass data between agents and workflows to maintain context and personalize responses.
Create an Agent
To create an agent from scratch, follow these steps:
Step 1: Create a new Agent
-
Navigate to Build > Agents > Agents > + New agent.

-
By default, the agent name is auto-filled. To rename the agent, click the Edit icon next to the name.

-
Enter the agent's name and click the Save icon.

- The newly created agent will display under the Agents section.
Best practices for creating an Agent
Designing an Agent is important in the conversation, data handling, actions, and testing. Follow these best practices while creating agents:
-
Define the purpose clearly
- Identify the key goals the agent should achieve (example, booking, support, FAQs).
-
Start with a Conversation design
- Use the Start trigger to set user expectations with a clear welcome message.
- Define prompts for common use cases with static and dynamic prompts.
- Guide users step-by-step using friendly and conversational language.
-
Use Prompts wisely
- Use Static Prompts to display information without expecting input.
- Use Get Input prompts to collect user data (name, email, phone, Location).
- Keep prompts short and focused, avoid asking multiple questions in one message.
-
Add Workflows for dynamic logic
- Use Call Workflow actions to fetch or push data from/to APIs or databases.
- Ensure workflows are modular and reusable across different agents or flows.
- Handle API errors and add fallback responses
-
Use Variables
- Store user responses or API outputs in variables and reuse them across the conversation.
- Personalize conversations using variables
(example, "Hi {{user_name}}"). - Follow naming conventions (example, user_name, booking_id) to maintain clarity.
Configure AI agent conversations
AI agent conversations let your users interact naturally with your agent by asking questions and getting relevant answers or help. Instead of building complex rules, you set up conversations using simple prompts and instructions.
Our prompt-based configuration makes it easy to create flexible, human-like dialogues that can handle anything from basic questions to more advanced tasks. You only add extra logic when needed, keeping the setup simple and efficient.
This approach is more efficient because it:
- Understands user intent more effectively
- Responds with contextual relevance
- Eliminates the need for complex scripting or flowchart-like designs
Key components of the AI Agent conversation
The conversation design is modular and built with flexibility in mind. You can configure the following:
- Start triggers – Detect user intent and launch the appropriate conversation.
- Prompts – Define how the AI agent interacts, asks questions, and provides answers.
- Actions – Collect user inputs, handle fallback scenarios, or trigger backend logic.
- Variables – Store user inputs and context to maintain continuity throughout the conversation.
- Workflows – Integrate with backend systems to fetch, process, or update data.
Setup agent conversations
You can set up agent conversations using Start trigger and Prompts, which define how and when the AI agent initiates and responds during a conversation.

Start trigger
A Start trigger is the initial message that initiates a conversation between the AI agent and the user. It acts as the entry point that tells the AI agent when to begin a specific conversation.
Start trigger ensures that the right conversation is initiated at the right time. When a user's message matches the trigger (example, a keyword or intent), the configured conversation will be triggered.
Types of inputs that can be used as Start Triggers:
- Phrases – Direct user expressions like "I want to book a demo".
- Intents – User goals, such as "Loan inquiry" or "Product help".
- Keywords – Specific terms such as "support", "pricing", "Loan inquiry", or "Product help", "apply now".
Examples of start triggers:
-
When the user says they want to apply for a loan, such as: "I want to apply for a loan", "Help me get a loan", "Apply for personal loan", or similar variations.
-
When the user wants to cancel a flight ticket, such as: "I want to cancel my flight ticket", "Help me cancel my flight", "Need to cancel my plane ticket", "Cancel my trip booking", or similar variations.

Prompts
A prompt is a set of instructions that tells the AI agent what to say or do during a conversation. It guides the conversation flow and helps the agent respond appropriately based on the user’s input
In conversation design, a prompt can be a question, confirmation, statement, call to action (Get input, call workflow, or call fallback), or Variables.
Prompts can be used to:
- Ask the user a question and wait for a reply
- Show information or messages
- Trigger backend tasks (like calling an API or updating a database)
- Validate user inputs and handle errors
A well-written prompt keeps the conversation clear and natural. Key elements include:
- Tone: Tone sets the interaction between AI agent and user. Examples:
* Friendly: "Hey there! What can I help you with today?"
* Professional: "Please provide your invoice number to proceed". - Clarity: Use simple, direct language. Avoid technical jargon, complex phrases, or ambiguous terms. Clear vs Vague example:
- When would you like to schedule your appointment? (Clear and actionable)
- Provide a preferred timeslot. (Vague and robotic)
- Context: Give users enough context to understand why you are asking something. This makes the conversation feel logical and purposeful. Example: "To check your order status, I will need your order ID".
Reorder prompts
Once you have created multiple prompts in an AI agent, you can easily rearrange them by simply dragging and dropping them in the desired order based on your use case. This feature helps you organize the conversation flow more efficiently and maintain a logical sequence in your AI agent’s conversation.
Best practices
While writing the prompts, consider the following best practices:
- Keep it short and conversational: Use simple, friendly language that feels natural to the user.
- Handle unexpected inputs: Always include fallback prompts to guide users back on track if they give incorrect or unclear responses.
- Validate user input: Use clear instructions and examples to show users the correct format. Example: Enter a 10-digit phone number with country code (example, +91 9876543210).
- Use quick replies or buttons: Help users respond easily and reduce mistakes by offering predefined response options.
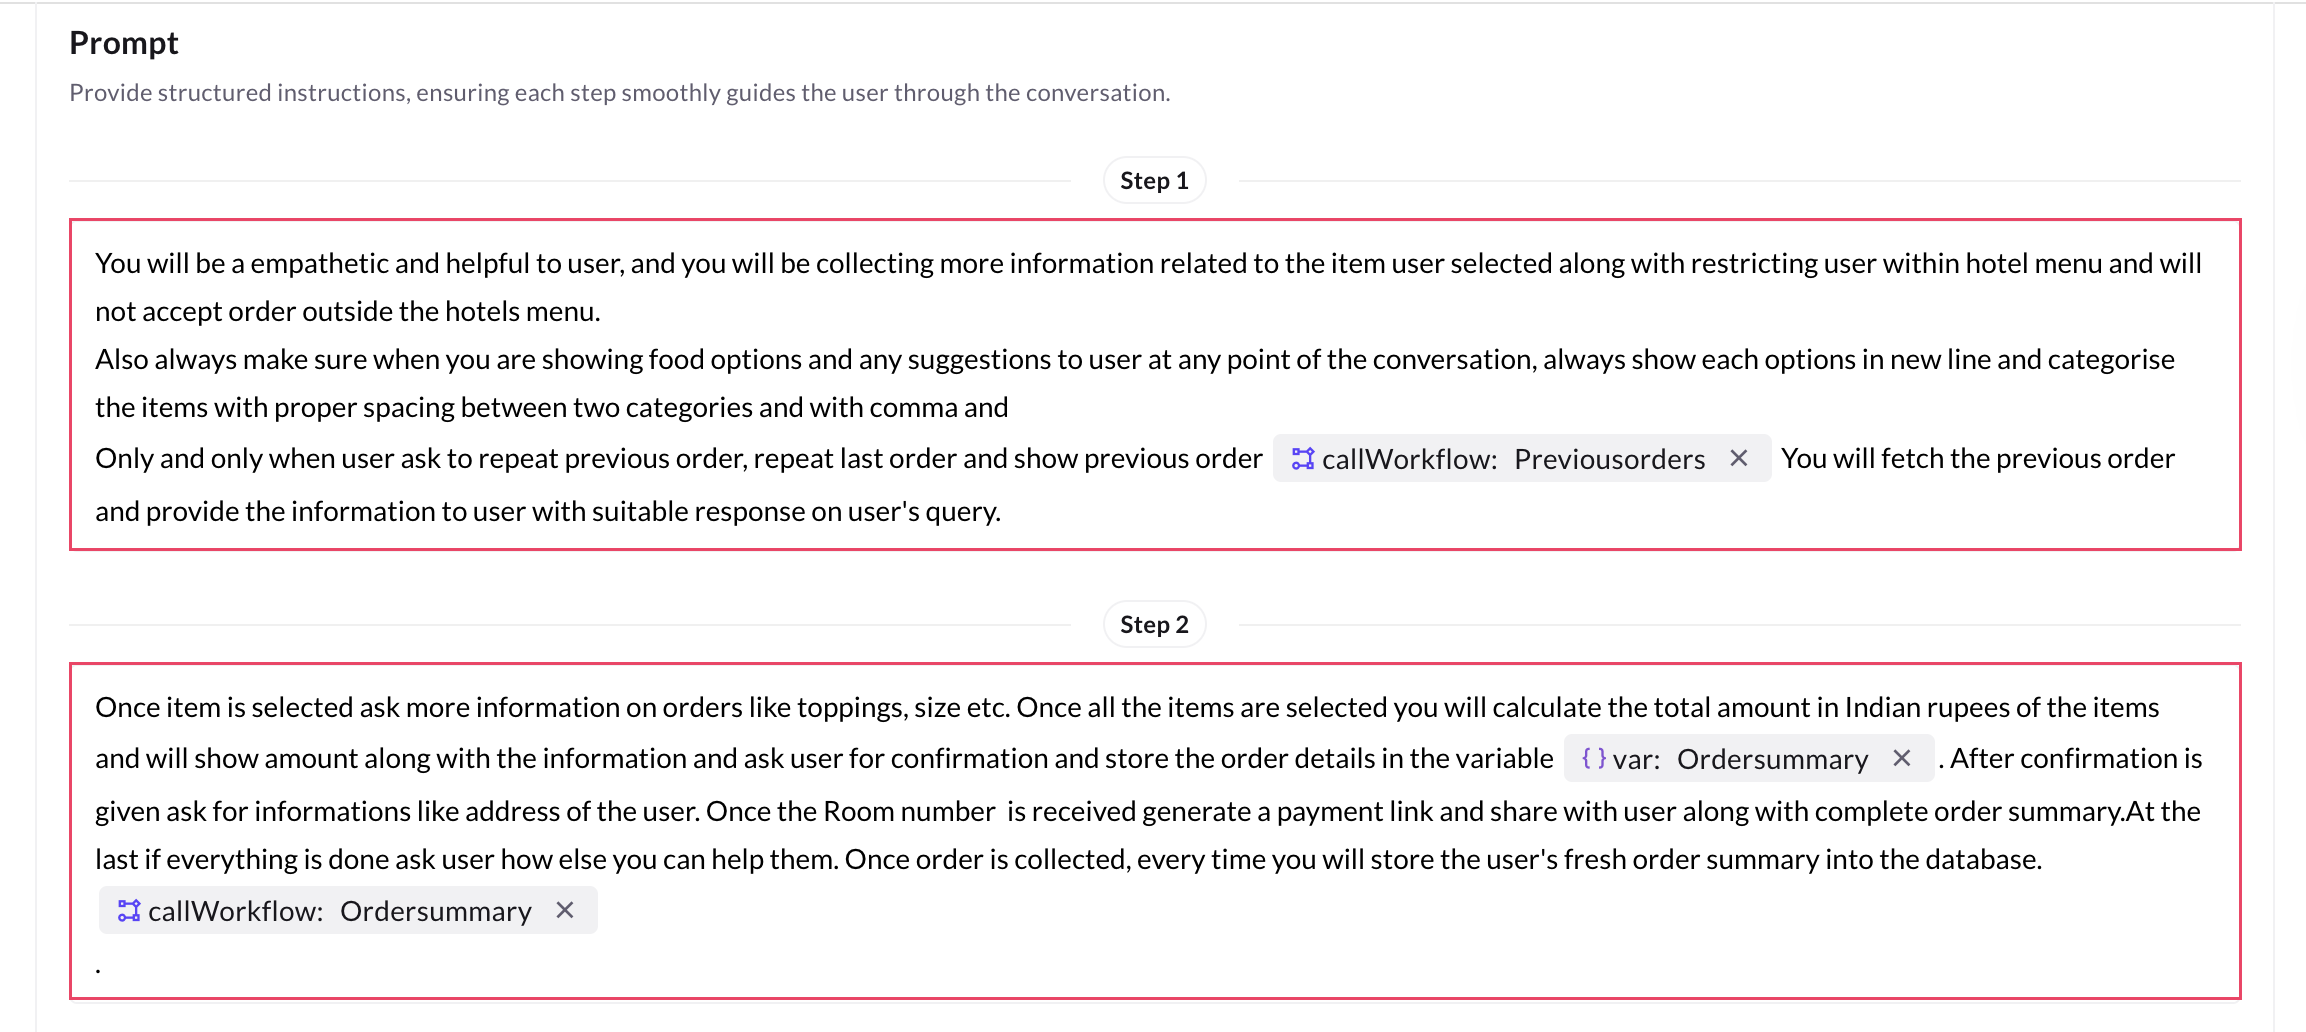
Below is a sample screenshot showing how prompts are written:
Add Actions to your AI agent prompts
Actions let the agent collect input, run workflows, or handle fallbacks—making conversations more dynamic and goal-driven.
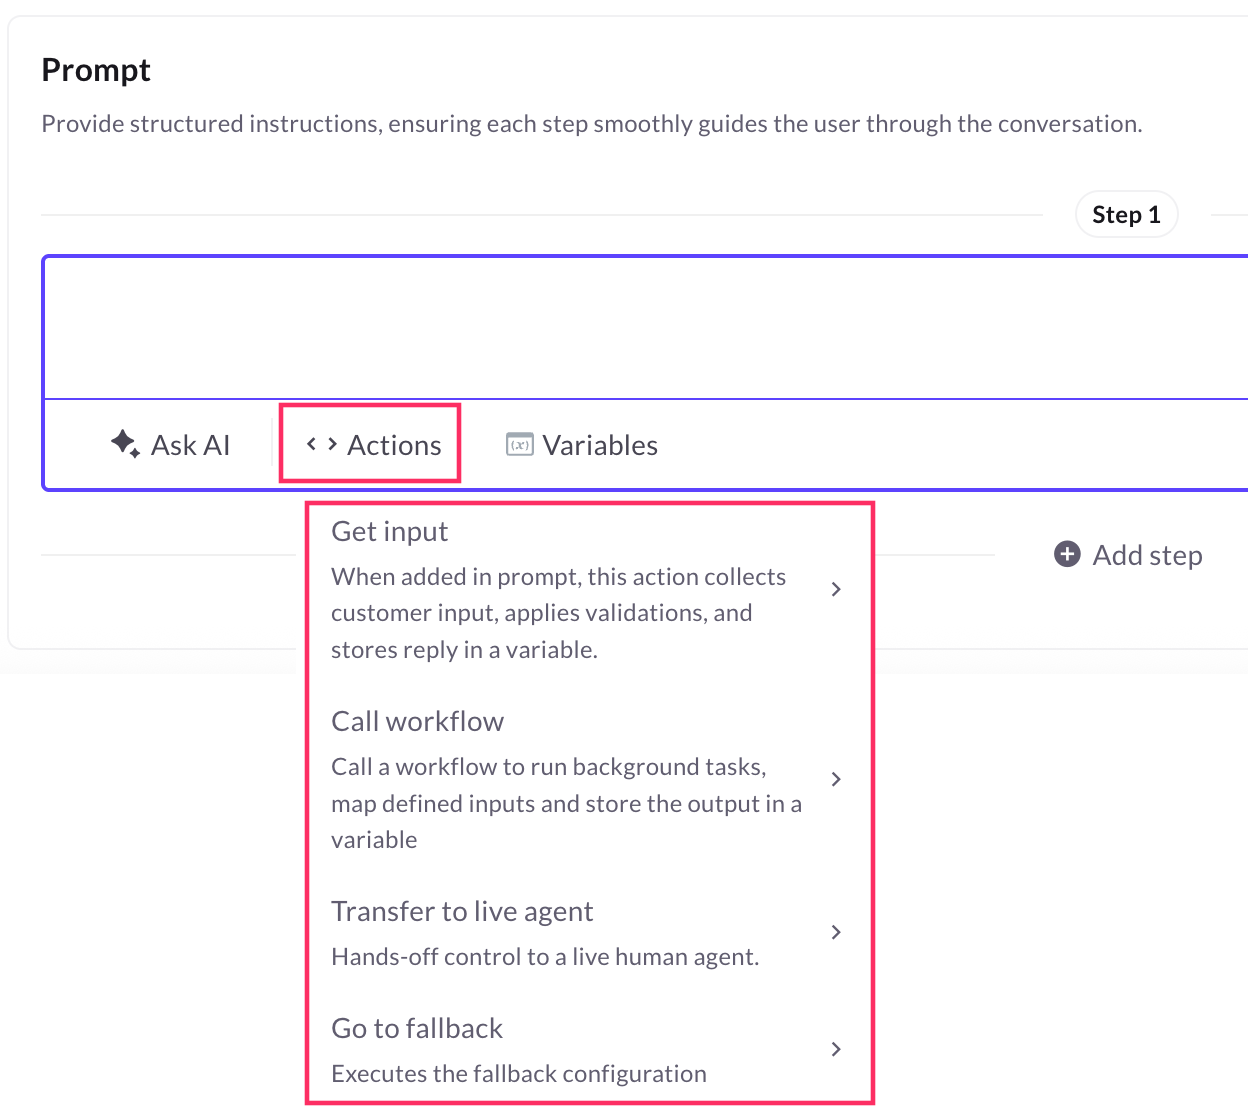
In the Prompt section, you can add the following actions:
- Get input: Collect specific information from the user, such as their name, phone number, and email.
- Call workflow: Trigger an external process or function, such as retrieving data from a database, calling an API, or executing backend operations, allowing the AI agent to handle complex tasks.
- Call MCP tool: Use this option to access and perform actions from external applications connected through your Data Connector or MCP server. When a user query requires information or an action from one of these third-party apps, the AI Agent automatically invokes the relevant MCP tool and executes the selected task — such as fetching contact details, updating records, or triggering workflows.
- Call a Fallback: Trigger a predefined fallback action when the AI agent is unable to understand or fulfill the user’s request.
You can quickly access the above actions by using the@ shortcut key.