Publish your AI-agent
Publishing a AI-agent involves deploying AI-agent changes to the live environment. Only a Super Admin can publish a AI-agent for the first time. Each AI-agent environment will have a unique AI-agent ID. It's important to understand that database records will not automatically transfer to the live environment upon publication. They must be configured separately in both the development and live environments.
Only certain user roles can approve the AI-agent. To know about user roles in detail, click here.
To publish your AI-agent, it's mandatory to configure Fallback.
Publish chatbot to go live
To publish a AI-agent to live mode follow these steps:
-
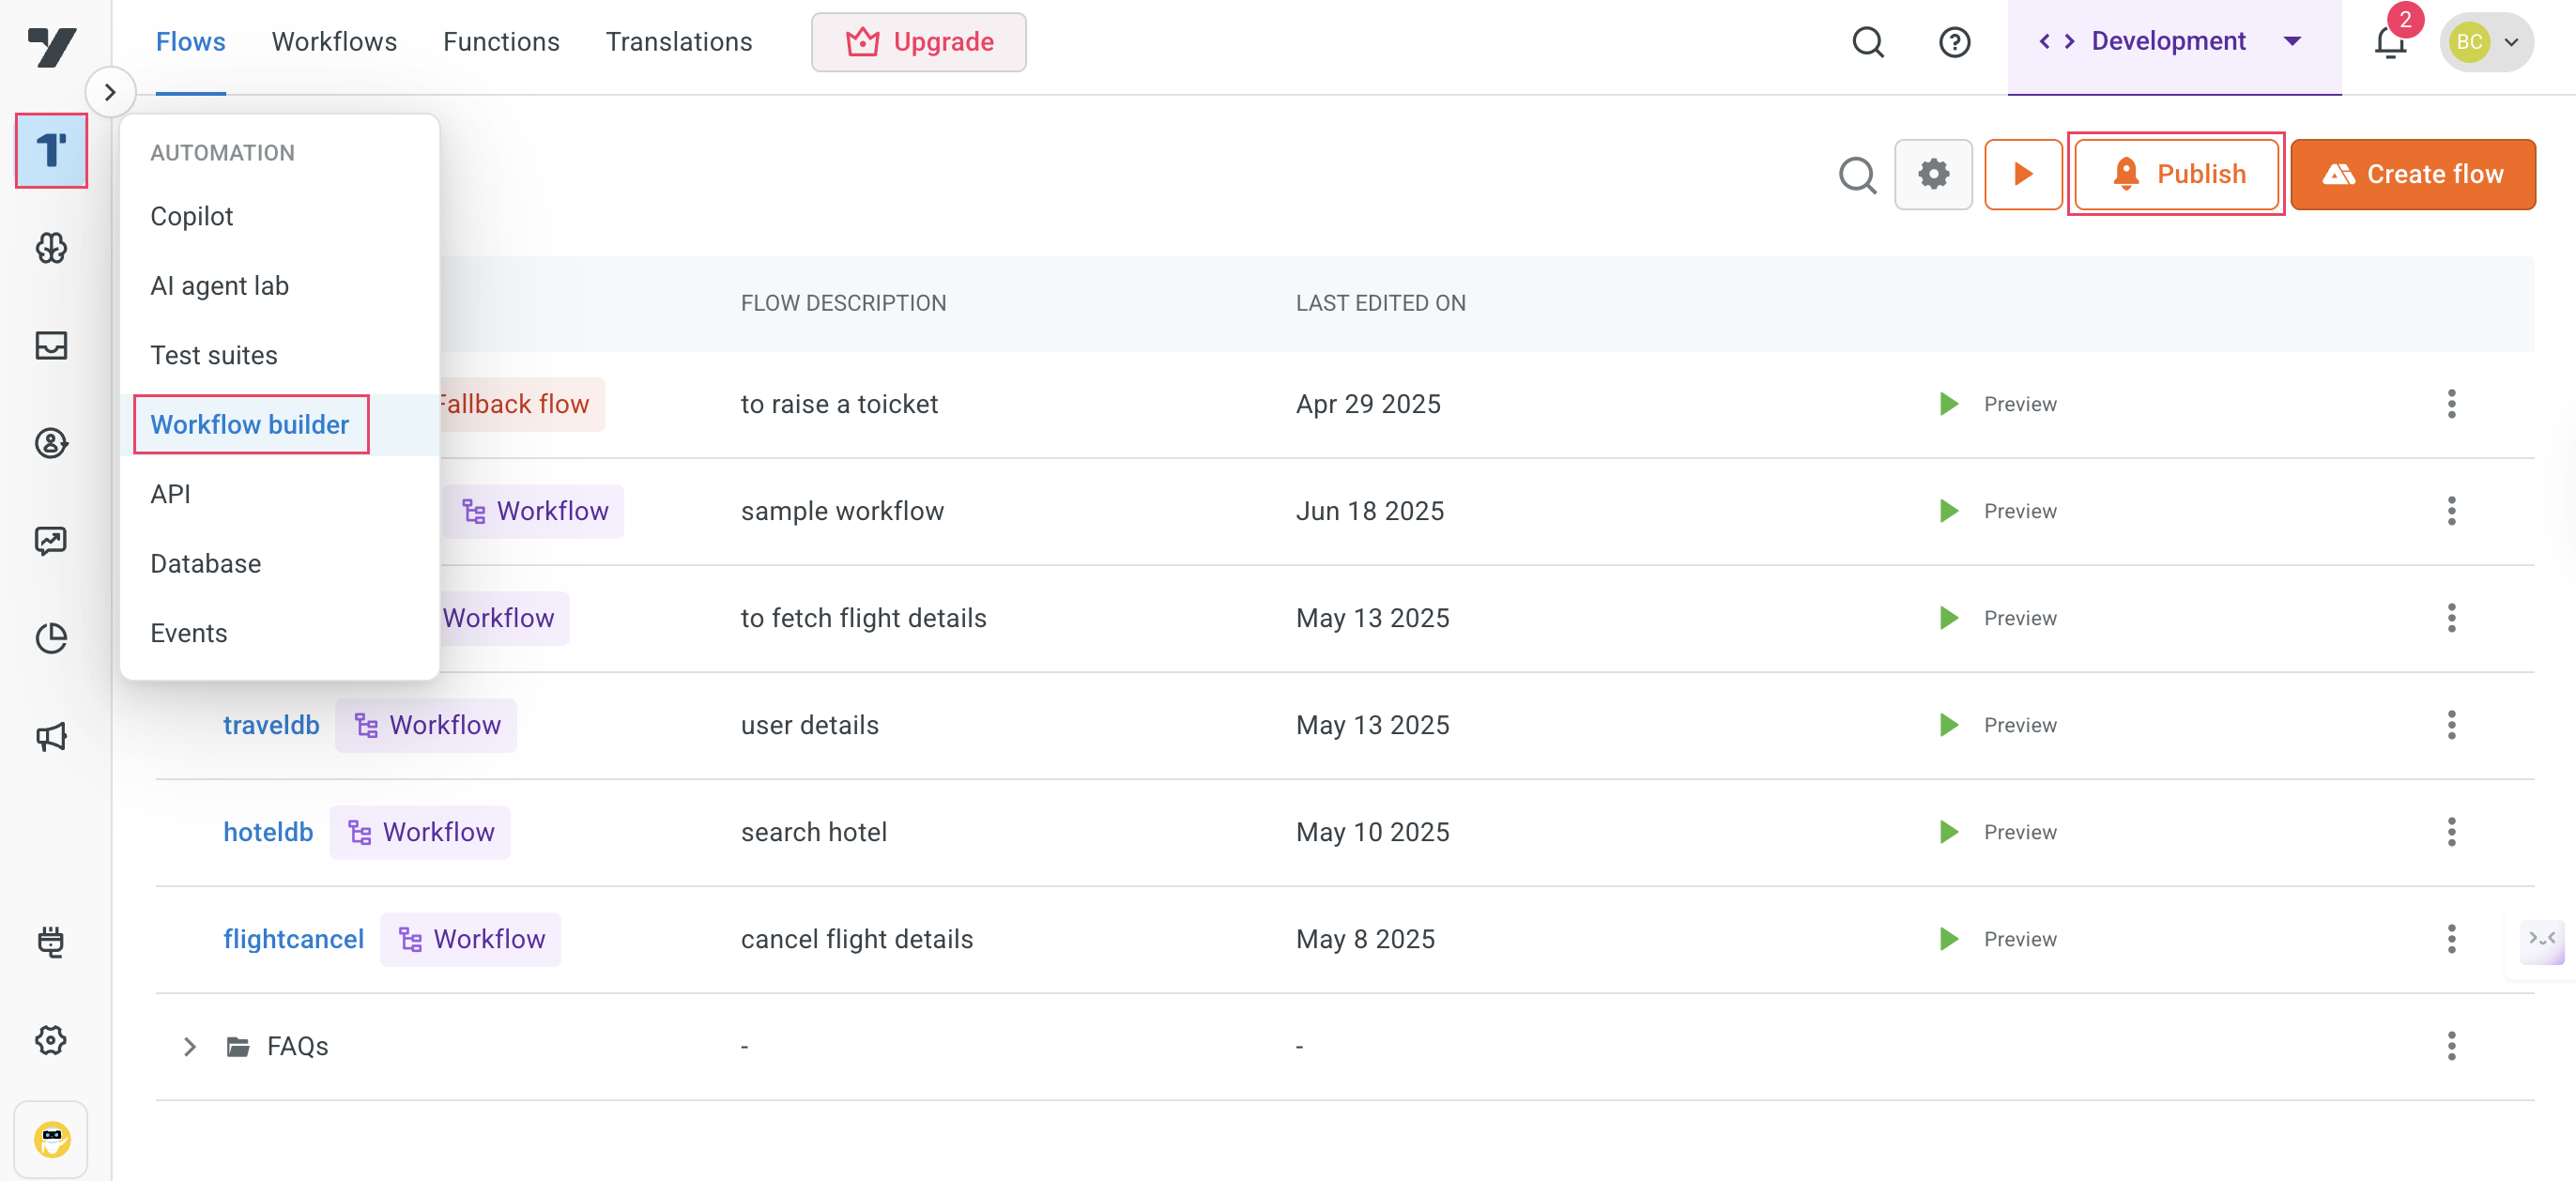
Ensure the AI-agent is in Sandbox/Development mode. Go to Automation > Workflow builder > Publish.
-
In the following screen, fill in the following fields.
-
Click Configure more channels to configure further more channels to the AI-agent in the upcoming stage.
-
In Approvers, you will see the list of AI-agent approvers added by the Super admin. This cannot be modified. All the approvers will be notified when you raise a publish request.
-
In Comment, add a message to the approver citing the changes made in the AI-agent.
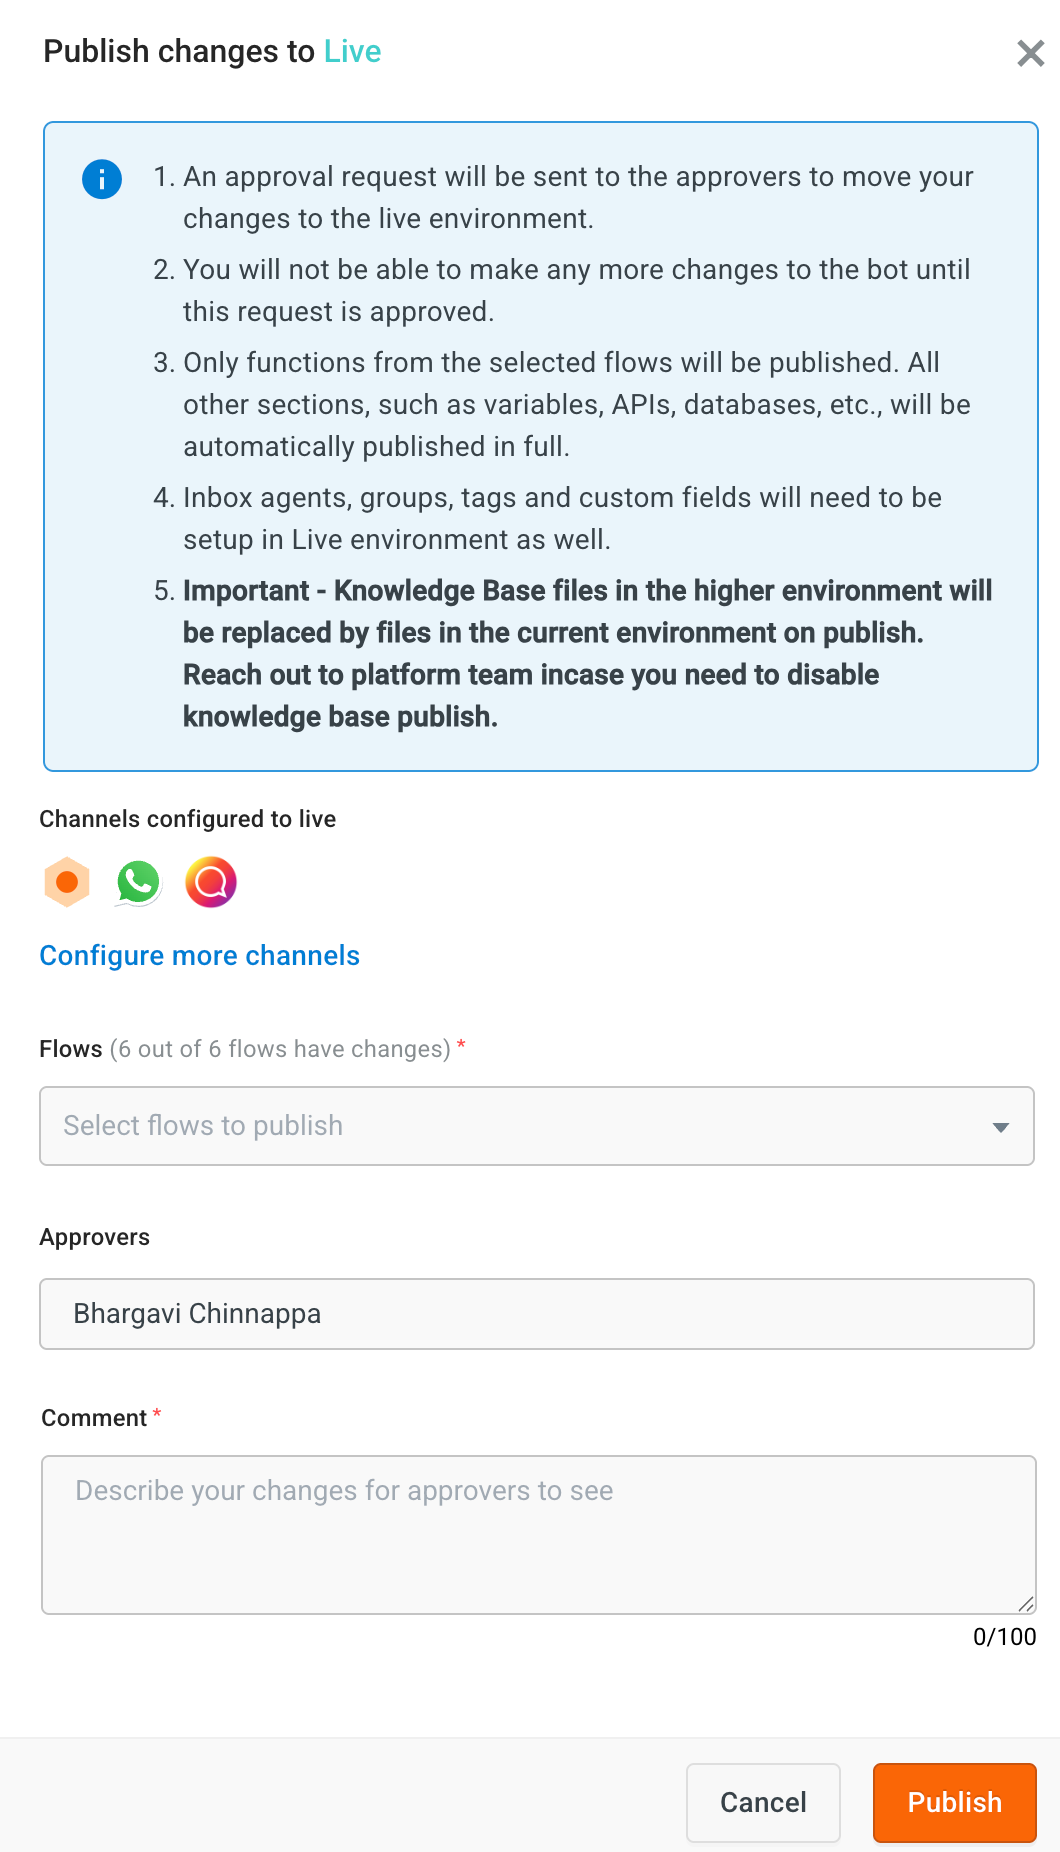
- Click Publish. The changes will move to Staging.
- Change your AI-agent environment to Staging, make changes (if any) and follow steps 1,2,3. The publish approval request will be sent to the Approver. AI-agents with only Development and Live modes need not do this. When you publish the changes, AI-agent sends the approval request to approvers.
To learn about different AI-agent environments (modes), click here.
Approve publish request
-
Users with Approver access(as provided by Super Admin) will receive an email with the content like the image below. Any one of them can approve, to approve click Review Request.

-
You will be redirected to the Bot approvals page. Click View request.

-
In the following screen, add a message to the approval requestor and click Publish.

Publish specific flows
Publishing certain flows only helps you to release specific flows within your AI-agent, allowing you to observe results while continuing to refine other components. This approach enables you to swiftly address issues or implement copy changes after the initial release without interrupting ongoing work. Additionally, it provides the opportunity to proactively plan your development efforts based on feedback received from the currently published flows, fostering an agile and responsive development process.
To access Publish selected flows, follow these steps:
-
Go to Automation > Publish changes > Publish selected flows

-
In the following pop-up, fill the following fields.
-
Flows: Choose the flows to be published.
-
Approvers: Displays the approvers who will approve the publish.
-
Comment: Add a message to the approvers

- Click the Publish button. The changes will move to Staging. Change your AI-agent environment to Staging, make changes (if any) and follow steps 1,2,3. The publish approval request will be sent to the Approver. AI-agents with only Development and Live modes need not do this. When you publish the changes, AI-agent sends the approval request to approvers. Click here to know about approving the publish request.
- When you publish your AI-agent in the Sandbox, all the parts like flows, intents, entities, and AI-agent skins will also move to Staging and later to Production.
- You cannot pick and choose which parts go to Staging; everything you set up in Sandbox will go there when you publish.
- If you create something new in Staging that wasn't in Sandbox, you can publish it once. The next time you publish from Sandbox, anything you added exclusively in Staging will be lost and won't be in Production.
To learn about different AI-agent environments (modes), click here.
Cancel publish request
If you wish to make changes to the current flow/AI-agent, or if you've raised a publish request by mistake or prematurely before finalizing the end result, you can cancel the publish request by:
- Go to Publish changes > select Publish bot or Publish selected flows(depending on the choice you made to raise the publish request).

- Click Cancel Request in the following screen.

Revert published changes
Revert option is a handy tool for fixing bugs in the live version. It lets you roll back to any previous version of your AI-agent. The Revert feature is available only in the live/production environment. Only Admins can have access to this option.
To revert changes:
-
Go to a AI-agent, ensure the AI-agent is in Live/Production mode and go to Automation > Build > Revert.

-
Select the version to which the AI-agent should be reverted.

-
Click Revert.

Decline publish requests
-
Users with Approver access(as provided by Super Admin) will receive an email with the content like the image below. Any one of them can decline, to decline click Review Request.
-
You will be redirected to the Bot approvals page. Click View request.
-
In the following screen, add a message to the approval requestor and click Decline.