Scope of Integration
Yellow.ai Integration with Jira allows you to seamlessly connect your jira cloud with the yellow.ai platform. Using this integration, one can create issue, view issue details, create project, get project details or get user details.
Atlassian and JIRA are different integrations available on the yellow.ai platform. To use them, you must set them up individually.
Configuration
Configuring the integration with jira iis straightforward. Follow the steps defined below to start integrating:
-
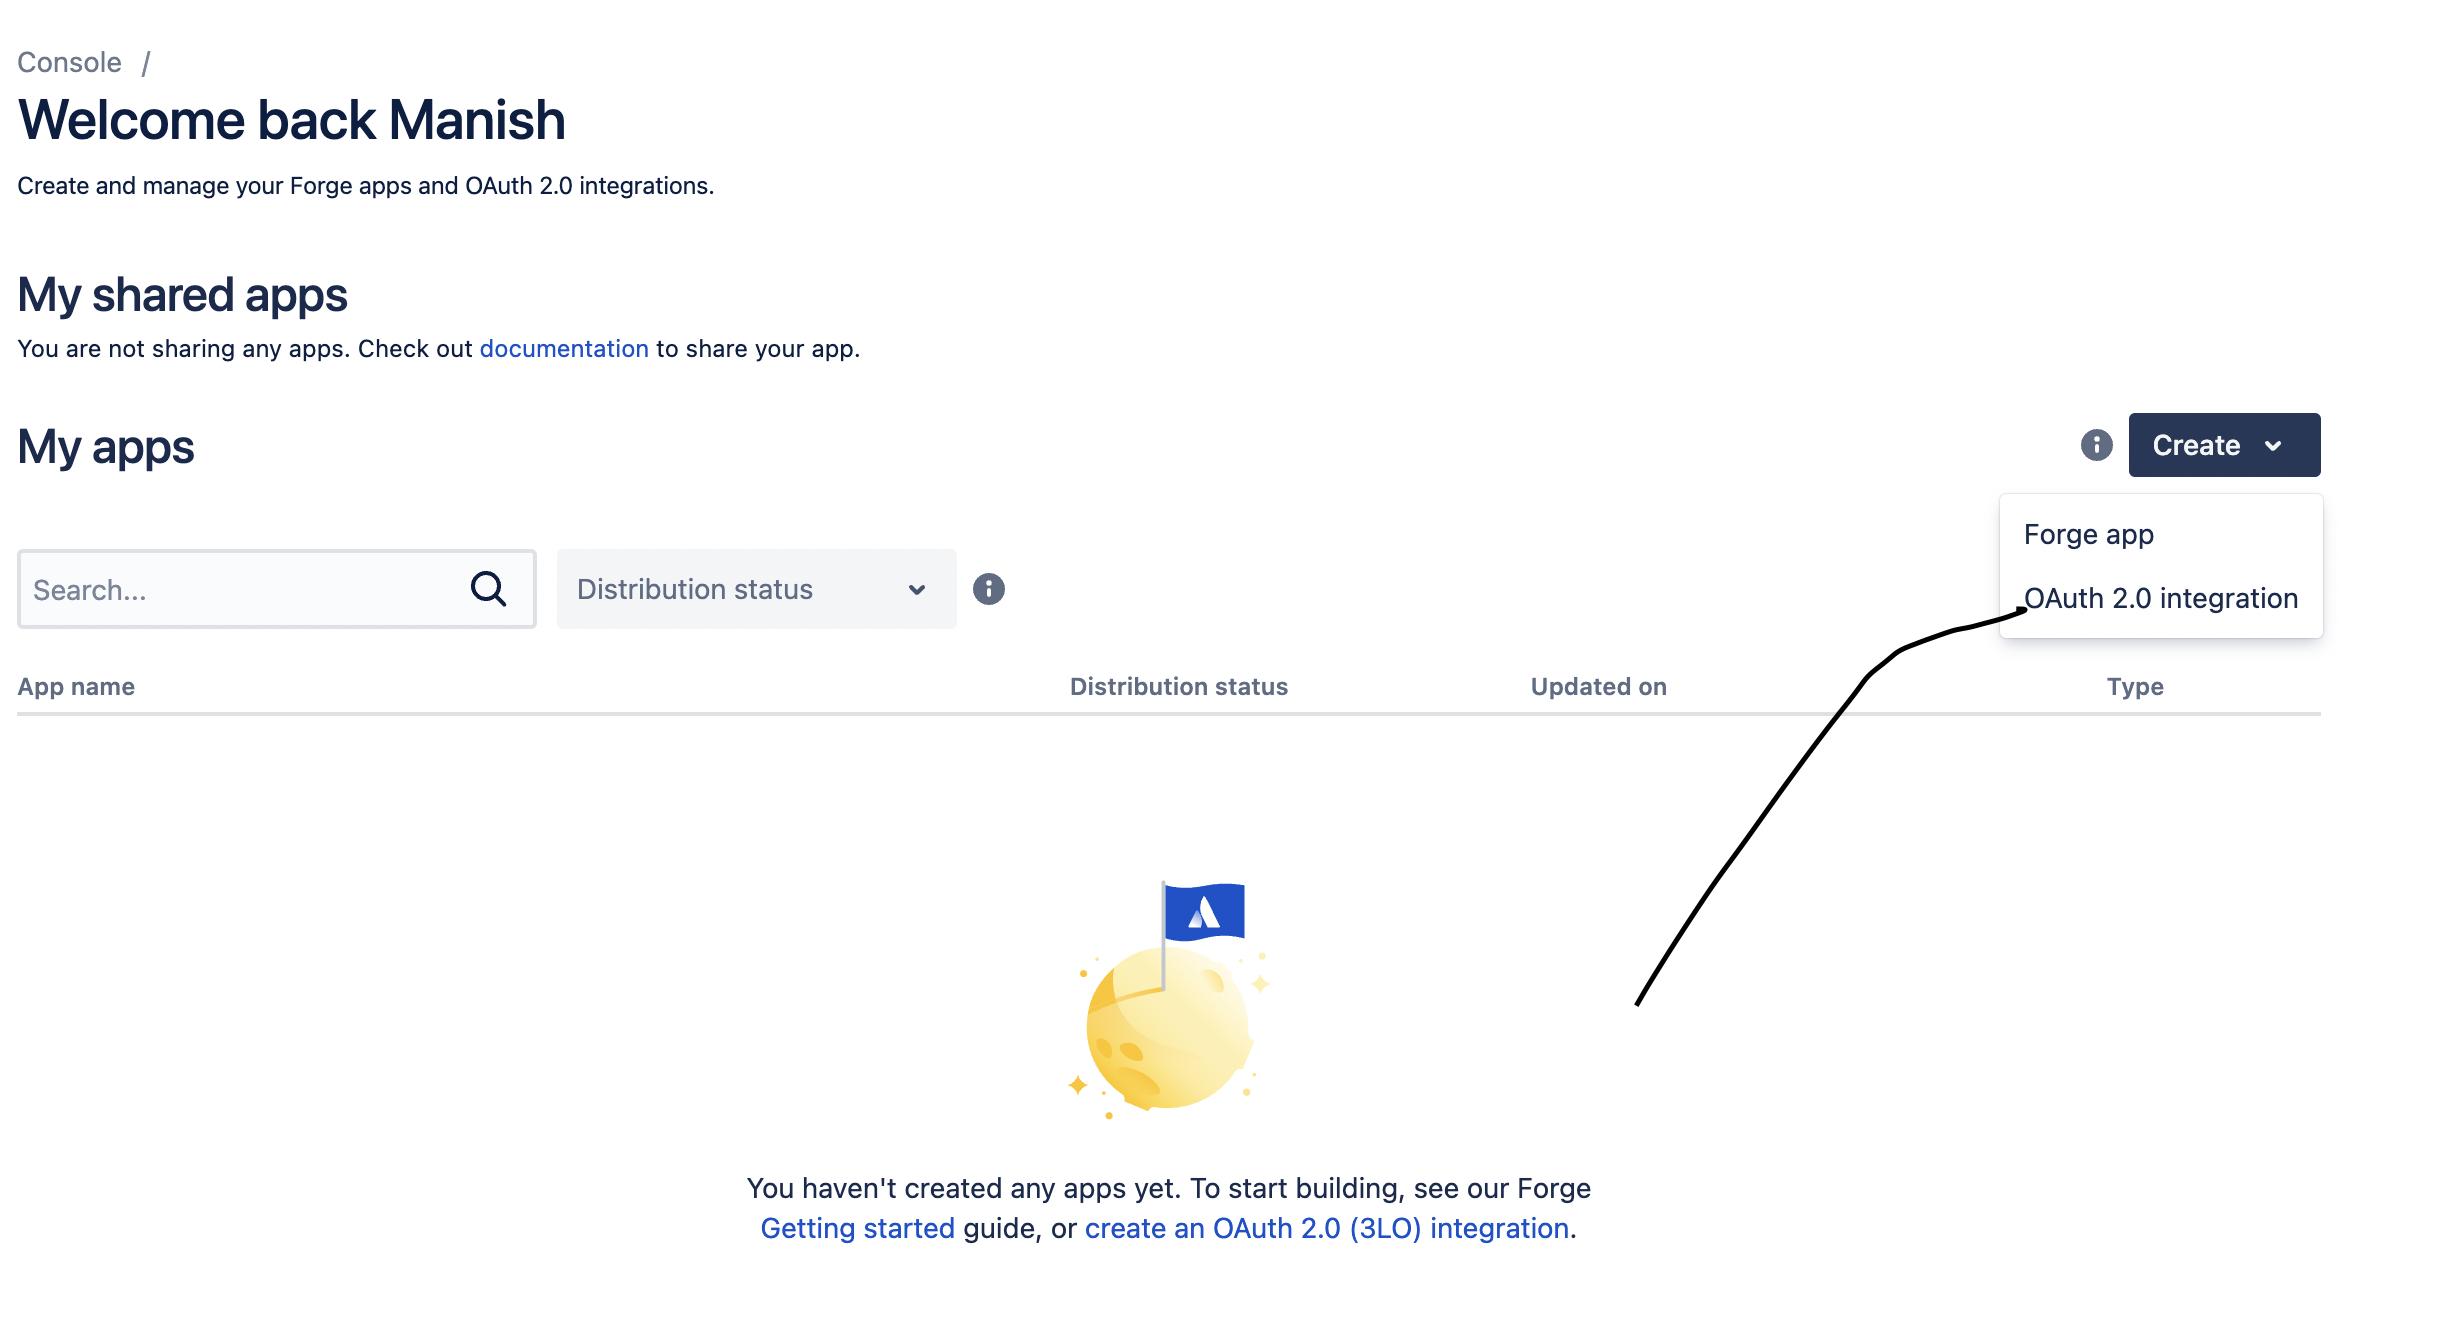
Create an application on https://developer.atlassian.com/console/myapps/
-
Select Oauth 2.0 integration
- Go to Console -> My apps -> youAppName -> Permission -> jira Api then click on add
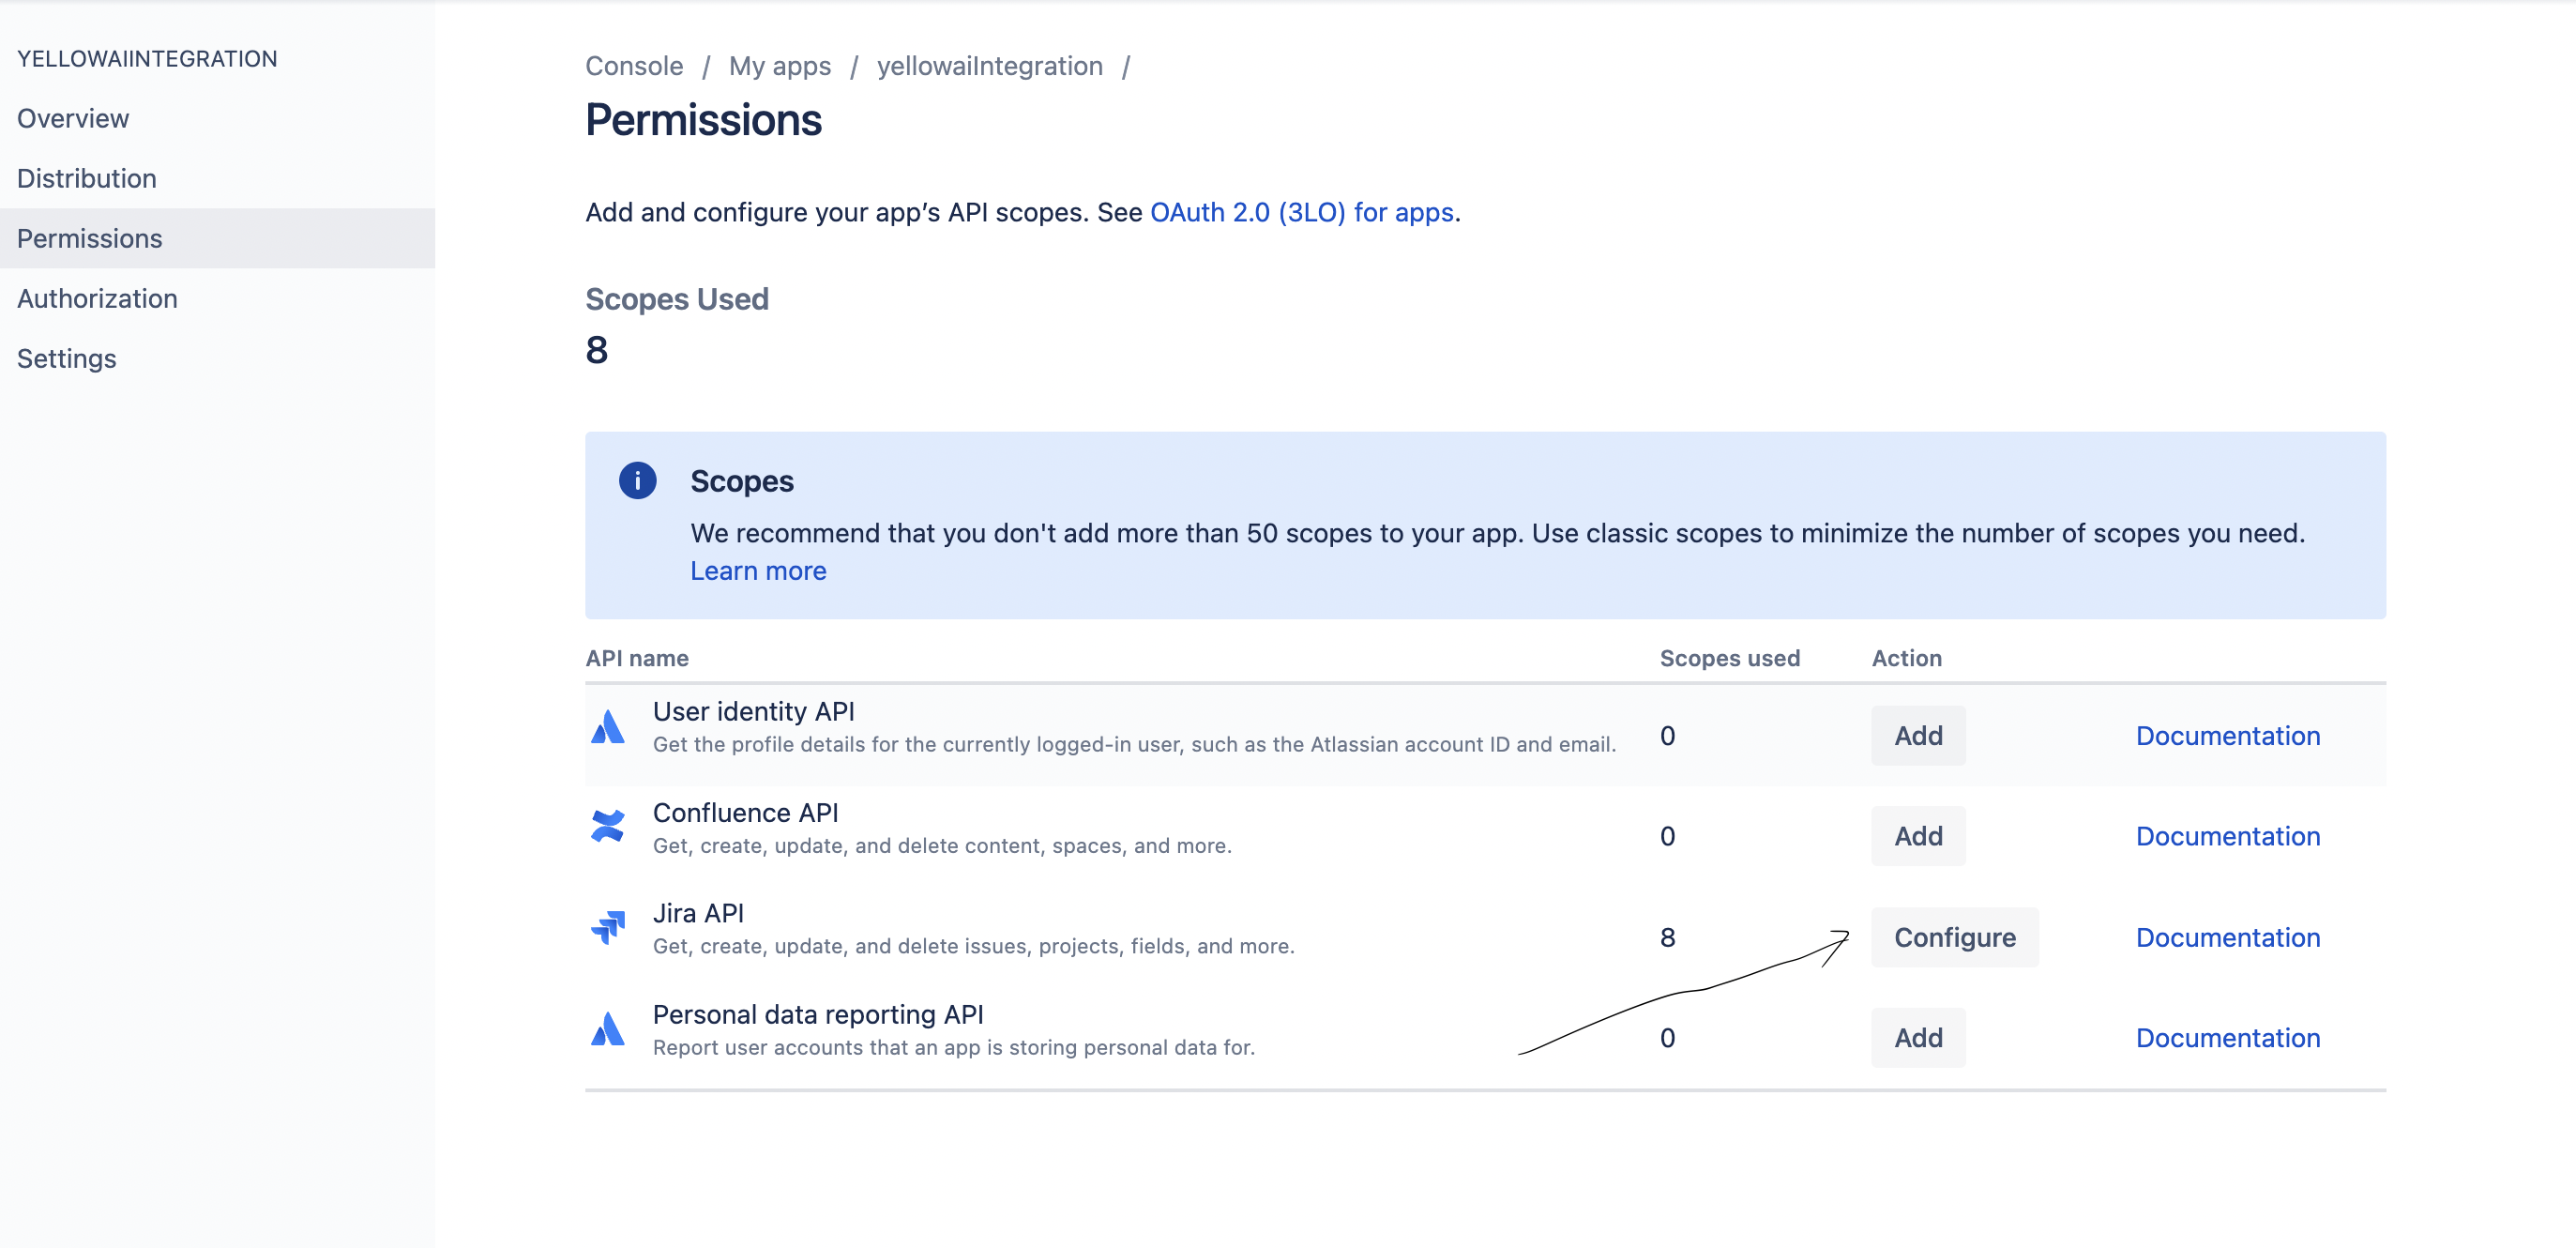
- Add and configure your app’s API scopes.

- Then Go to Authorization and copy the url from integration card then configure the url there. \
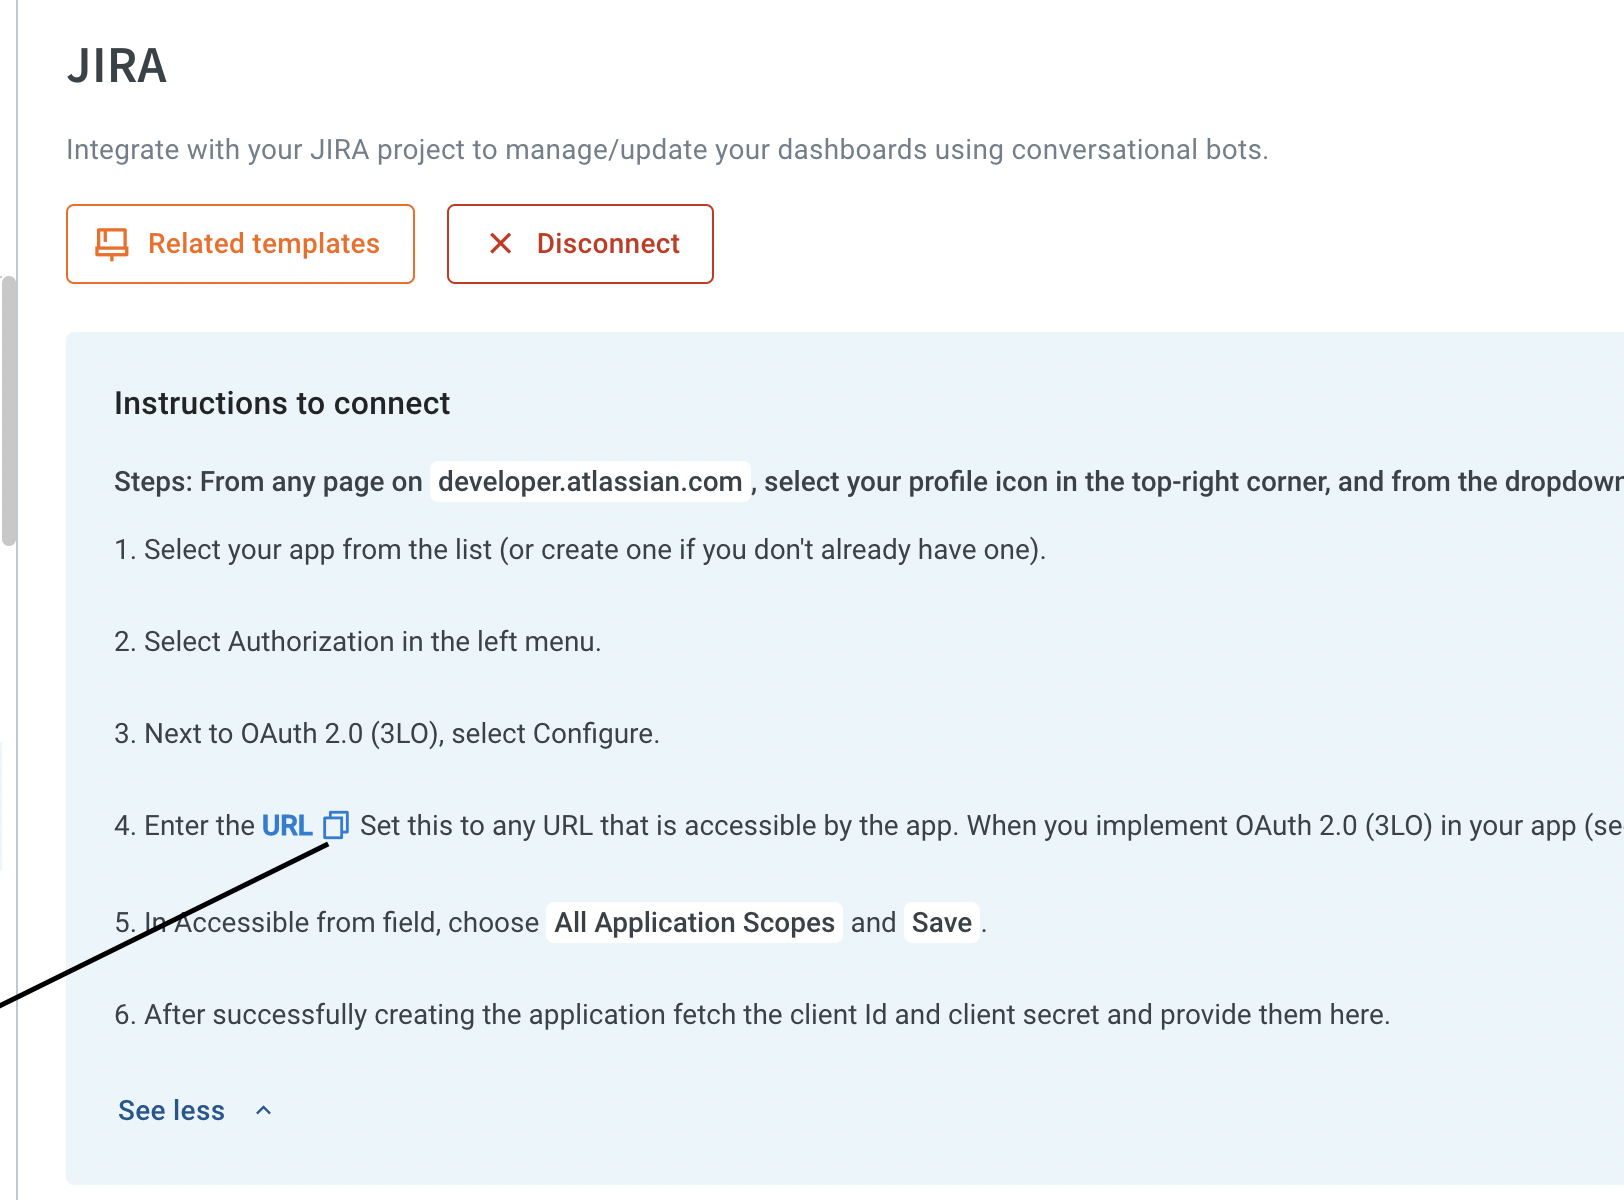
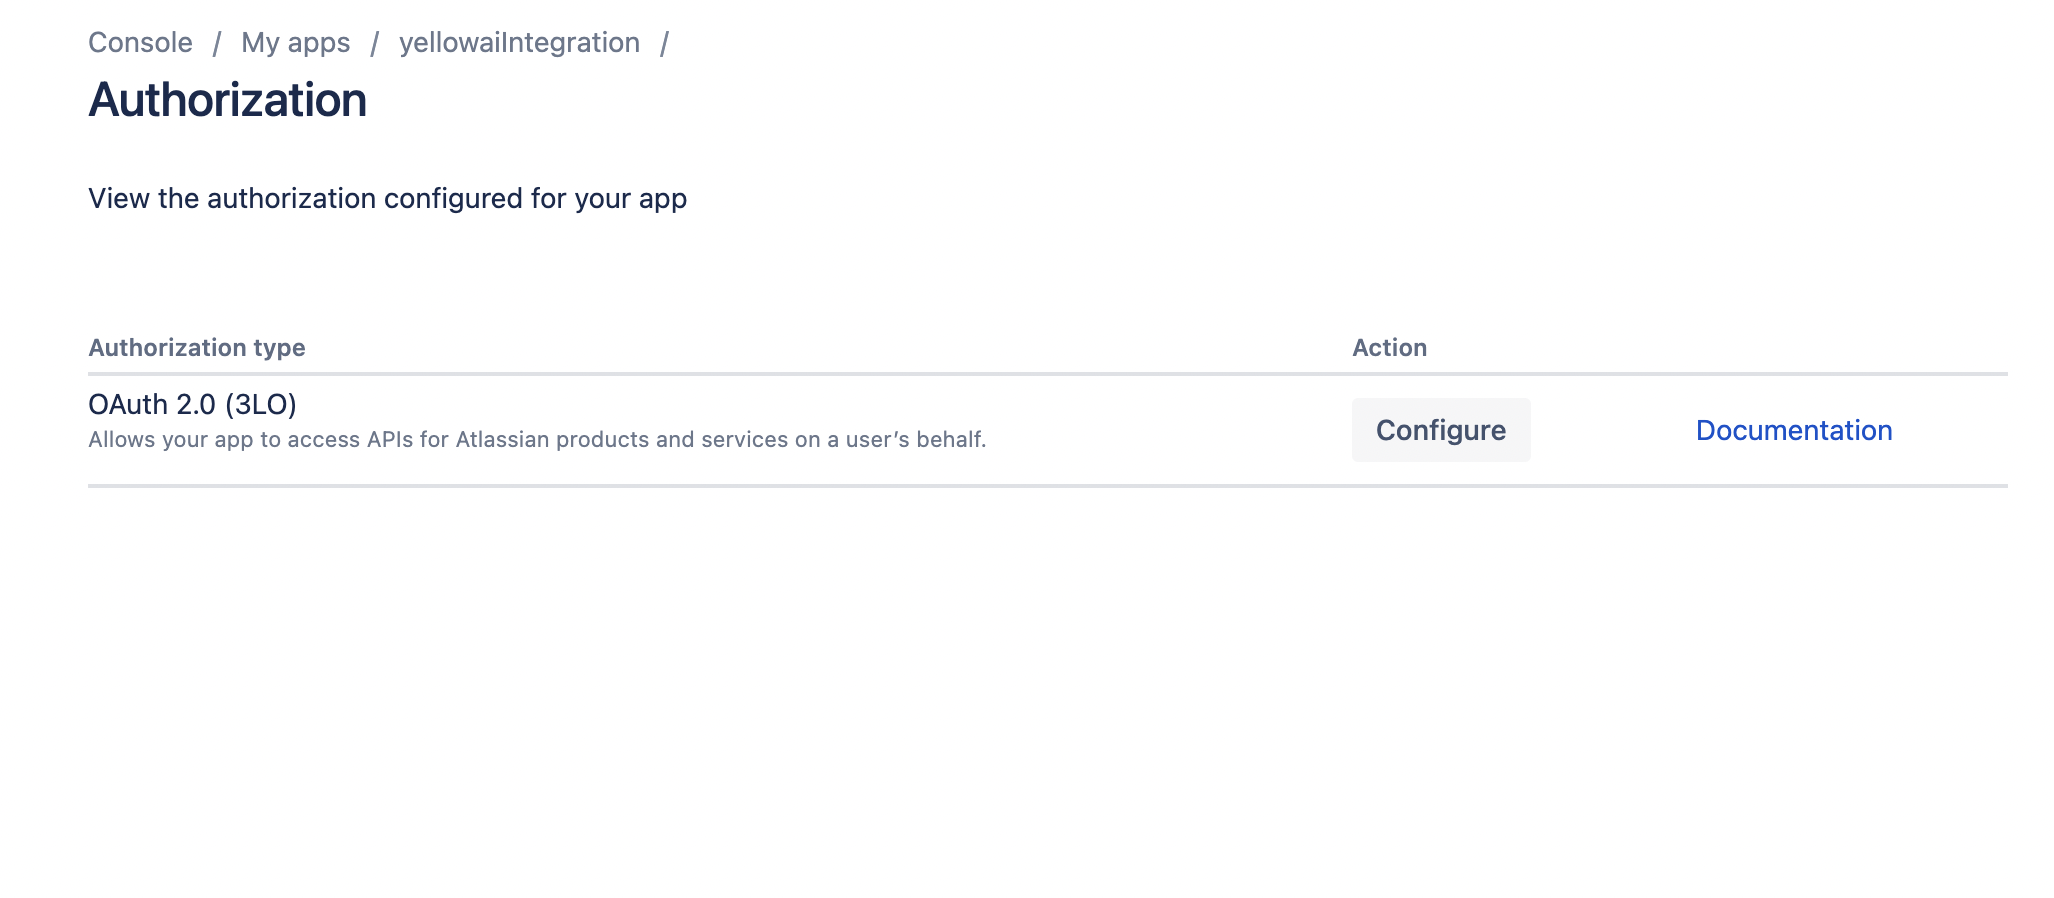
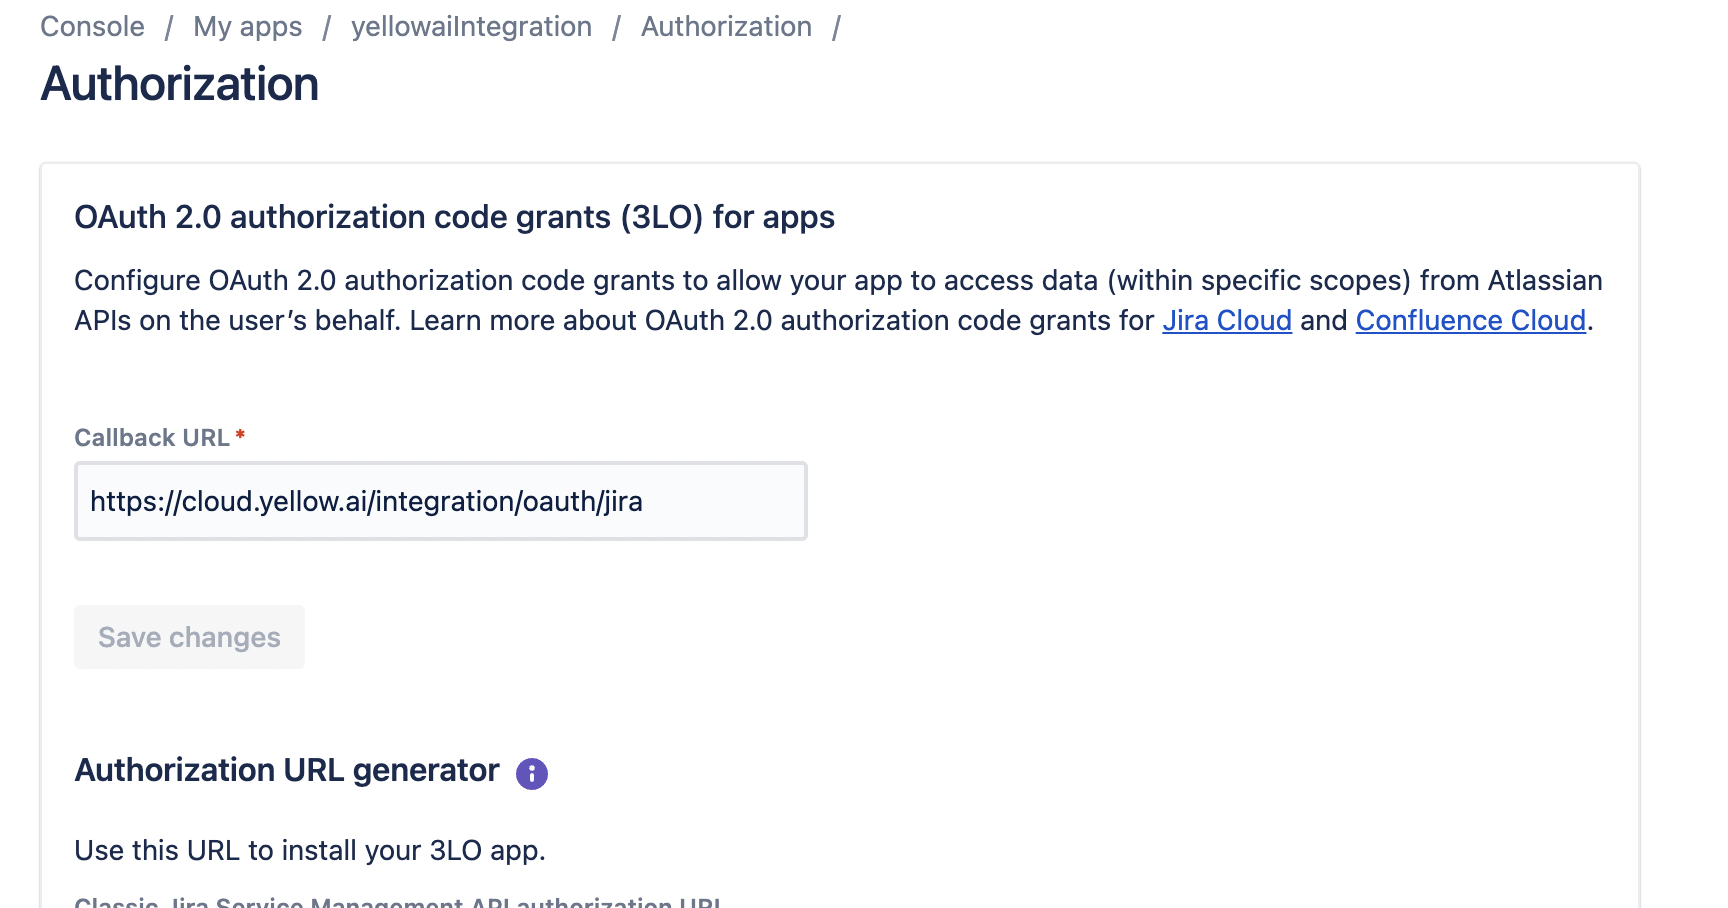
- Go to setting then copy client Id and client Secret then paste in to integration form and connect. It is oauth based integration hence jira will ask to give access to above app then allow. Then you can use jira integration action node.

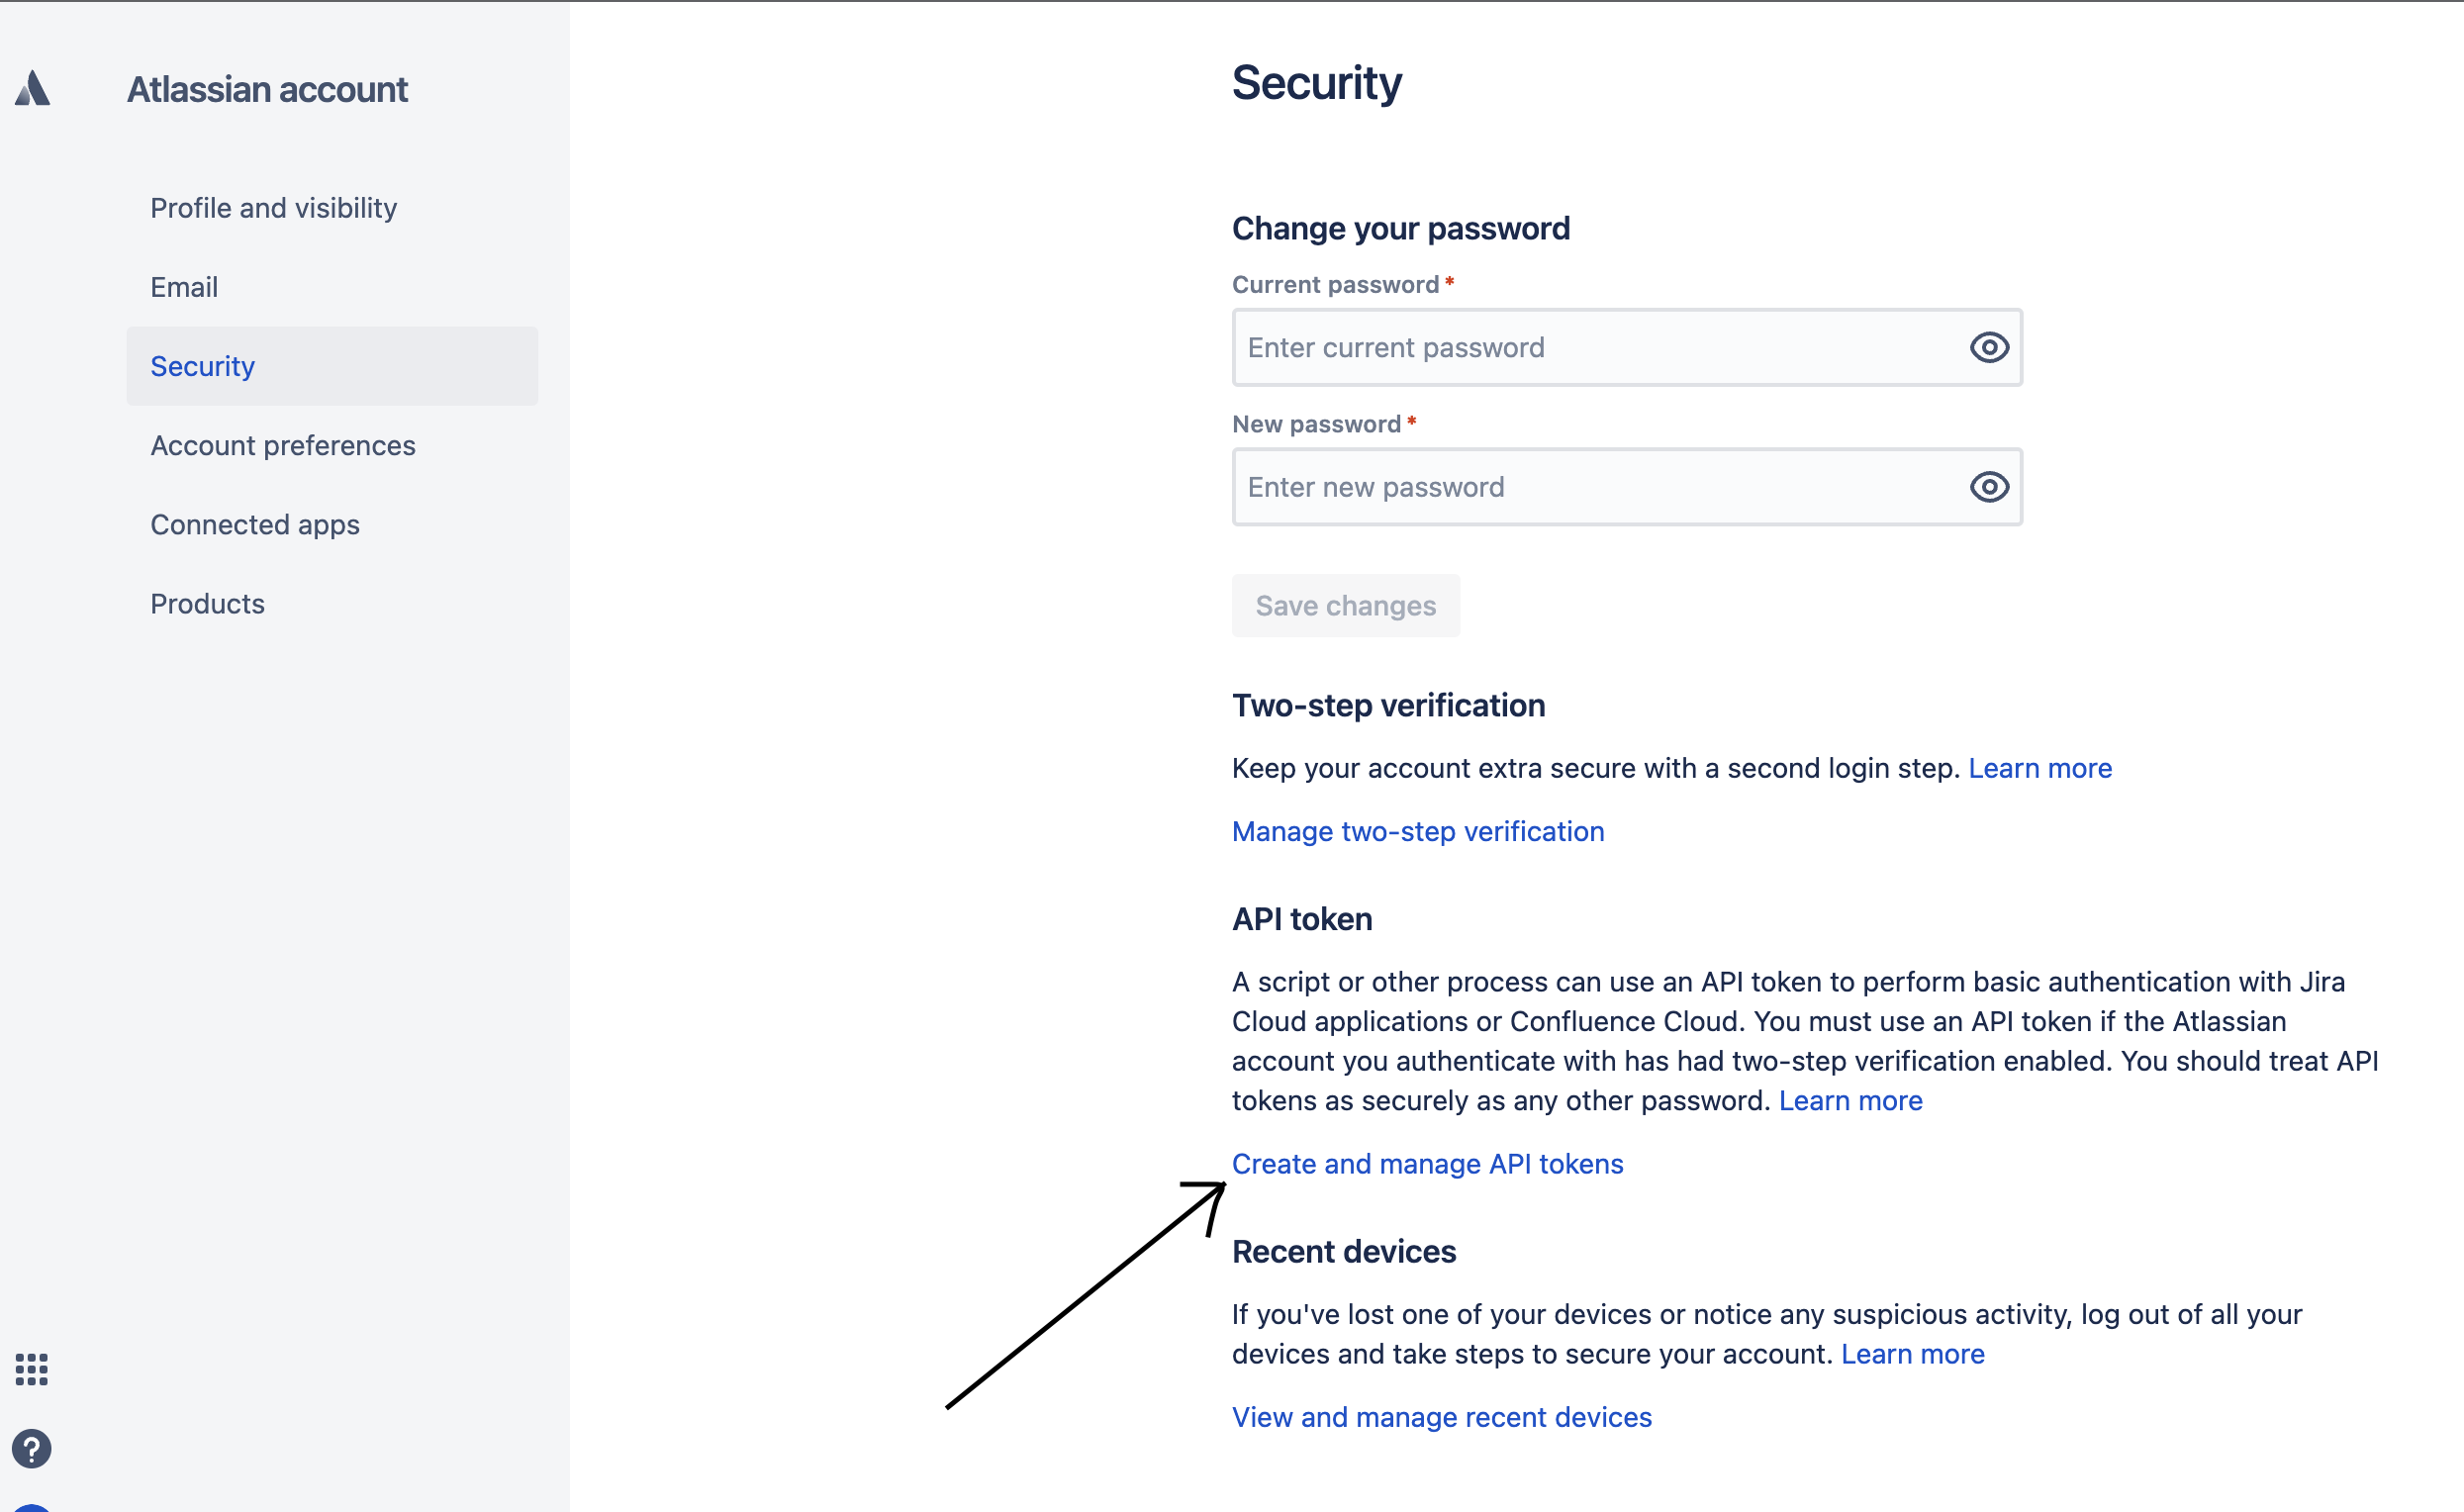
- Get ApiToken value for using inside the action-node. follow the below steps Click on Profile icon on top-right -> Manage Account -> Security -> API Token -> Create and manage API tokens -> create new API token and copy the value and paste somewhere for your reference.
- If you have multiple accounts, follow the above mentioned steps to add each of them.
- Enter a unique name for each account to easily identify them within the yellow.ai platform. It is recommended to use a name that aligns with its purpose for better usability.
- You can add a maximum of 5 merchant accounts.
- In a two-tier environment, such as bots with only Development/Live environments, you can add account names only in the development mode. Once added and flows have been built, in the Live mode, you can only choose the account names and not edit them.
- In a three-tier environment, such as bots with Staging/Sandbox/Production modes, in Staging and Sandbox modes, you can add and edit new accounts. However, in Production, only the account details added in Staging will be available. You can only map in the production environment.
Use-cases
Following are the use-cases which are currently accommodated in the Integration:
When multiple accounts are added, select the appropriate account for each node, allowing you to leverage the unique functionalities of each account for their intended purposes.
Get Issue Details:-
From this method you can get the issue details. Node Input Params:-
| Field Name | Sample Input | Remarks |
| issueIdOrKey* | INTG-189 | Issue Key or Issue Id. |
Output Response should be stored in object type variables
Get Project Details:-
From this method you can get Project Details. Node Input Params:-
| Field Name | Sample Input | Remarks |
| projectIdOrKey* | INTG or 10004 | Project Key or Project Id. |
OutPut Response should be stored in Object type variables
Get Project Status:-
From this method you can get Project Status Details. Node Input Params:-
| Field Name | Sample Input | Remarks |
| projectIdOrKey* | INTG or 10004 | Project Key or Project Id. |
Output Response should be stored in Array type variables
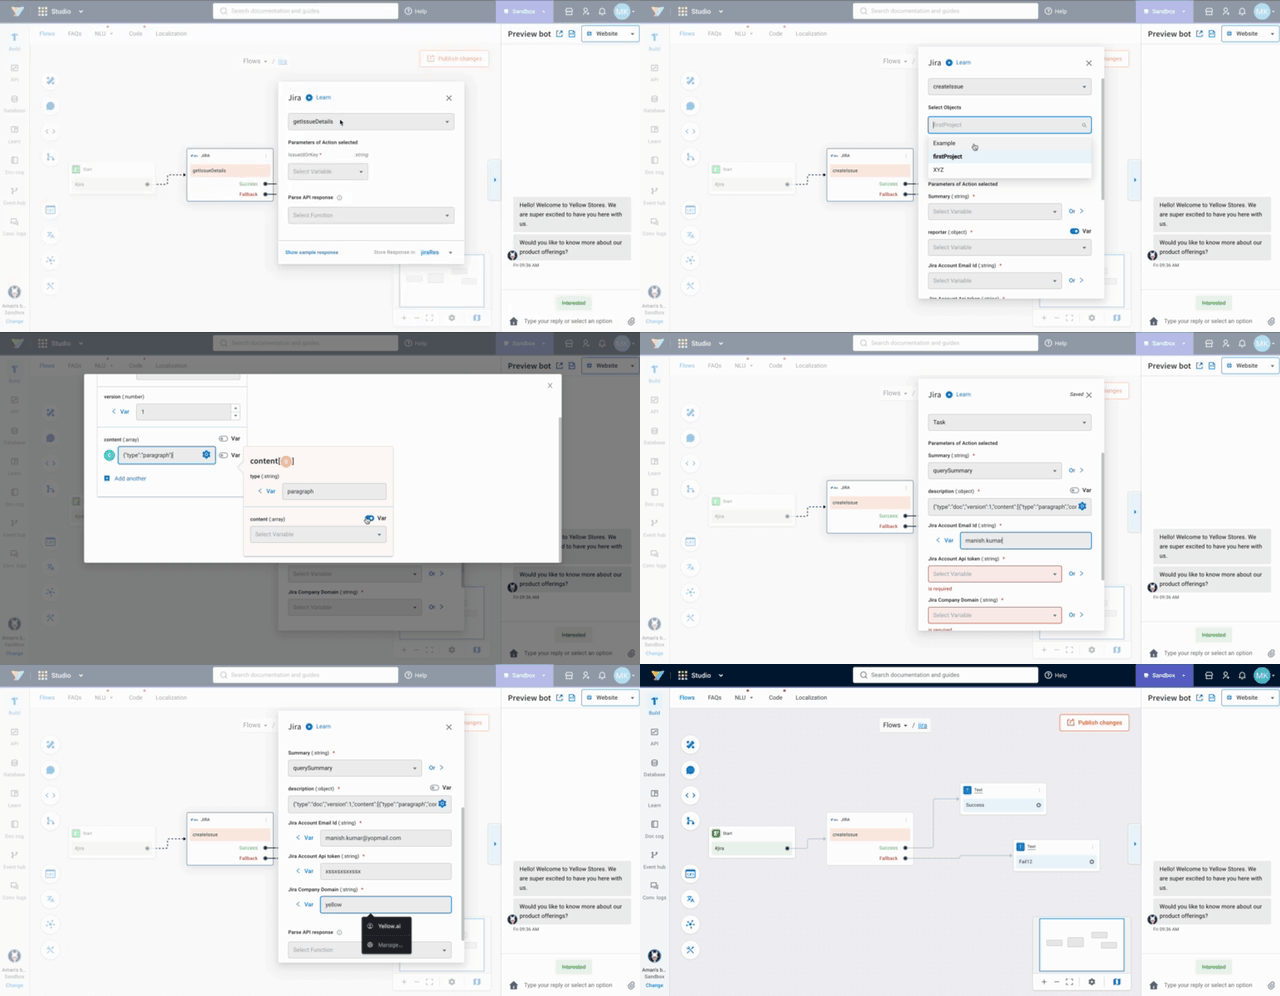
Create Jira Issue:-
Creates an issue or, where the option to create subtasks is enabled in Jira, a subtask. A transition may be applied, to move the issue or subtask to a workflow step other than the default start step, and issue properties set.
Creating a subtask differs from creating an issue as follows:
issueType must be set to a subtask issue type .
parent must contain the ID or key of the parent issue.
This action node is based on V2 action node in which field are fetching dynamically.
 Following the above steps will connect your Google Sheets with Yellow.ai platform.
Search user Details:-
From this method you can fetch user details.Finds users with a structured query and returns a paginated list of user details
Node Input Params:-
| Field Name | Sample Input | Remarks |
| userNameOrEmail* | [email protected] | Username or emal. |
Output Response should be stored in Array type variable.
Create Project:-
From this method you can create project.. Node Input Params:-
| Field Name | Sample Input | Remarks |
| nameOfProject* | Example Project | Name of Project |
| key | INTG | Unique Key value |
| projectTypeKey | Bussiness,Software | Project type Key enums(Bussiness, Software,Cloud) |
| leadAccountId | 16 digit varchar | Account Id of user, use search user details action node to get accountId |
| [email protected] | Jira Email address of person who creating project | |
| apiToken | a12Esjsjs!23 | Api Token |
| jiraCompanyDomain | yellowmessenger | Subdomain name of jira board |
ProjectTypeKey Enums- business, service_desk, software
Response Should be stored in Object type variables.
Search issues by query:-
Returns lists of issues matching a query string. Use this resource to provide auto-completion suggestions when the user is looking for an issue using a word or string.
Node Input Params
| Field Name | Sample Input Remarks | |
| query* | Test Issue | Search Query of issue. |