Custom voices — library and cloning
Custom voices are one of the headline additions in Nexus. You can clone a voice from a short audio sample, manage everything in a library, and use any saved voice across your v3 agents — no engineering required.
This page walks you through both surfaces:
- Voice Library — your cloned voices plus Yellow's curated global voices.
- Voice Cloning — turning a short audio sample into a reusable voice.
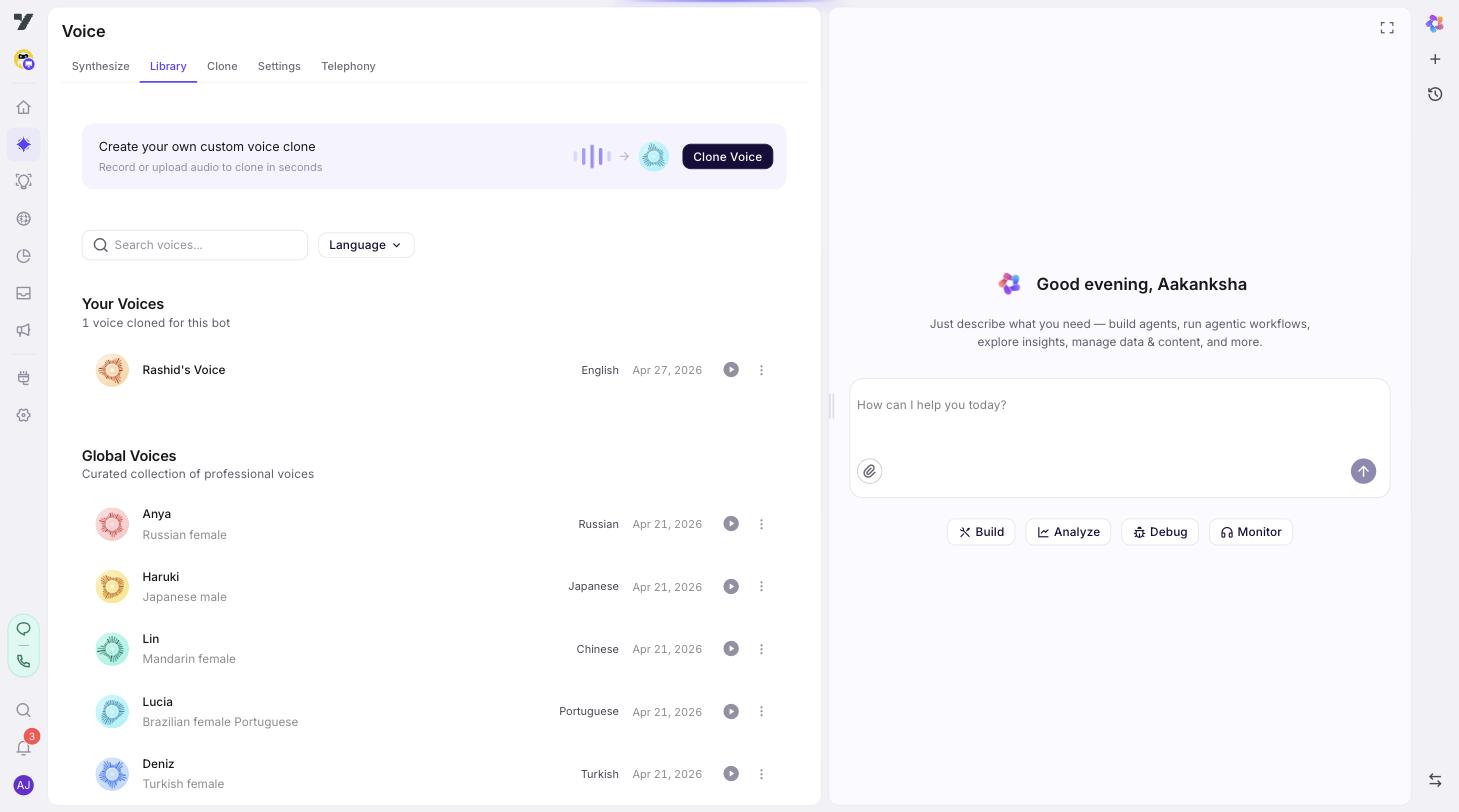
Open the library
In your bot, go to AI Agent → Voice → Library.
You'll see two sections:
- Your Voices — every custom voice cloned for this bot. Each row shows name, language, creation date, and actions.
- Global Voices — Yellow's curated professional voices, available to all bots. Read-only — you can use them but not edit or delete.
Each row supports:
| Action | What it does |
|---|---|
| Click row | Plays a short preview. |
| Try it out | Opens the TTS Playground with the voice pre-selected so you can hear it speak any text. |
| Copy ID | Copies the voice ID — useful if you're scripting or referencing the voice externally. |
| Delete | Removes the voice from your library (custom voices only). |
A search box and a language filter at the top help you scan a large library.
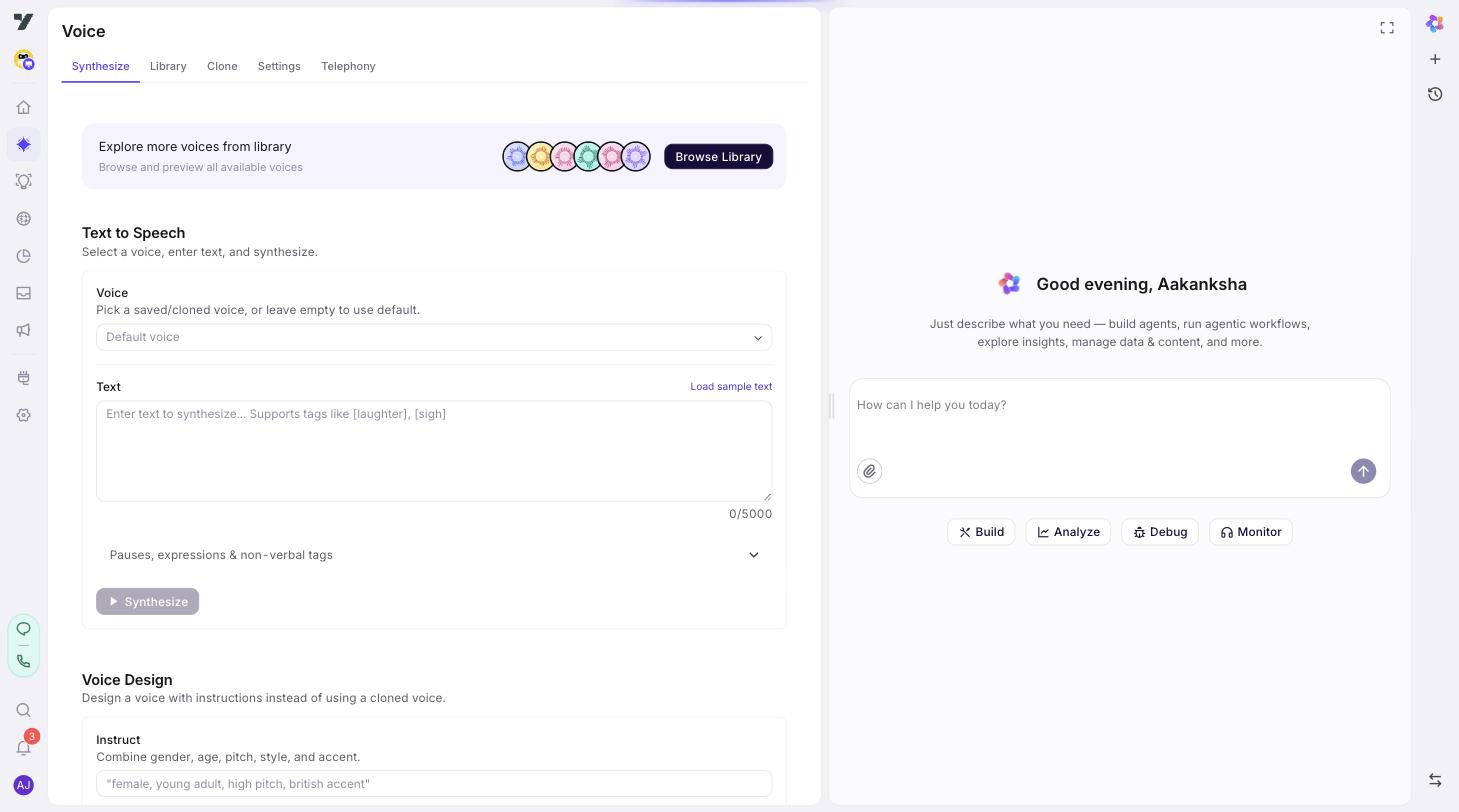
TTS Playground
AI Agent → Voice → TTS is a dedicated text-to-speech sandbox. Pick any voice (custom or global), type any text, and hear it. It's the fastest way to:
- Audition voices before assigning one to an agent.
- Sanity-check that a cloned voice sounds right outside of a conversation.
- Generate a short clip to share with stakeholders.
The page accepts a ?voice=<voiceId> URL parameter, so the Try it out button on the library page jumps straight here with a voice already selected.
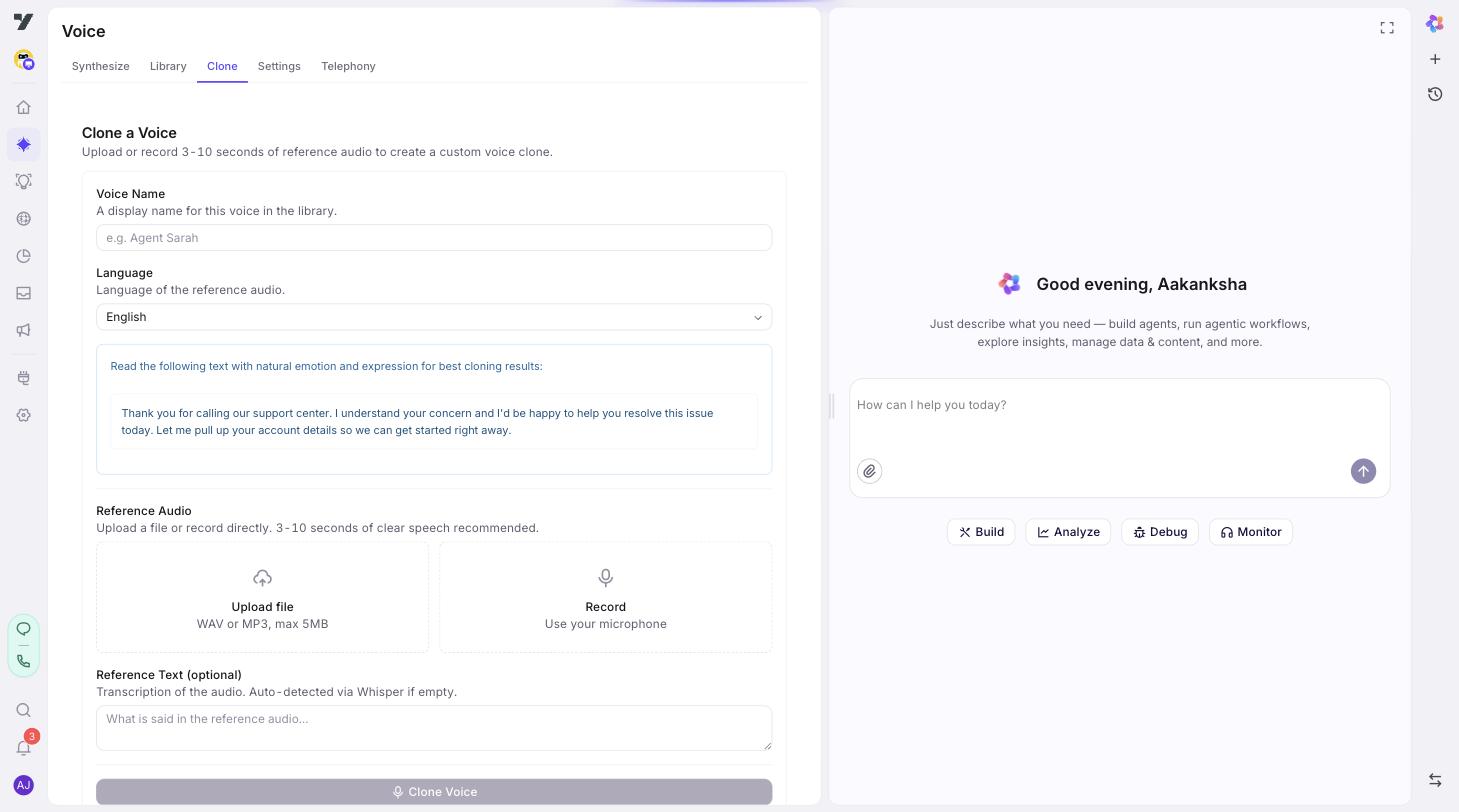
Cloning a voice
Cloning takes a short, clean audio sample of a real voice and produces a new voice you can use in any agent. The whole process takes a couple of minutes.
Step 1: Open the cloning page
Go to AI Agent → Voice → Clone.
Step 2: Name your voice
Give it a clear, descriptive name (≤100 characters). The name appears in the Voice Library and in the voice picker on Voice Settings.
Examples that age well:
Aria — Support ENMaya — Hindi Sales (warm)Brand voiceover — corporate v2
Avoid names like voice1, test, or final-final — you'll regret them within a month.
Step 3: Pick the language
The dropdown lists 646+ supported languages, grouped:
- Popular — English, Spanish, French, German, Portuguese, Italian, Chinese, Japanese, Korean, Hindi, Arabic, Russian.
- European, Asian, Middle Eastern & African, Other — for everything else.
The language tells the cloning model what phonemes to expect. Pick the language the sample audio is recorded in — not what you eventually want the cloned voice to speak (the same cloned voice can speak many languages once trained).
Step 4: Provide reference audio
You have two options:
| Option | When to use |
|---|---|
| Upload | You already have a clean recording (WAV or MP3, ≤5 MB). |
| Record | You want to capture a sample directly in the studio (3–10 seconds is the sweet spot). |
A blue banner shows a language-specific sample text to read aloud — phonetically rich phrases that produce the best clones. Read the suggested text rather than improvising; the model has been tuned around it.
Audio quality matters more than length. A clean 5-second clip beats a noisy 30-second one. Use a quiet room, a good mic, and avoid plosives (b, p) directly into the mic.
Step 5: (Optional) Provide reference text
Reference text is the transcript of your audio. Two paths:
- Leave it blank — the system auto-detects the transcript using Whisper. Convenient and usually correct.
- Type it manually — useful when the audio includes uncommon names, brand terms, or precise phrasing the auto-detection might mis-hear.
If you read the suggested sample text in Step 4, leave the field blank — the auto-detect handles it cleanly.
Step 6: Clone
Click Clone Voice. You'll see a progress indicator while the model trains. When it's done:
- The voice appears under Your Voices in the library.
- It's immediately selectable in the Voice Settings voice picker for any agent in this bot.
- The Try-it-out flow lets you preview it in the TTS Playground.
If cloning fails, the most common causes are:
- Audio is too short (under ~2 seconds) or too long (the model truncates).
- Audio is too noisy or quiet.
- Multiple speakers in the sample.
Re-record cleanly and try again.
Step 7: Wire the cloned voice into an agent
Open AI Agent → Profile → Voice Settings. The cloned voice now appears in the Voice dropdown (under your custom voices). Pick it, save, and the next call will use it.
If your bot has additional agents, repeat for each agent that should use the new voice. Different agents can use different voices.
Best practices
Recording samples
- One speaker, one take, no music. Multi-speaker samples confuse the model.
- Quiet room. Background HVAC, traffic, or typing leaks into the clone.
- Read the suggested sample text. It's tuned to give clean clones — don't improvise.
- Aim for 5–8 seconds. Shorter risks under-fitting; much longer doesn't help.
Naming
- Lead with the voice character, not the use case. "Aria — warm support EN" beats "Support voice." When the use case shifts you don't have to rename.
- Include language in the name. Saves you ten clicks every time you scan the library.
Library hygiene
- Delete failed clones. A cluttered library makes it hard to find the right voice.
- Document your shortlist. Keep a brief external note of which voices map to which agents. Future you will not remember.
Picking a voice for an agent
- Match voice to context. Calm support, energetic sales, neutral information. The voice IS the brand on a call.
- Test on real call audio, not just the TTS Playground. The Voice → Telephony Web Call uses the full call pipeline including telephony codecs, which can change how a voice sounds.
- Don't switch voices on a live bot without warning users. Returning users notice immediately.
Common questions
| Question | Answer |
|---|---|
| Can I edit a cloned voice? | No. Re-clone with a better sample if you want to adjust. |
| Can I share a cloned voice across bots? | Custom voices are per-bot. Yellow's global curated voices are shared across all bots. |
| Does the cloned voice work in Realtime Audio mode? | No — Realtime mode uses OpenAI's voice catalog. Custom voices apply to Text & TTS (pipeline) mode. |
| What languages can a cloned voice speak? | The cloning model generalizes well across languages once trained. Test in your target languages before committing. |
| Where do I see what voice an agent is using? | AI Agent → Profile → Voice Settings for each agent. |