Billdesk UPI integration
Yellow.ai Integration with Billdesk UPI Payment Gateway allows you to create UPI Intent for WA Pay, view payment status and Send UPI notification with the yellow.ai platform.
Connecting BillDesk to yellow.ai
You can connect your account only in development environment and not in live. For a three-tier environment, you can connect an account in Staging and Sandbox environment. Once the AI agent is published, it will use the integrations if they are configured in the flows.
-
Get the KeyId, Client Id, Merchant Id, Public Key File and API Base URL from Billdesk Team.
-
Upload your Public Key file in some bucket or server like (AWS-S3, SFTP, etc) and Get the public CDN Url . Note:(CDN URL should be public readable).
-
On the Cloud platform, navigate to the Development/Staging environment and click Extensions > Integrations > Payment > BillDesk. You can also search for the Cashfree app.

-
In Give account name, enter a unique name for the integration. You can use only lowercase alphanumeric characters and underscores (_).
-
Enter Key ID, Client ID, Merchant ID, BillDesk public key CDN URL, API base URL and click Connect.
-
To connect multiple accounts, click + Add account and follow the instructions mentioned above. You can connect upto 15 accounts per integration.

Events to enable for BillDesk UPI Payment
You need to Activate the Billdesk Payment Status after integrating BillDesk.
To know how to enable events, refer to this doc.
BillDesk actions from AI agent conversations
Once the Stripe account is connected, you can perform the following actions through AI agent conversations: Generate UPI intent and Generate UPI collect.
-
Go to Development/Staging environment and navigate to Automation > Build > Select the flow where you want to add the Generate payment link node.
-
Click Add node > Integrations > BillDesk.
-
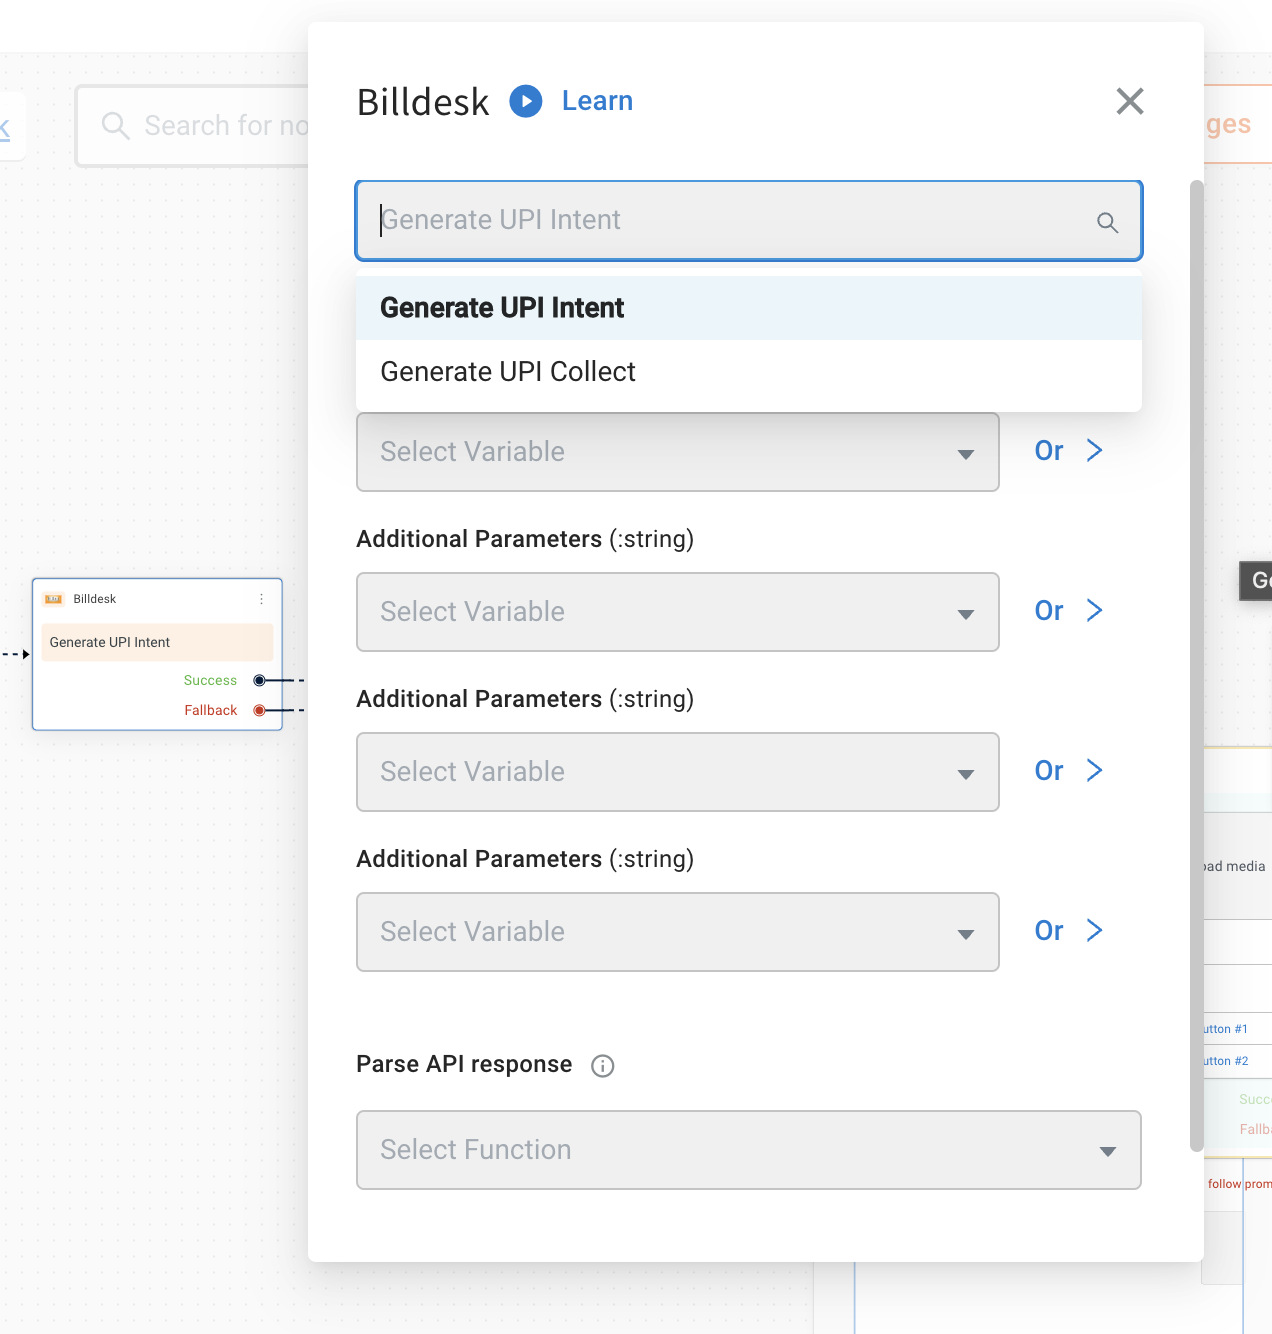
In Action, choose your preferred action.
1. Generate UPI Intent
Generate UPI collect BillDesk refers to a process where you create a request to collect funds from the user using UPI through the AI agent conversation.
Get the final amount from your cart total and call the Generate UPI Intent action node of integration, get the transaction Id and Intent URI for whatsapp pay api.
_ Node Input Params:-_
| Field Name | Sample Input | Description |
|---|---|---|
| Amount* | 200 | The amount for the request. |
| Additional Parameters | any varchar | additional_info values that can be attached to the transaction. |
| Additional Parameters | [email protected] | additional_info values that can be attached to the transaction. |
| Additional Parameters | Some value | additional_info values that can be attached to the transaction. |
To use in the App platform AI agent use below function.
app.executeIntegrationAction({
    "integrationName": "billdesk",
    "action": "Generate UPI Intent",
    "dynamicParams": {
        "amount": 100
    }
}).then((res)=>{
    console.log("response from action node", res);
    app.log(res, '||Response from action node||')
}).catch((err)=>{
    console.log("Error in action node",err);
    app.log(err, '||Error in action node||')
})
Sample Success Response:
{
  "objectid": "transaction",
  "transactionid": "X7890477676443",
  "orderid": "UPIODR00000004",
  "mercid": "BDMERCID",
  "transaction_date": "2022-03- 18T11:50:27+05:30",
  "amount": "2.00",
  "surcharge": "0.00",
  "txn_process_type": "collect",
  "bankid": "789",
  "itemcode": "DIRECT",
  "auth_status": "0002",
  "transaction_error_code": "TRP0000",
  "transaction_error_desc": "Transaction Pending",
  "transaction_error_type": "pending",
  "payment_method_type": "upi"
2. Generate UPI Collect
The end customer will authorize the transaction via the UPI PSP mobile app. On successful authorisation, BillDesk will receive a callback from the acquirer, and in turn BillDesk will notify the merchant via webhook notification.
_ Node Input Params:-_
| Field Name | Sample Input | Description |
|---|---|---|
| Amount* | 200 | The amount for the request. |
| VPA* | billdesk@upi | UPI Id of customer |
| Additional Parameters | any varchar | additional_info values that can be attached to the transaction. |
| Additional Parameters | [email protected] | additional_info values that can be attached to the transaction. |
| Additional Parameters | Some value | additional_info values that can be attached to the transaction. |
To use in the App platform AI agent use the below function.
app.executeIntegrationAction({
    "integrationName": "billdesk",
    "action": "Generate UPI Collect",
    "dynamicParams": {
        "amount": 100,
        "vpa":"billdesk@upi",
        "additionalParameters4":"anything"
        "additionalParameters5":"anything"
        "additionalParameters6":"anything"
    }
}).then((res)=>{
    console.log("response from action node", res);
    app.log(res, '||Response from action node||')
}).catch((err)=>{
    console.log("Error in action node",err);
    app.log(err, '||Error in action node||')
})
Sample Success Response:
{
  "objectid": "transaction",
  "transactionid": "X7890477676443",
  "orderid": "UPIODR00000004",
  "mercid": "BDMERCID",
  "transaction_date": "2022-03- 18T11:50:27+05:30",
  "amount": "2.00",
  "surcharge": "0.00",
  "txn_process_type": "collect",
  "bankid": "789",
  "itemcode": "DIRECT",
  "auth_status": "0002",
  "transaction_error_code": "TRP0000",
  "transaction_error_desc": "Transaction Pending",
  "transaction_error_type": "pending",
  "payment_method_type": "upi"