Instamojo integration
Instamojo is a popular payment gateway in India that enables businesses to accept payments online through multiple channels such as UPI, debit/credit cards, net banking, wallets, and more. With this integration, you can connect your AI Agent to Instamojo to initiate and manage payment requests, track transaction statuses, and ensure a secure payment experience for your customers.
This guide provides step-by-step instructions to help you:
- Set up your Instamojo API credentials
- Create and manage payment links Handle payment callbacks and statuses Ensure compliance and best practices for secure transactions Whether you're building an e-commerce site, a digital service platform, or a donation portal, this integration helps streamline your payment collection process with minimal effort.
Get required API credentials from Instamojo
To integrate Instamojo with your application, you need the following credentials:
- API Key
- Auth Token
- Private Salt (for webhook verification, if required)
- Client ID & Client Secret (for OAuth2 flows, in some cases)
Follow these steps to get them:
-
Create or Log in to Your Instamojo Account
- Go to https://www.instamojo.com and log in to your Merchant Dashboard .
-
Go to Dashboard > Go to** API & Plugins** > Generate Credentials > Select Direct Rest API Integration.

-
Generate Your API Credentials
- On the Developers page, go to the section “API Credentials” and click "Generate Credentials" or "Create New App", if prompted. You will receive API Key, Auth Token, and Private Salt.
Credentials vary between Test Mode and Live Mode. Use test credentials while integrating for testing, and live credentials only when you're ready for production.
- Test Mode: This mode is intended for testing purposes and for developers who are just beginning their integration with Instamojo. Test Mode is completely free of charge but requires completion of KYC (Know Your Customer) verification. No actual charges will be incurred, even if valid card details are provided on the Instamojo test environment for sign-up.
- Live mode: In Live Mode, transactions occur in real-time, and actual charges apply. To operate in Live Mode, users must provide their bank account information and complete the KYC (Know Your Customer) process. This ensures compliance with regulatory requirements and enables seamless processing of payments. To get started with Live Mode, visit Instamojo's website and sign up for an account.
Connect Instamojo with Yellow.ai
Follow these steps to begin integrating:
You need to integrate first with Development/Staging or Sandbox environment. Once the integration is complete and the application is published, all connected integrations will be available in the Live environment.
-
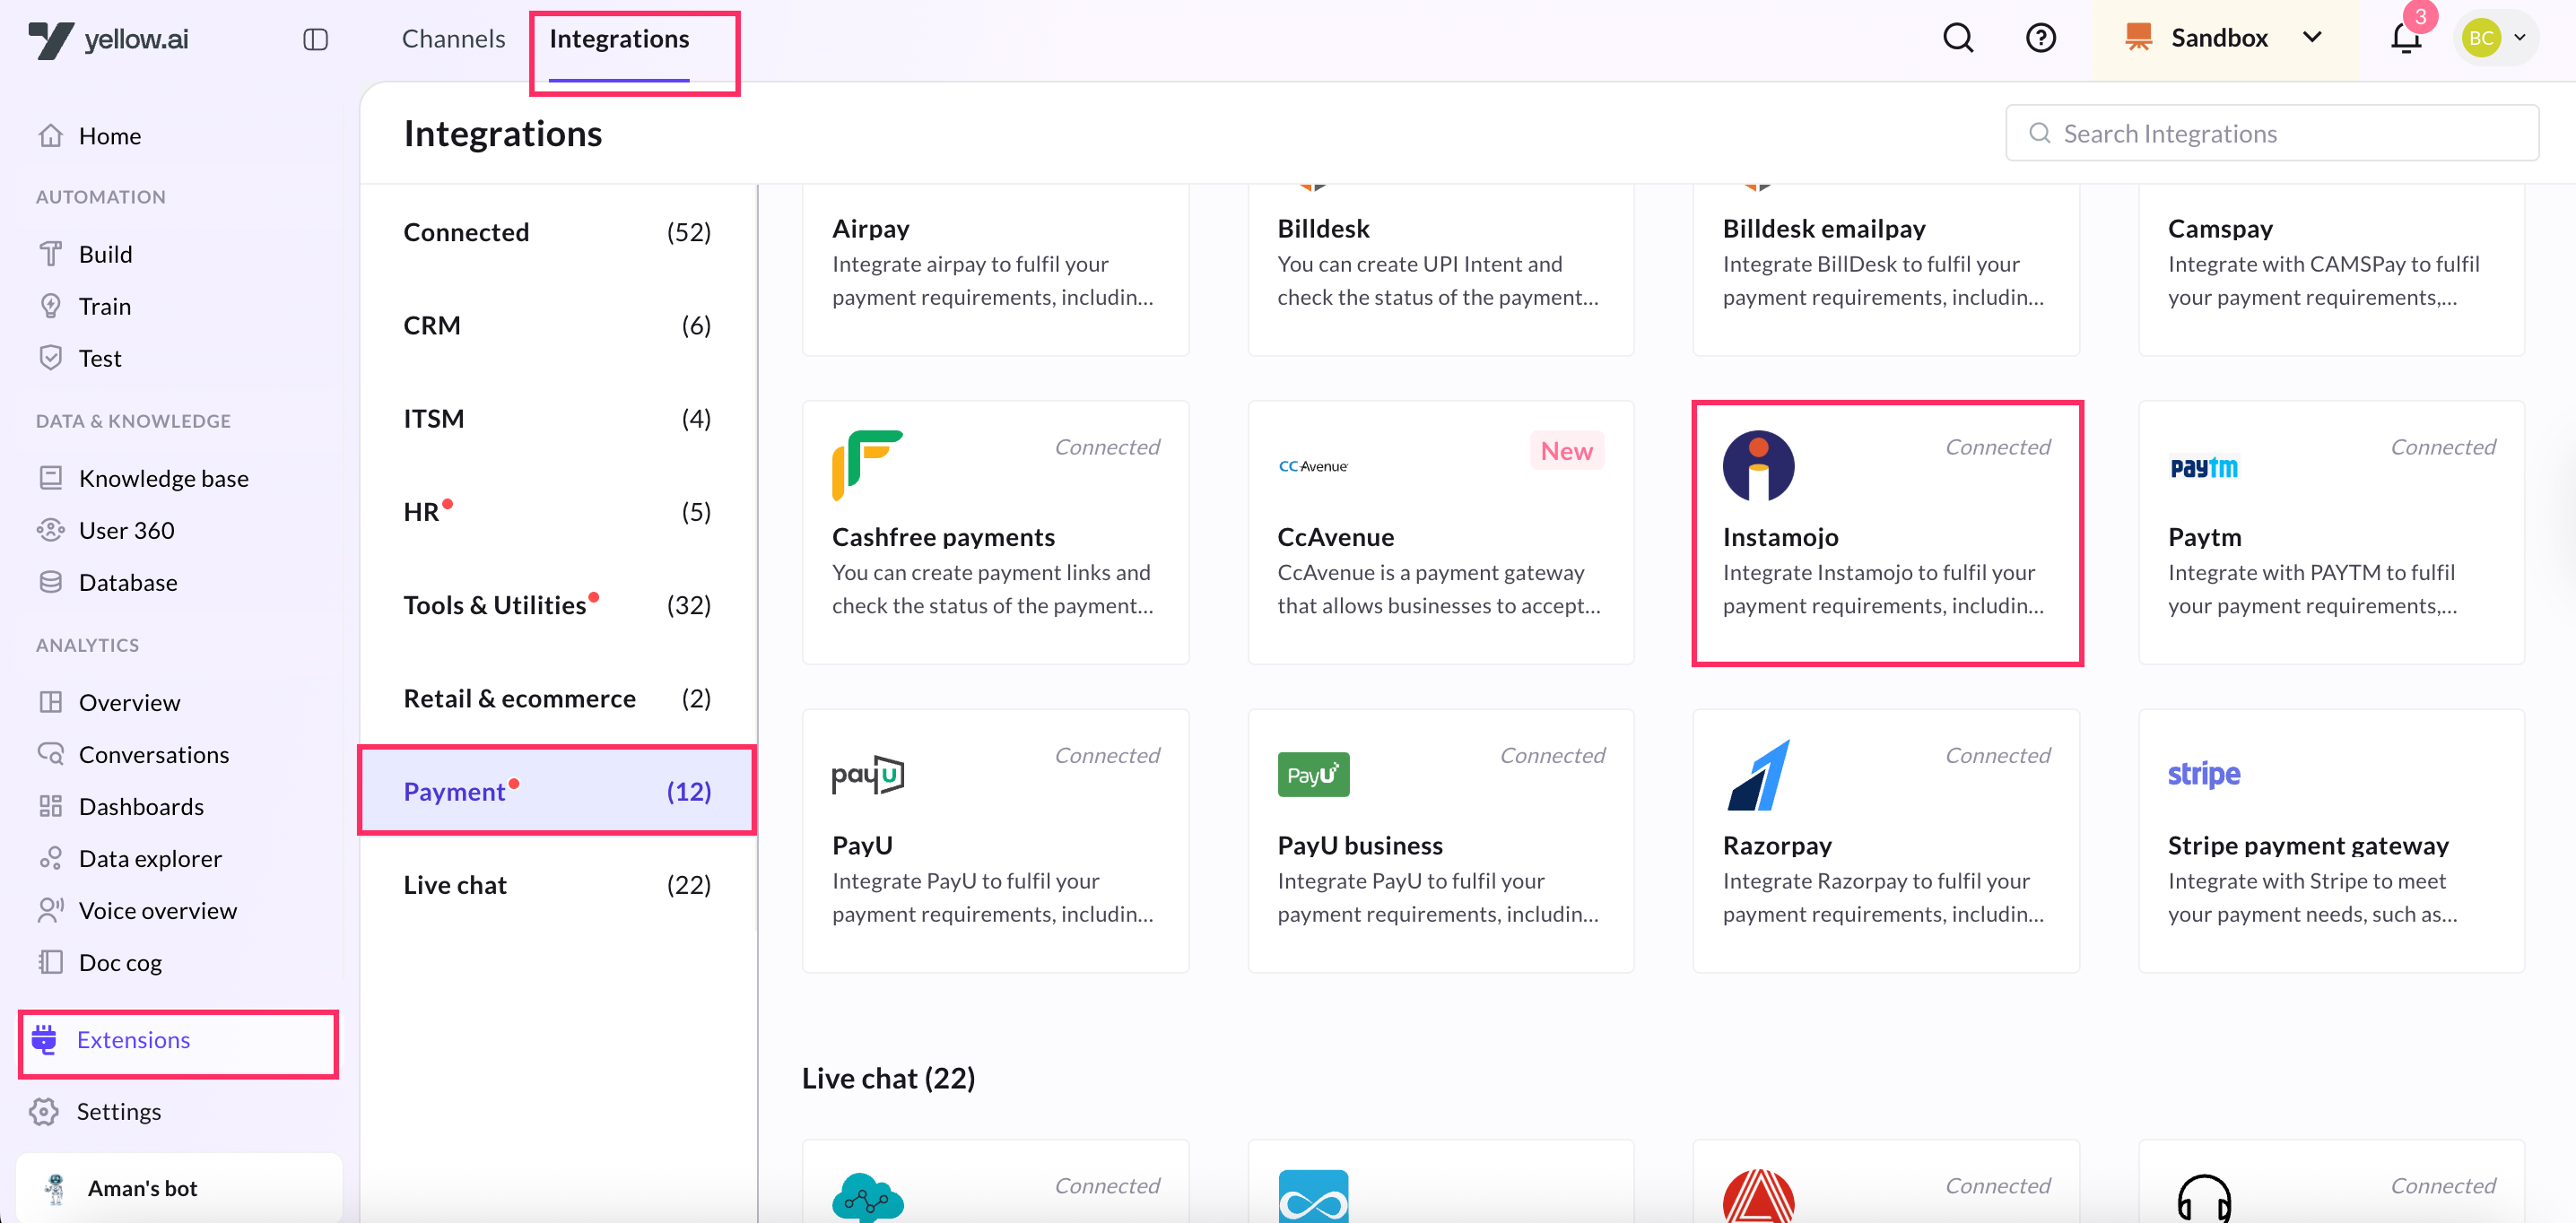
On the Cloud platform, Navigate to the Development/Staging environment and click Extensions > Integrations > Payment > Instamojo.
-
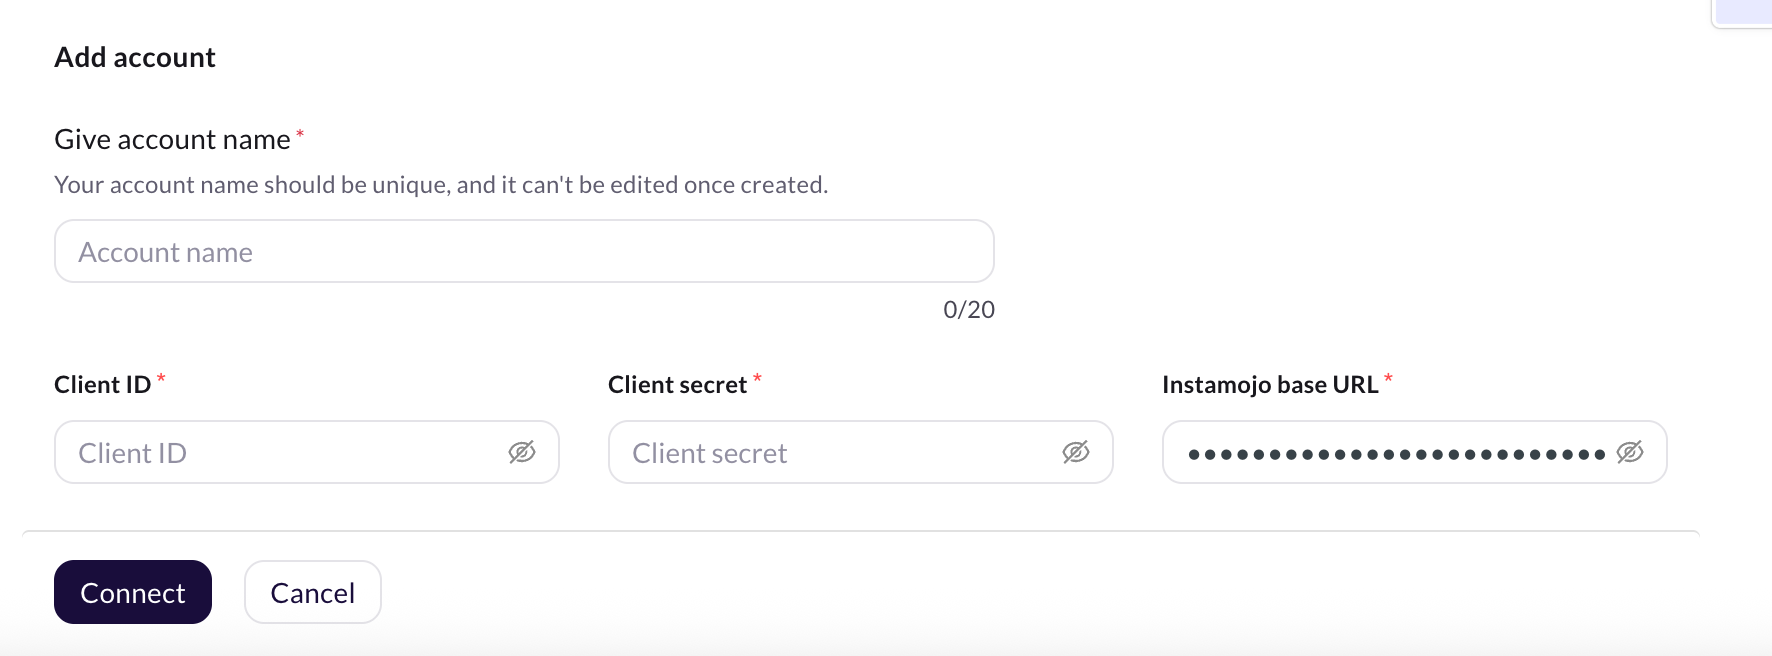
In Give account name, enter a unique name for the integration. You can use only lowercase alphanumeric characters and underscores (_).
-
Enter the Client ID and Client Secret that was captured using the previous section.
-
In Instamojo base URL. for sandbox environment use
https://test.instamojo.comas baseUrl and for production env usehttps://api.instamojo.comas baseUrl. -
To add multiple accounts, click + Add account and follow the above mentioned steps. You can add a maximum of 5 merchant accounts.
Enable Instamojo related events for the AI agent
Instamojo payment status event: Indicates an update in the payment status. . Instamojo primarily recognizes the following payment status values: Pending, Sent, Failed, and Completed.
- To activate an event, refer to this section.
- To trigger a AI agent flow using the activated event, click here.
Perform Instamojo actions from your AI Agent
This integration enables the AI agent to perform the following Instamojo actions:
- Generate payment link
- Create refund
-
Go to Development/Staging environment and navigate to Automation > Build > Select the flow where you want to add the Generate payment link node.
-
Click Add node > Integrations > Instamojo.

Generate Payment link
This action allows you to generate payment link at any point in a conversation.

Here's a detailed and user-friendly table for the "Generate Payment Link" action using Instamojo, following the same format and tone as your previous API field description tables:
Field descriptions for Generate payment link
| Field | Description |
|---|---|
| Amount* | The exact amount to be charged from the customer. This should be a numeric value, typically in INR (e.g., 499.00). |
| Customer email* | The email address of the customer who will receive the payment link. This is used for communication and transaction tracking. |
| Customer mobile number* | The mobile number of the customer. Instamojo can use this to send the payment link via SMS. |
| Customer name* | Full name of the customer. Helps personalize the payment experience and is often required for recordkeeping. |
| Purpose* | A short description of what the payment is for (e.g., "Product Purchase", "Subscription", "Consultation Fee"). This will be shown to the customer. |
| Send email* | A boolean value (true or false). If set to true, Instamojo will send the payment link to the customer via email. |
| Send SMS* | A boolean value (true or false). If true, the payment link will also be sent via SMS to the customer's mobile number. |
| Status callback URL* | The endpoint (URL) where Instamojo should send status updates about the payment (e.g., success, failure). Useful for backend workflows and confirmation logic. Copy Webhook URL from the Instamojo card at the integration page. Example: https://dummyurl.yellowmessenger.com/integrations/genericIntegration/instamojo/x16450274?id=l%2B%2FD1yhpida7KtXeCEVUofPRsNBY%3D |
| Parse API response | When enabled, the system will parse and store key fields from the Instamojo response automatically (like payment ID, link URL, etc.). |
Sample success response
{
"id": "05f317448ad84649aa1a9c7328edb015",
"user": "https://api.instamojo.com/v2/users/90f01dfdacbe4fe7892fc27dbdc30906/",
"phone": "+919999999999",
"buyer_name": "John Doe",
"amount": "2500",
"purpose": "FIFA 16",
"status": "Pending",
"payments": [],
"send_sms": true,
"send_email": true,
"sms_status": "Pending",
"email_status": "Pending",
"shorturl": null,
"longurl": "https://www.instamojo.com/@foo/05f317448ad84649aa1a9c7328edb015",
"redirect_url": "http://www.example.com/redirect/",
"webhook": "http://www.example.com/webhook/",
"created_at": "2016-05-09T16:10:13.786Z",
"modified_at": "2016-05-09T16:10:13.786Z",
"resource_uri": "https://api.instamojo.com/v2/payment_requests/05f317448ad84649aa1a9c7328edb015/",
"allow_repeated_payments": false,
"mark_fulfilled": true
}
Create refund action
Use this action to initiate Instamojo refund directly from the AI Agent.
Parameters required to process the request
Sure! Here's the updated table with the required fields marked with an asterisk (*) only in the first column, and the "Required" column removed for clarity:
Field descriptiond for Create refund action
| Field | Type | Description |
|---|---|---|
| Description* | string | A short explanation of the reason for the refund. This helps provide context to the Instamojo team or for internal tracking. |
| Payment ID* | string | The unique payment identifier generated when the customer made the payment. This ID is required to locate and process the correct transaction. |
| Refund Amount* | number | The amount to be refunded. If the full amount is to be refunded, enter the total transaction amount. Partial refunds are allowed only once. |
| Unique Transaction ID* | string | A unique ID you define for the refund request. Helps in tracking and reconciling the refund operation. Must be unique for each refund call. |
| Issue Type* | string | A standardized refund reason code accepted by Instamojo. Allowed values: • RFD – Duplicate/Delayed payment• TNR – Product/service not available• QFL – Customer not satisfied• QNR – Product lost/damaged• EWN – Digital download issue• TAN – Event was canceled• PTH – Other issues |
| Parse API Response | (System-handled) | Automatically extracts and formats the API response for use in subsequent actions. Typically enabled for smooth workflows. |
Sample success response
{
  "refund": {
    "id": "C5c0751269",
    "payment_id": "MOJO5c04000J30502939",
    "status": "Refunded",
    "type": "QFL",
    "body": "Customer isn't satisfied with the quality",
    "refund_amount": "100",
    "total_amount": "100.00",
    "created_at": "2015-12-07T11:01:37.640Z"
  },
  "success": true
}
Reference
For more information about the action nodes you use here, refer to Create Payment, webhooks.