Intercom Live Chat
Configuration
Inside your project, navigate to the Integrations tab and on the left side bar select Live Chat. You will find Intercom Live chat
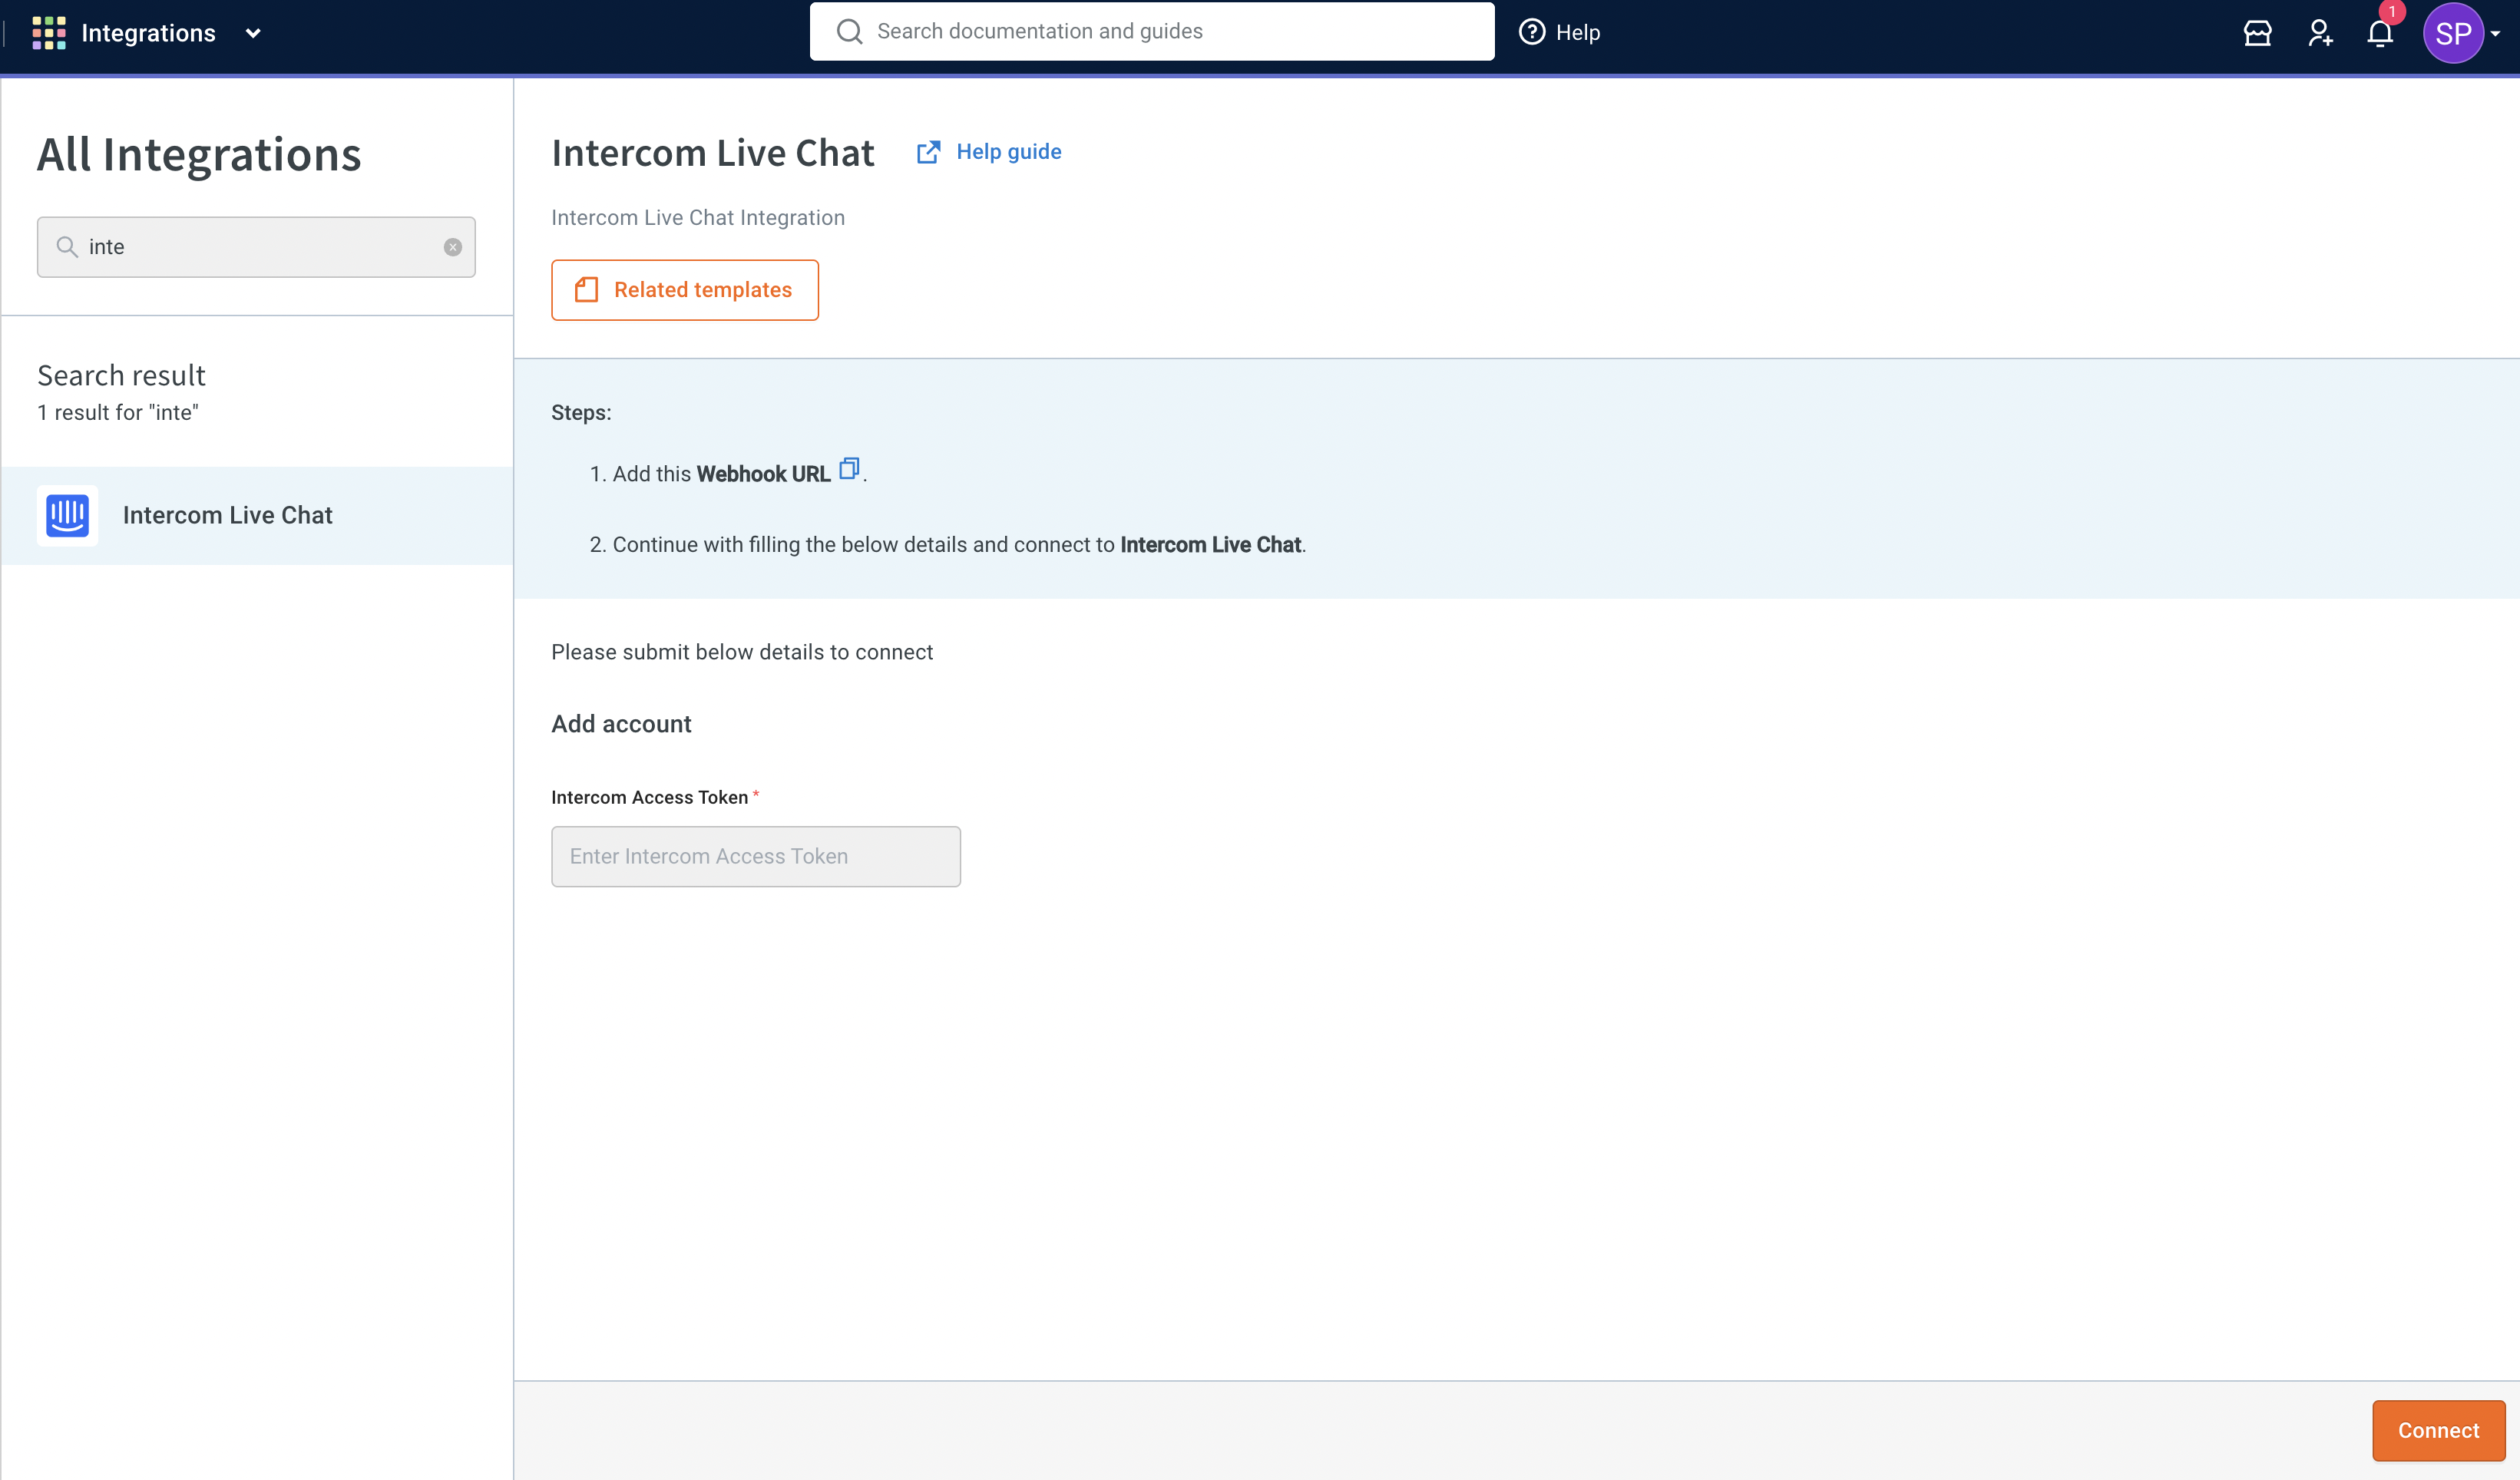
Copy webhook details from the Integrations page and enter it in Settings -> Webhooks. Add conversations.admin.replied and conversations.admin.closed topics.
You’ll need to provide an Intercom access token, which you can find inside your intercom developer app → Configure → Authentication → Access Token. Then click on connect.
If you have multiple accounts, follow the above mentioned steps to add each of them.
- Enter a unique name for each account to easily identify them within the yellow.ai platform. It is recommended to use a name that aligns with its purpose for better usability.
- You can add a maximum of 15 accounts.
- In a two-tier environment, such as bots with only Development/Live environments, you can add account names only in the development mode. Once added and flows have been built, in the Live mode, you can only choose the account names and not edit them.
- In a three-tier environment, such as bots with Staging/Sandbox/Production modes, in Staging and Sandbox modes, you can add and edit new accounts. However, in Production, only the account details added in Staging will be available. You can only map in the production environment.
Use Case
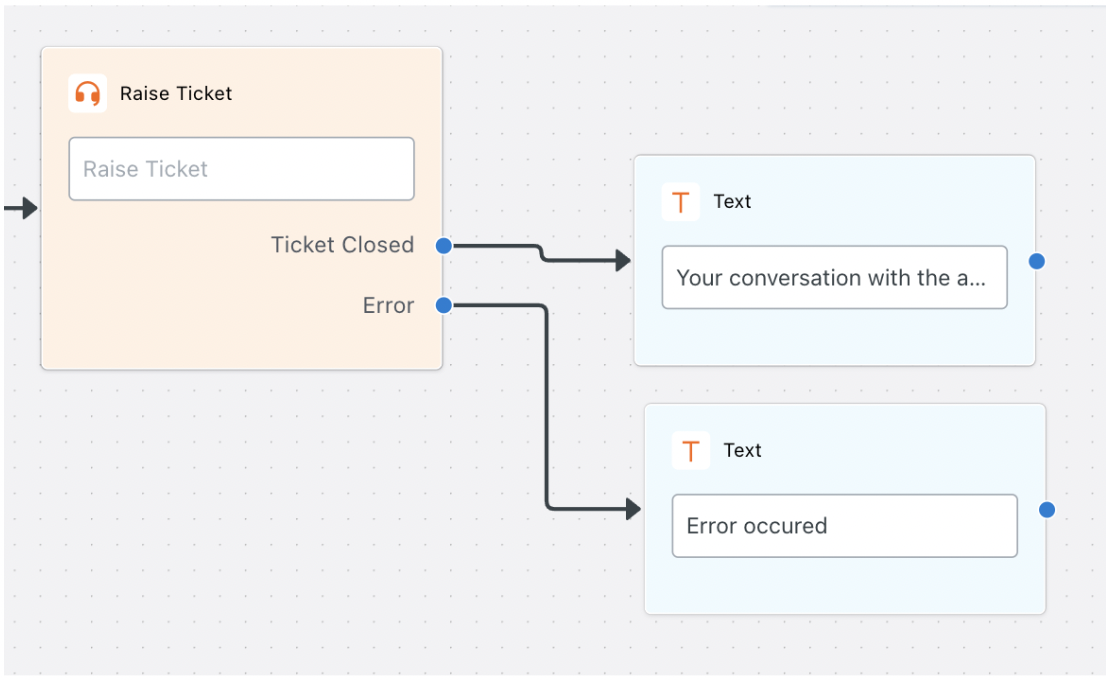
In this integration you can use raise ticket node to create a conversation with intercom agent and once conversation initiates the user can talk to the intercom agent, once the conversation between them ends bot takes over the conversation with user.
When multiple accounts are added, select the appropriate account for each node, allowing you to leverage the unique functionalities of each account for their intended purposes.
Events
Following are the events which are currently accommodated in the Integration:
Use Ticket-closed in the Raise Ticket node to perform specific actions when a live chat closes, instead of using the ticket-close event.
| Event | Description |
|---|---|
| intercom_message_reply | This event reaches to bot when intercom agent sends a reply to the user. |
| intercom_agent_assigned | This event reaches to bot when any of the intercom agent accepts your ticket. |
| ticket-closed | This event reaches to bot when intercom agent closes the user ticket. |
If you have added multiple accounts in your platform, enable events for each of those accounts.
Support
- The text and attachments (image, file, video) are being supported from both user and agent side.
- Custom fields:
- Go to Contacts -> All Users -> Most Recent Contact.
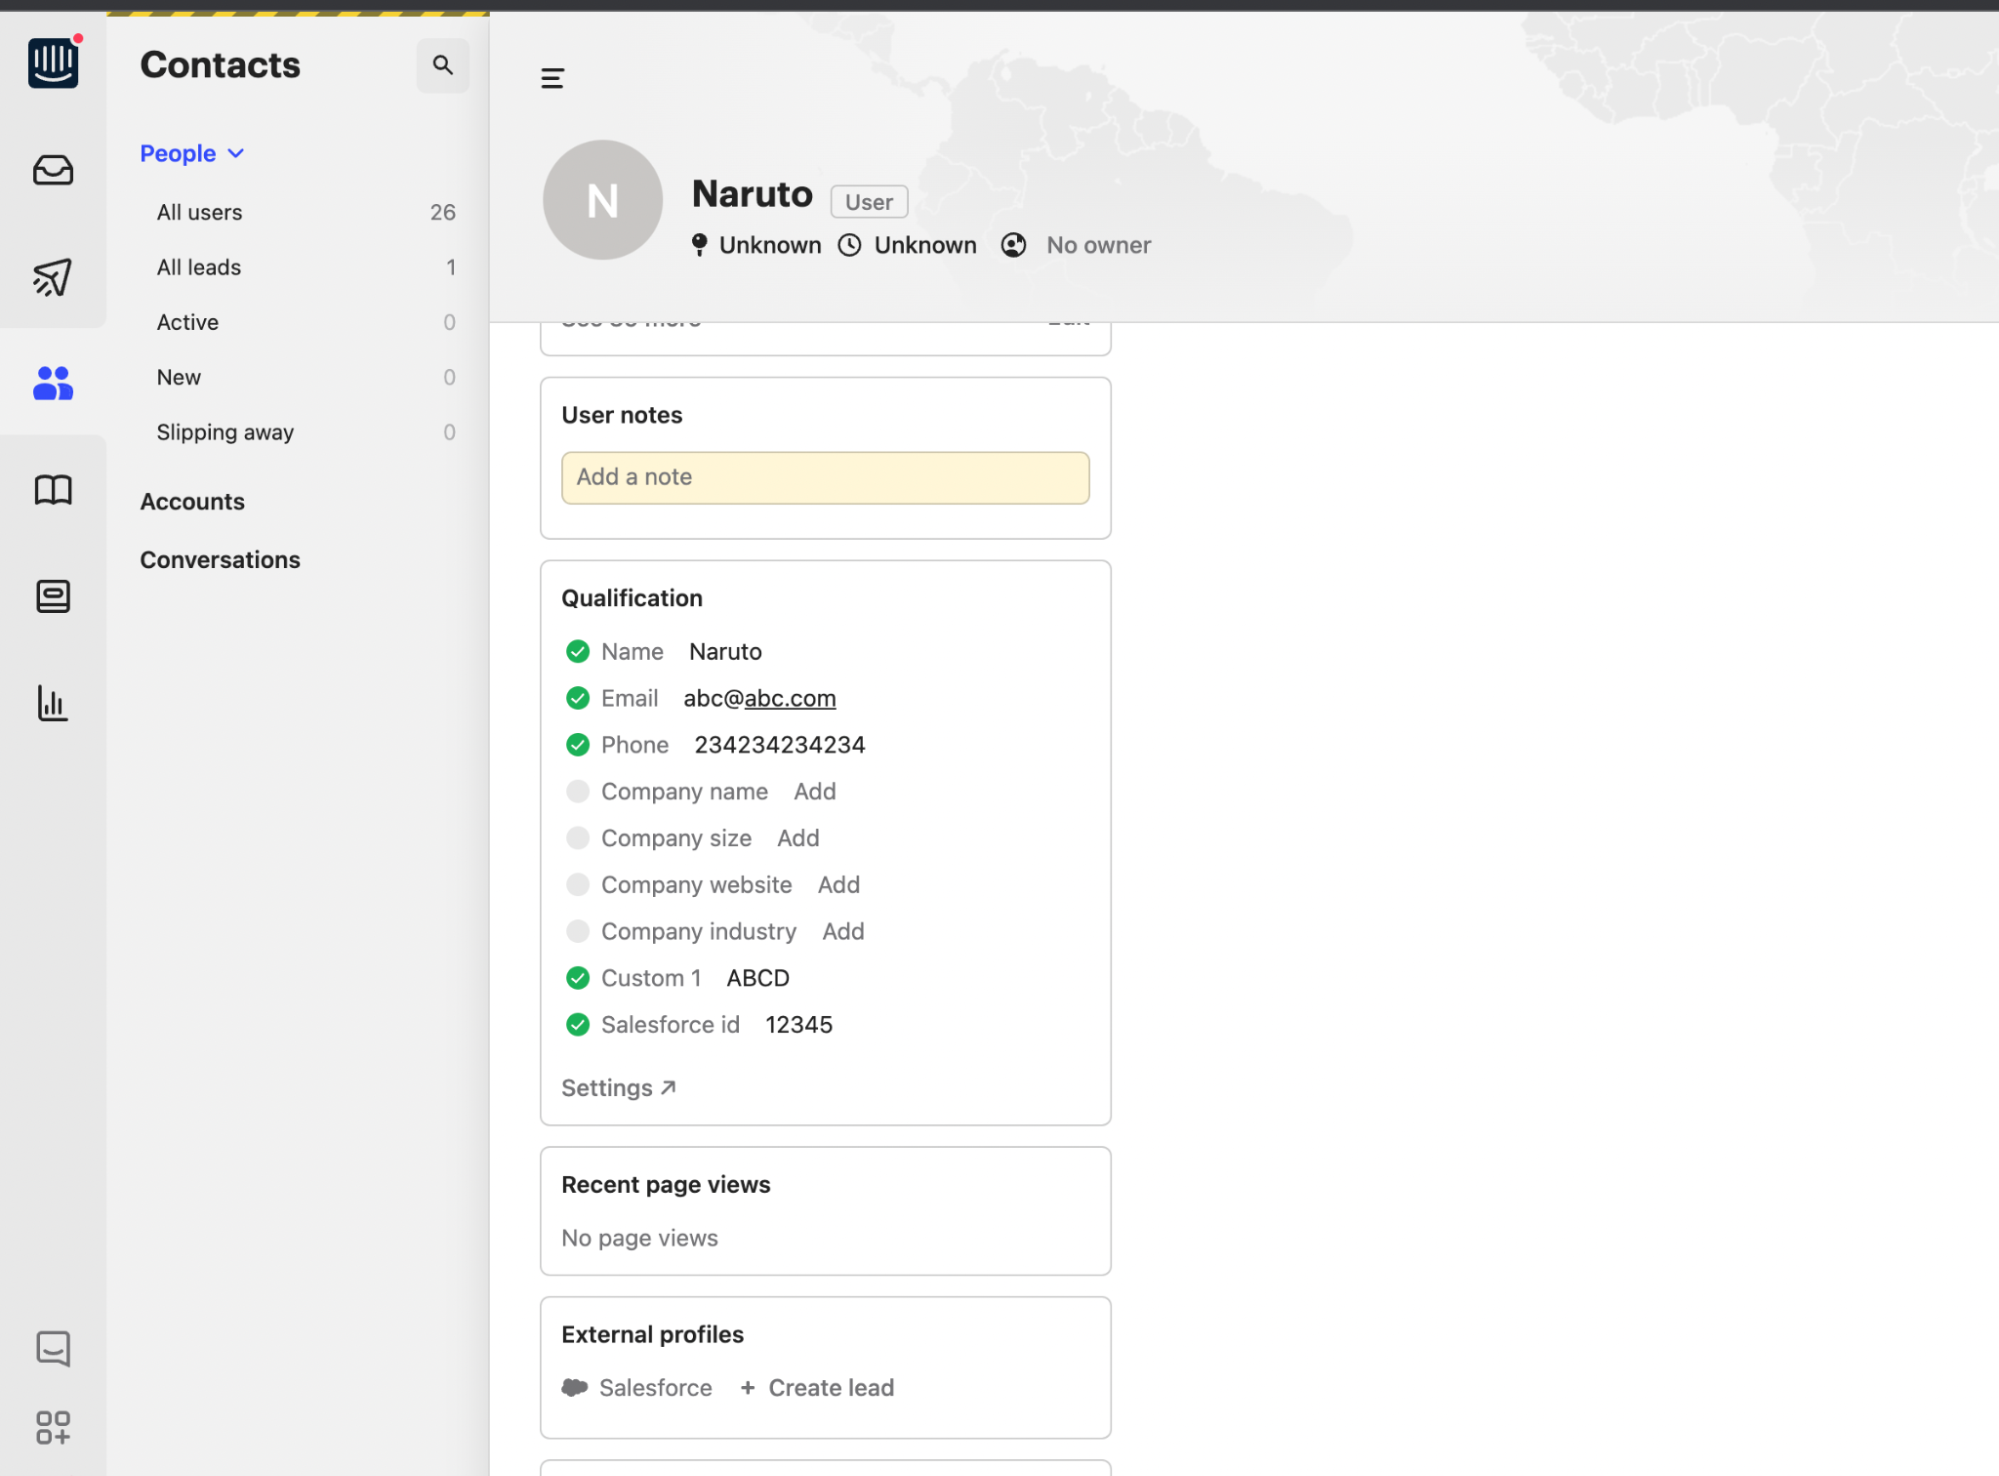
- Under the Qualification section you can see the Settings icon. Click on it, you'll be redirected to the Qualifications Settings page.
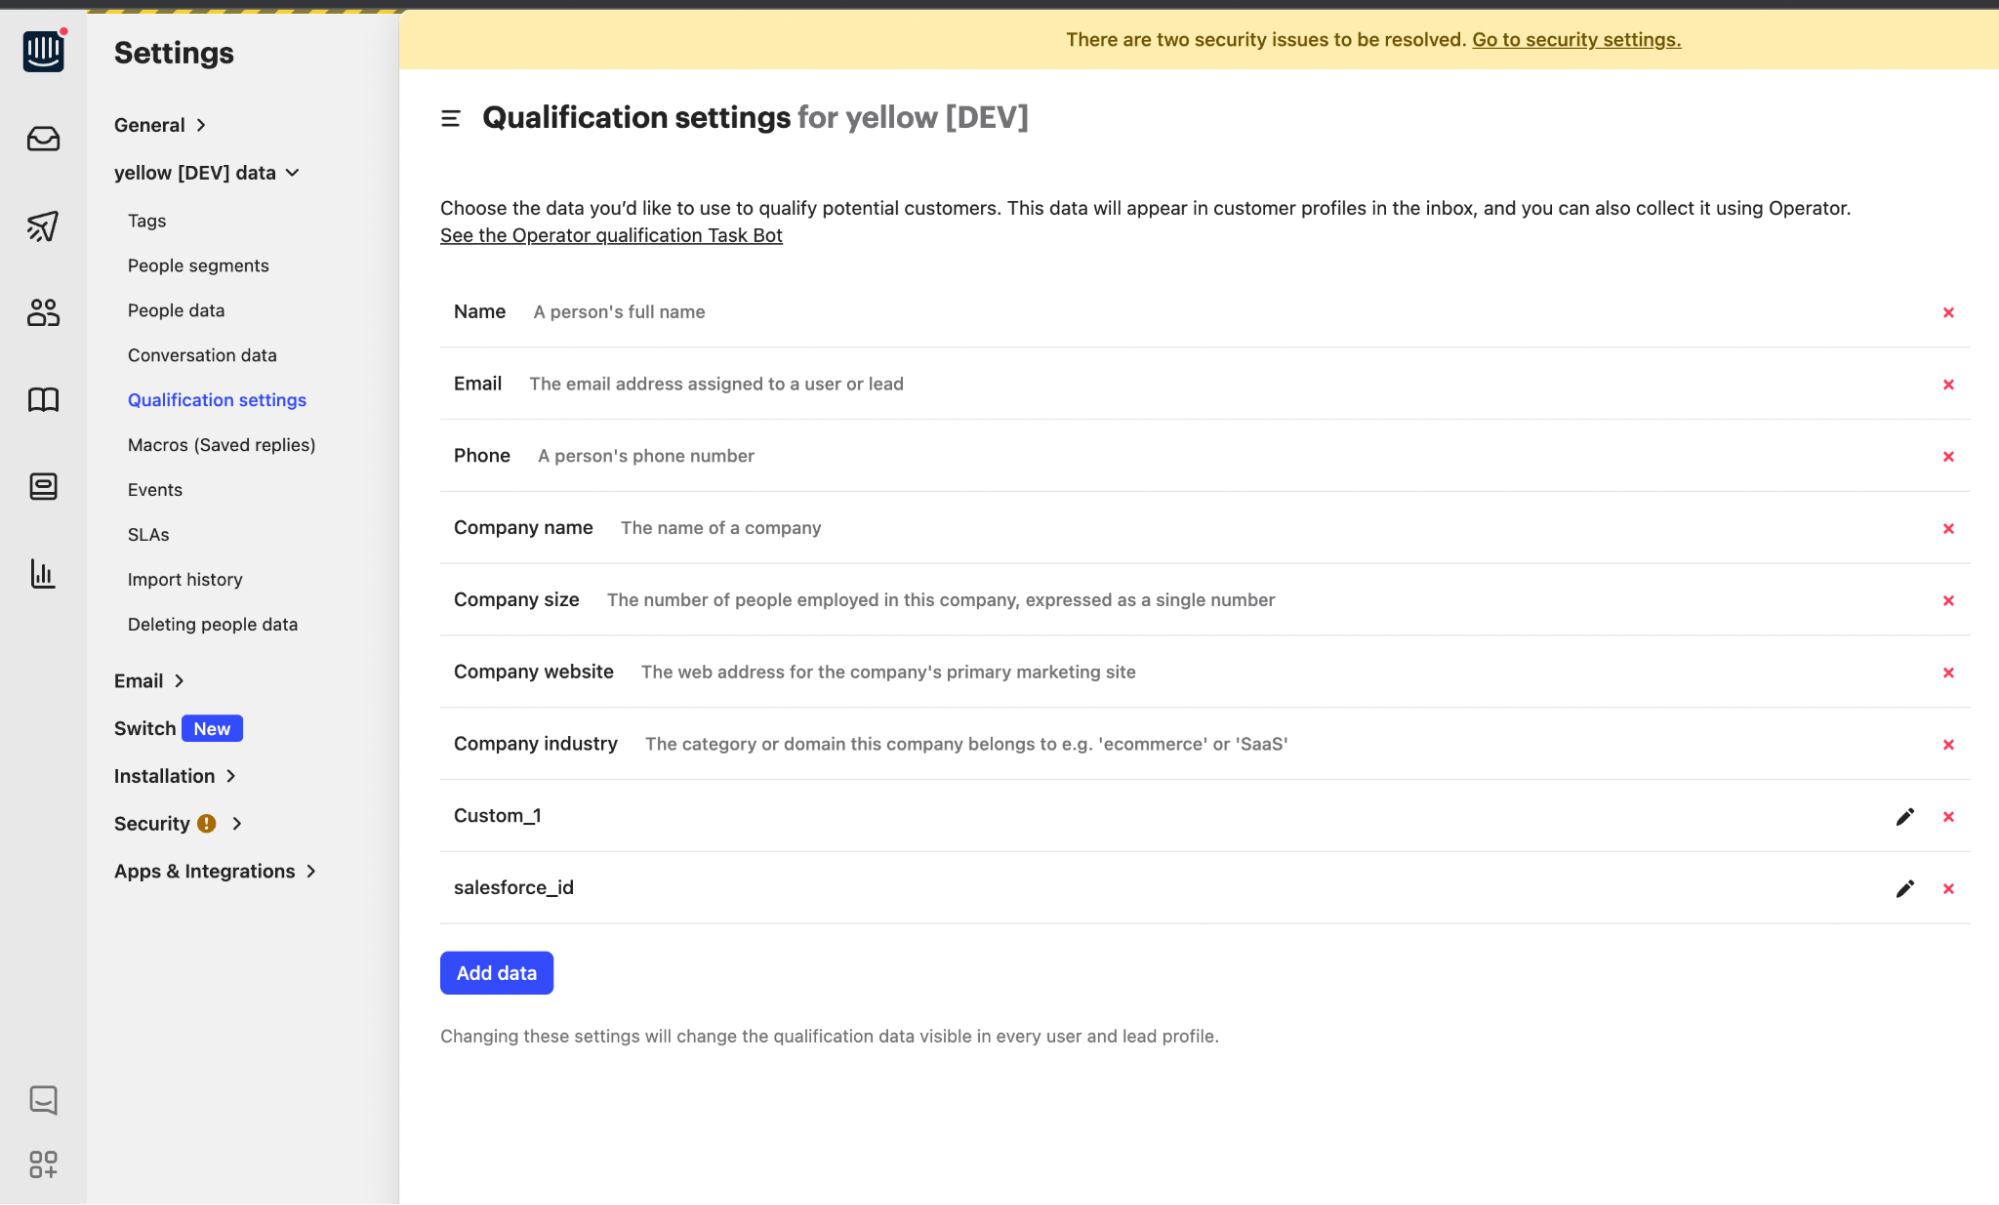
- By clicking on the Add Data button, you can see the option to Add New Data which is used to add custom fields.
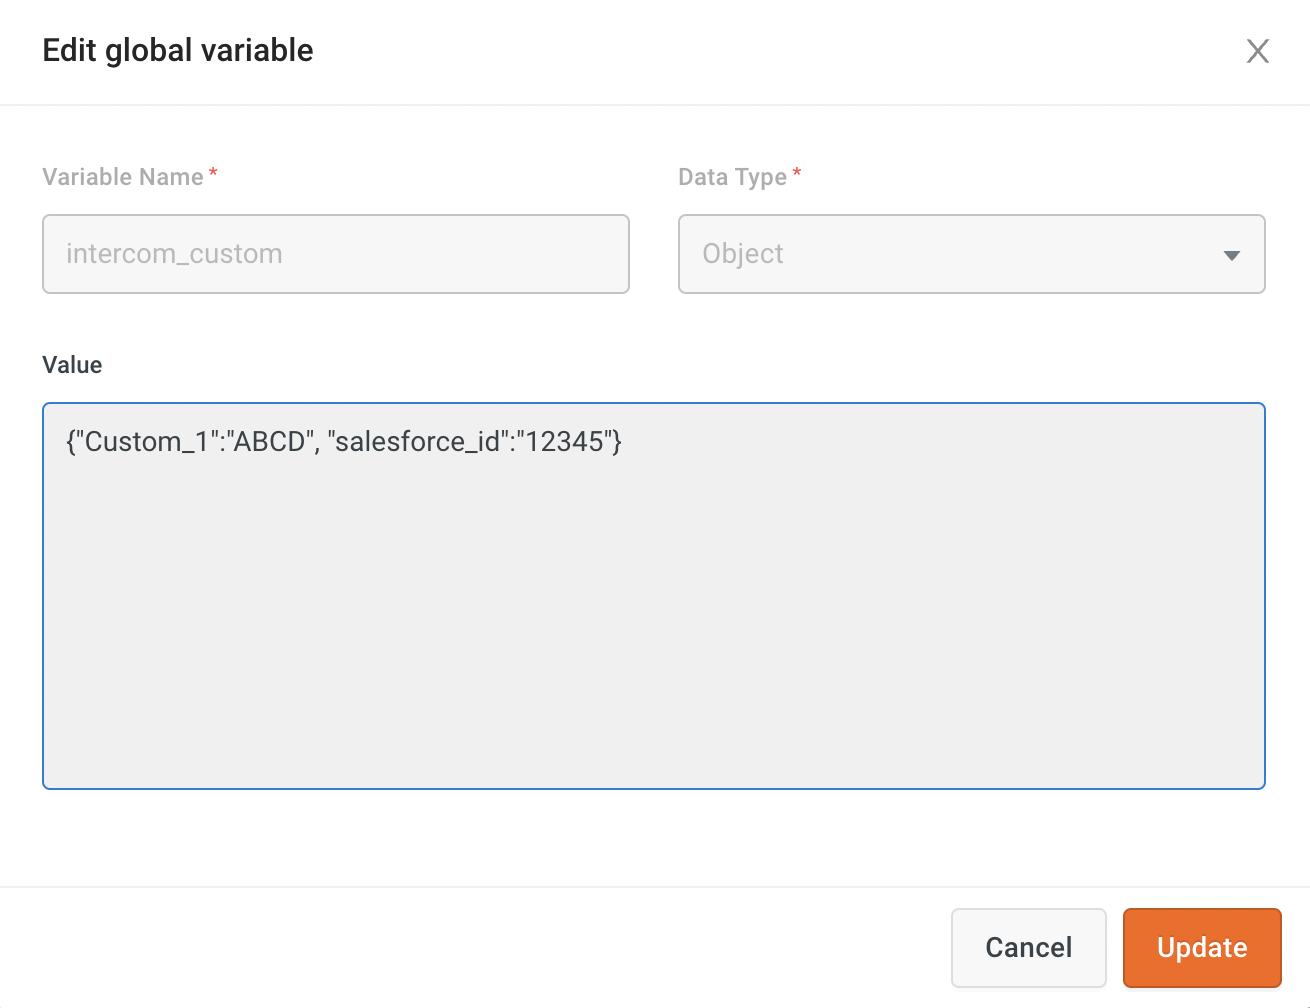
- In the bot, you can see a field for “Intercom Live Agent Custom Fields” (if intercom integration is connected). Assign a variable of type object to this field.
- That object variable needs to have custom fields as keys.
- Go to Contacts -> All Users -> Most Recent Contact.
Reference
https://developers.intercom.com/intercom-api-reference/reference#conversation-model