Topic Analysis for 3rd-party ticketing tools
In this article, we refer to any non-Yellow.ai inboxes as 3rd-party apps.
Understand automation rate for 3rd-party inboxes
Automation rate refers to the number of conversations handled solely by the AI agent without any human agent intervention. When a conversation is transferred to a human agent, the automation rate decreases, indicating that the AI agent was unable to fully resolve the user’s query.
There are two types of chat transfers:
-
Active handover
- Yellow.ai Inbox: The conversation is transferred to a human agent through the agent-transfer event.
- 3rd-Party Inbox: The AI agent is paused, and the chat is handed over to a human agent using an event configured at the AI-agent level. However, these transfers are not tracked by default.
-
Passive handover: In passive handovers, the AI agent collects relevant information and routes the query through alternative methods instead of a live chat:
- Schedule callback: The AI agent collects user details and schedules a callback.
- Email: The AI agent creates a support ticket via email.
- Ticket in 3rd-party system / Trigger event: The AI agent raises a support ticket in an external system or triggers a custom event.
Transfers within the Yellow.ai Inbox are tracked using the agent-transfer event. However, when using a 3rd-party inbox, these handovers rely on AI-agent-level configuration and are not trackable out of the box.
Using the chat handoff node
When working with 3rd-party inboxes, it is important to track sessions where the AI agent was unable to resolve the query and the issue was escalated—similar to how it's done within the Yellow.ai Inbox. This is achieved by logging the agent-transfer event.
With Bot Developer access, you can configure the Chat Handoff node just before the ticket creation node (e.g., for Zendesk, ServiceNow, Intercom, etc.). When this node is triggered, it logs the agent-transfer event in the User Engagement Events table.

This setup enables visibility into sessions that involved agent intervention—even if managed outside Yellow.ai Inbox—helping teams measure automation rates and identify opportunities for improving the AI agent’s effectiveness.
Example: Tracking Agent Sessions via Zendesk
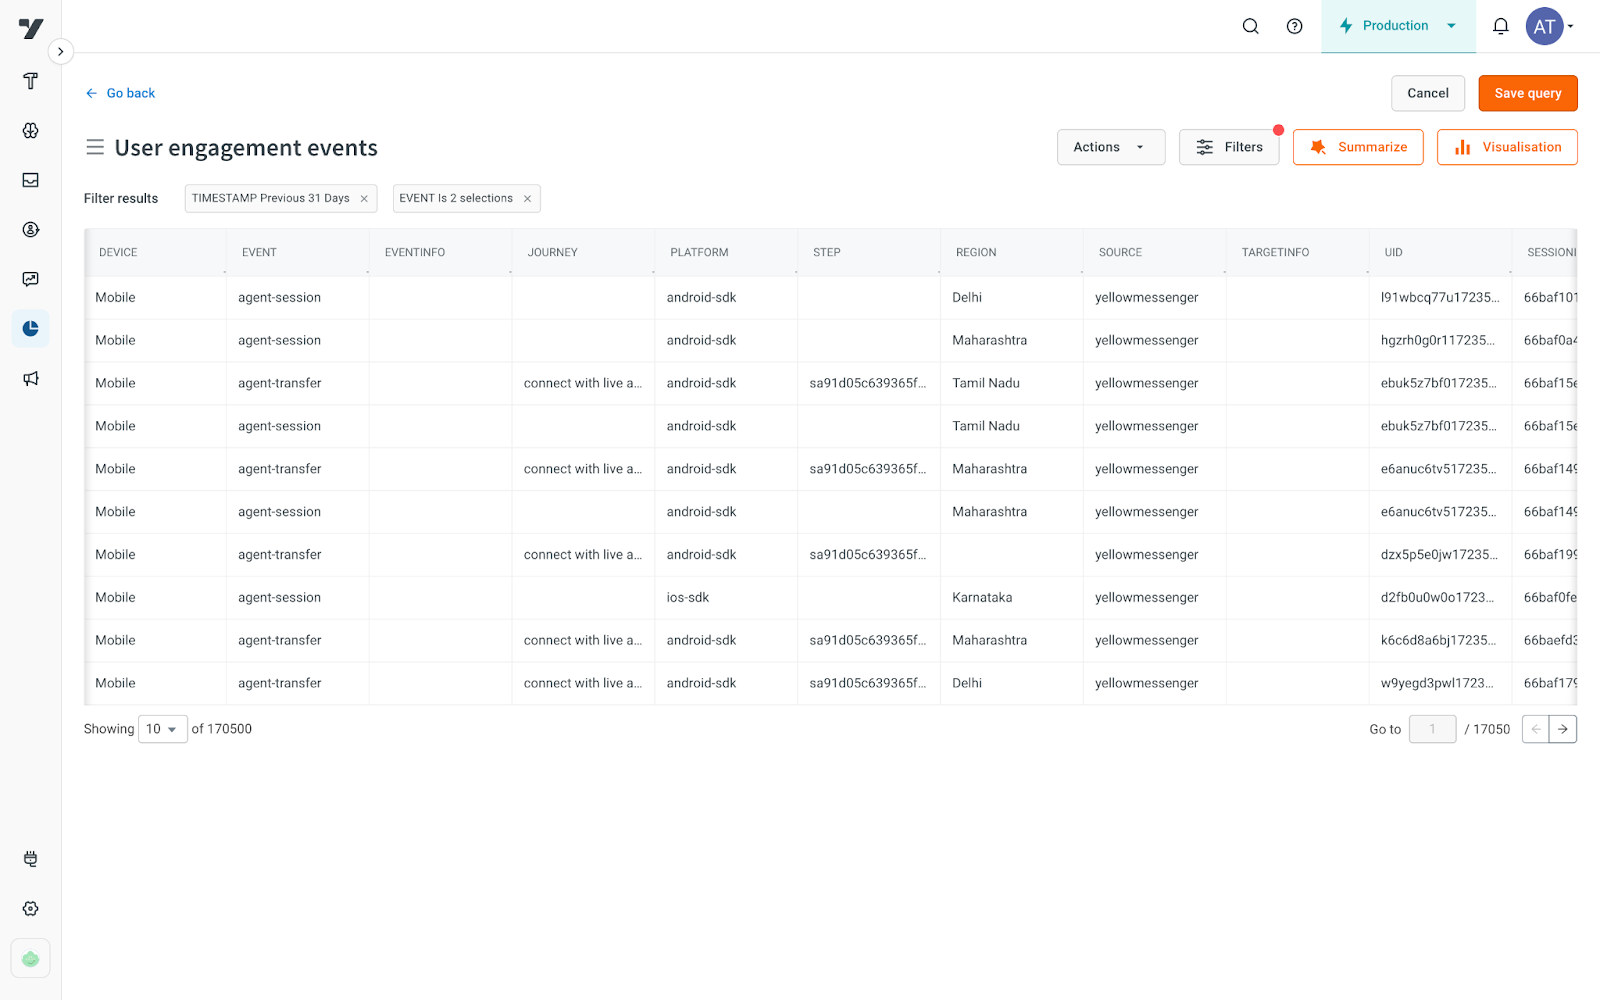
When a ticket is raised in Zendesk, the Chat Handoff node is triggered just before the handoff. Once the passive or offline ticket is created, agents typically respond via email, call, or other channels. This handoff is recorded as an agent-transfer event in the User engagement events table, making it measurable.

The Chat Handoff node acts as a consistent marker for agent involvement across 3rd-party systems, ensuring automation metrics remain accurate.
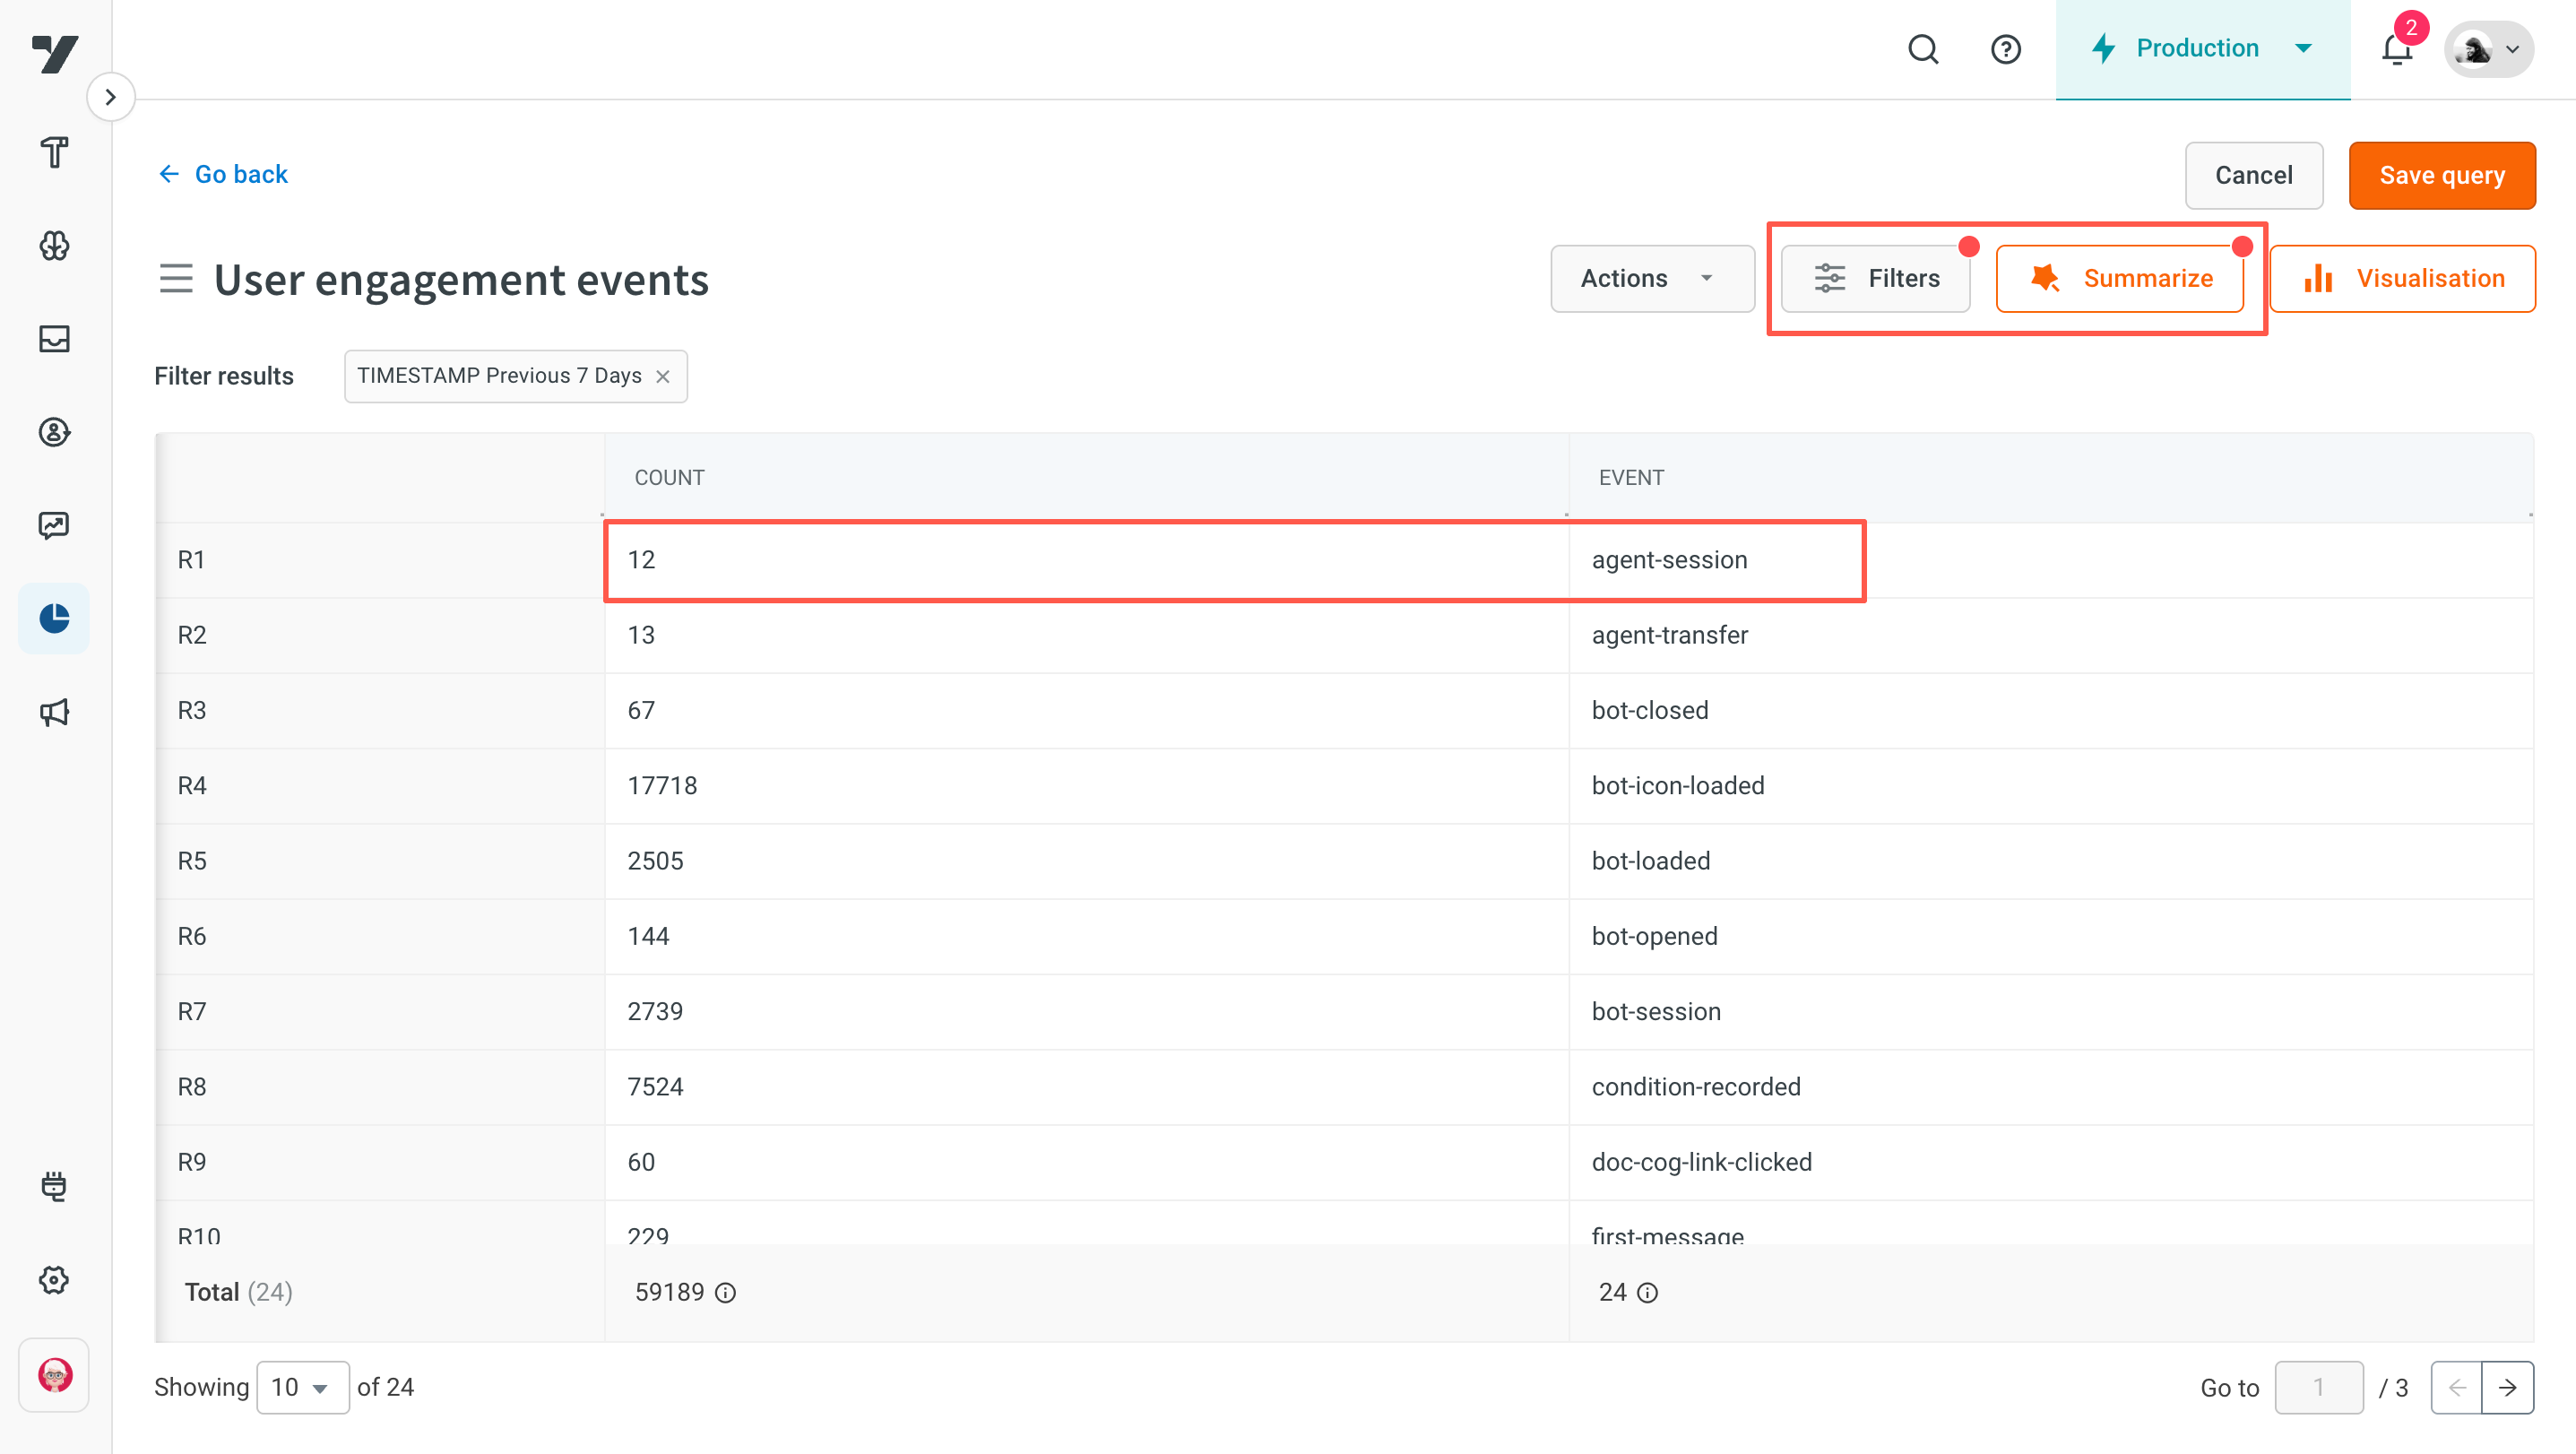
User engagement events table:
Analyze transcripts from 3rd-Party Inboxes
When a ticket is created in a 3rd-party inbox, the resulting interactions can span multiple channels such as calls, emails, web chats, and SMS. However, by default, Yellow.ai does not have access to transcripts from 3rd-party ticketing tools. This limitation restricts visibility to only the interactions between users and AI agents, excluding conversations handled by human agents via external systems.
To bridge this gap, Yellow.ai enables the import, analysis, and display of transcripts and insights from 3rd-party ticketing tools directly within the Analyze module.
Flow comparision:
| Yellow.ai workflow | 3rd-Party workflow |
|---|---|
| - The AI agent handles user queries. - A live agent takes over, pausing the AI agent. - Once the live agent exits, the AI agent resumes. | - The AI agent responds to the user. - The system creates an offline ticket while the AI agent remains active. - The chat continues without a defined session end time. |
3rd-Party workflow:
After the handover to the 3rd-party system, Yellow.ai receives the ticket details. Once the ticket is closed (regardless of when), Yellow.ai analyzes the transcript and displays both the conversation and insights in the Analyze module.
Setup requirement
Yellow.ai's backend does not automatically initiate ticket closure or transcript fetching when it receives offline ticket messages. To enable this process, you must:
- Create an automation rule in your 3rd-party ticketing system (e.g., Freshdesk, Zendesk).
- Configure a webhook that sends ticket updates to Yellow.ai.
You can set up this webhook using Yellow.ai’s Integration module.
Webhook URL for the connected account can be fetched from Yellow.ai > Integration > Your 3rd-party Inbox > Weebhook URL beside the account name.

Configure Freshdesk webhook
Set up Freshdesk webhook
Follow these steps to enable automations and set up a webhook:
- Log in to your Freshdesk account: Use your credentials to log in to your Freshdesk account.
- Go to admin settings: Click on Admin in the left-hand sidebar to open the configuration options.
- Open the automation section: In the Workflows section of the admin settings, click on Automations to access workflow and trigger management options.
- Select Ticket Updates: Under the automations tab, choose Ticket Updates to create rules for ticket-related updates.
- Define webhook trigger conditions: Specify the conditions for the webhook trigger. Add the required criteria to ensure the webhook activates under the appropriate circumstances.

- Action settings: Add the action settings as below.

Enable Freshdesk events on Yellow.ai
- Go to automation: Open Yellow’s platform and navigate to Automation from the sidebar.
- Access events: In the automation settings, go to Events and select Integrations.
- Activate the Freshdesk event: Locate the freshdesk-ticket-updated event and activate it for the connected Freshdesk account.

Once configured, you can see the analysis generated on the Analyze module for the chats happening on the 3rd-party apps.


Learn more about Freshdesk integration here.
Configure Zendesk webhook
To receive notifications for ticket updates within Zendesk's offline ticketing system, you can set up webhook and trigger.
Create a Webhook
To configure a webhook for receiving ticket update notifications, follow these steps:
- Log in to your Zendesk account.
- Go to Admin Center by clicking the Admin icon in the sidebar.
- Navigate to Apps > Integrations > Webhooks.
- Click on Create Webhook.
- In Name field, enter the name of your webhook.
- In Endpoint URL, provide the URL where you want to receive the notifications.
- In Request method, select POST.
- In Request format, choose JSON.
- Click Create to save the webhook.

Create a trigger
To notify the webhook when a ticket is updated, set up a trigger:
- Go to Admin center by clicking the Admin icon in the sidebar.
- Navigate to Objects and rules > Triggers.
- Click on Add trigger.
- In trigger details, enter a Name of the trigger.
- In Conditions, define when the trigger should activate (example, when a ticket is updated).
- In Actions, set the action to notify the webhook you created.

Learn more about Zendesk integration here.