Create custom dashboards for Monitor
Custom dashboards are named filter presets for the Monitor section that let inbox admins and supervisors save a specific combination of agents, groups, tags, channels, priority, and custom fields — and instantly return to that pre-filtered view without re-applying filters every session.
- Custom dashboards help teams focus on the data that matters to them without manual re-filtering.
- Saved filters are applied simultaneously across both Chat Trends and Email Trends sub-tabs in Inbox Overview.
- Dashboards are shareable via URL — anyone with the link lands directly on the pre-filtered view.
- Admins can create dashboards visible only to themselves or shared across the team.
For example, you want to monitor all chats and tickets handled by the Payments group that are tagged as Escalation. Create a custom dashboard named Payment Escalations — you and your team can jump directly to that filtered view from the sidebar at any time.
Admins will have visibility into all conversations that meet the filter criteria.
Supervisors will only see data that pertains to their group and its agents.
Use cases for custom dashboards
- Group-specific monitoring: Create a dashboard scoped to a single support group to quickly review their volume and response times.
- Tag-based triage: Build a dashboard filtered by tags like Escalation or VIP to keep high-priority conversations in view.
- Channel analysis: Isolate metrics for a specific channel (e.g. WhatsApp or email) to compare performance across touchpoints.
- Priority tracking: Create a dashboard for Urgent or High priority conversations so nothing critical slips through.
- Agent performance: Scope a dashboard to a set of agents to evaluate workload distribution and handling times side-by-side.
What you can filter
A Custom Dashboard can save any combination of:
| Filter | Description |
|---|---|
| Agents | Scope metrics to one or more specific agents. |
| Groups | Limit data to selected support groups. |
| Tags | Show only conversations tagged with selected labels. |
| Channel | Filter by source channel (e.g. WhatsApp, email, web). |
| Priority | Focus on conversations of a given priority level (Low / Medium / High / Urgent). |
| Custom fields | Filter by workspace-configured custom conversation fields. |
Steps to create a new custom dashboard
Only Inbox Admins have the authority to create new custom dashboards.
Method 1: + New custom dashboard
-
Navigate to Inbox > Monitor.
-
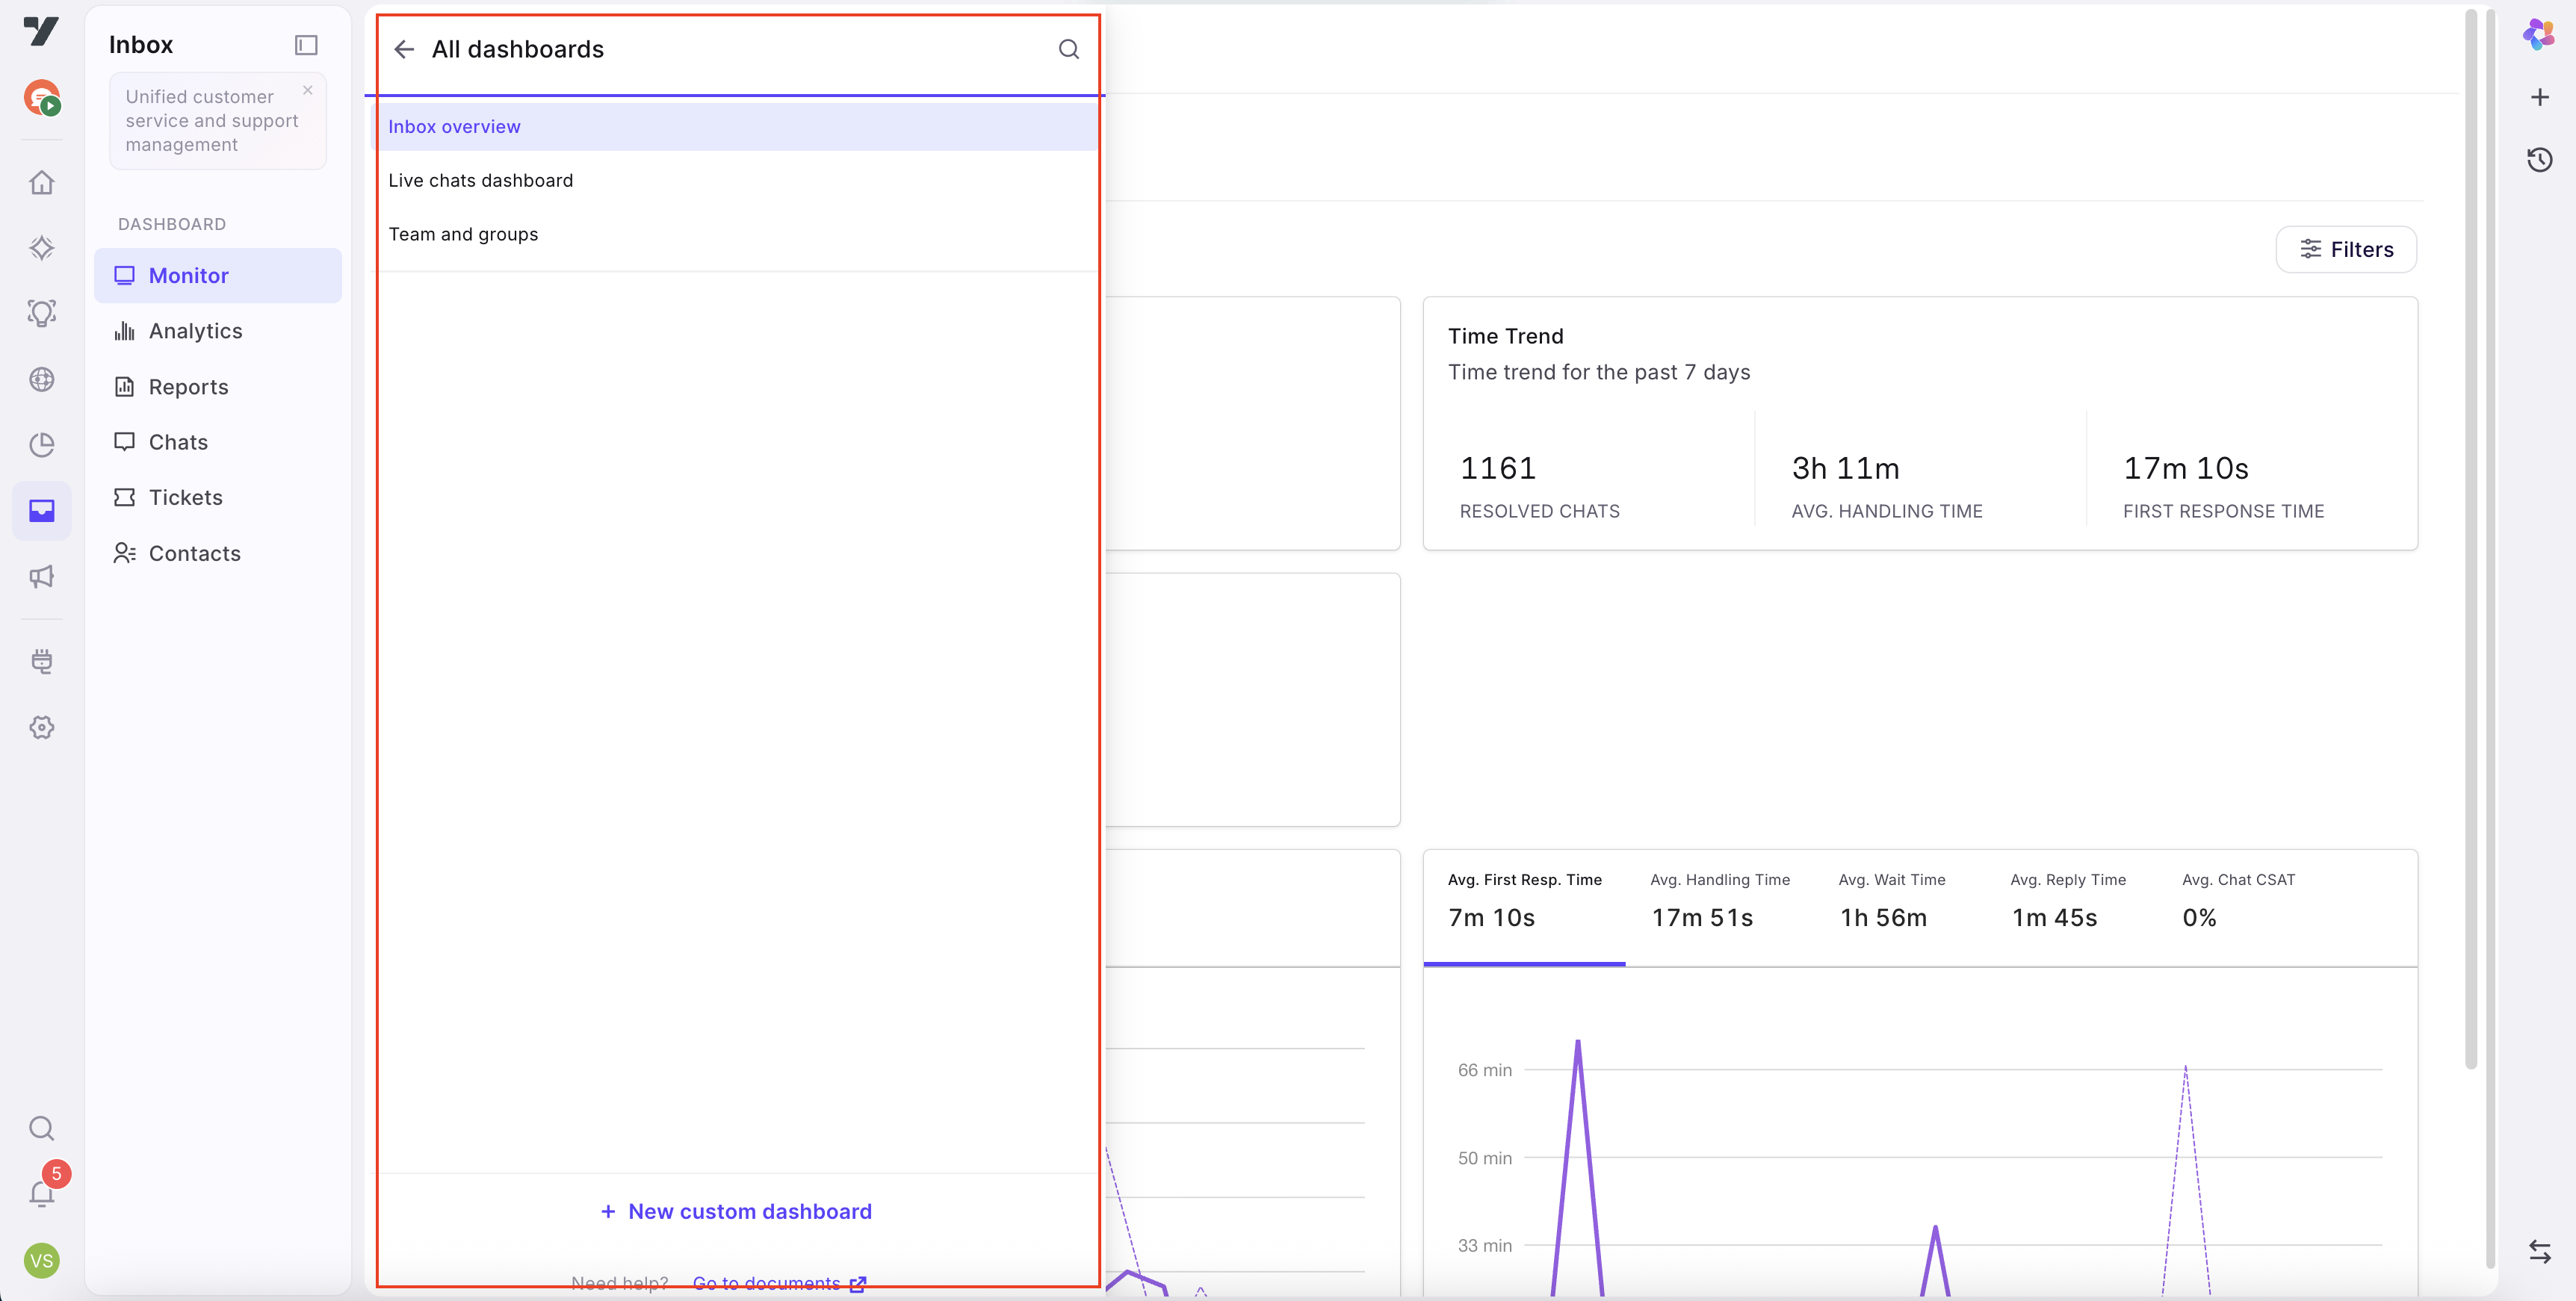
Click the ≡ icon next to the page title to open the dashboard drawer.
-
Click + New custom dashboard.
-
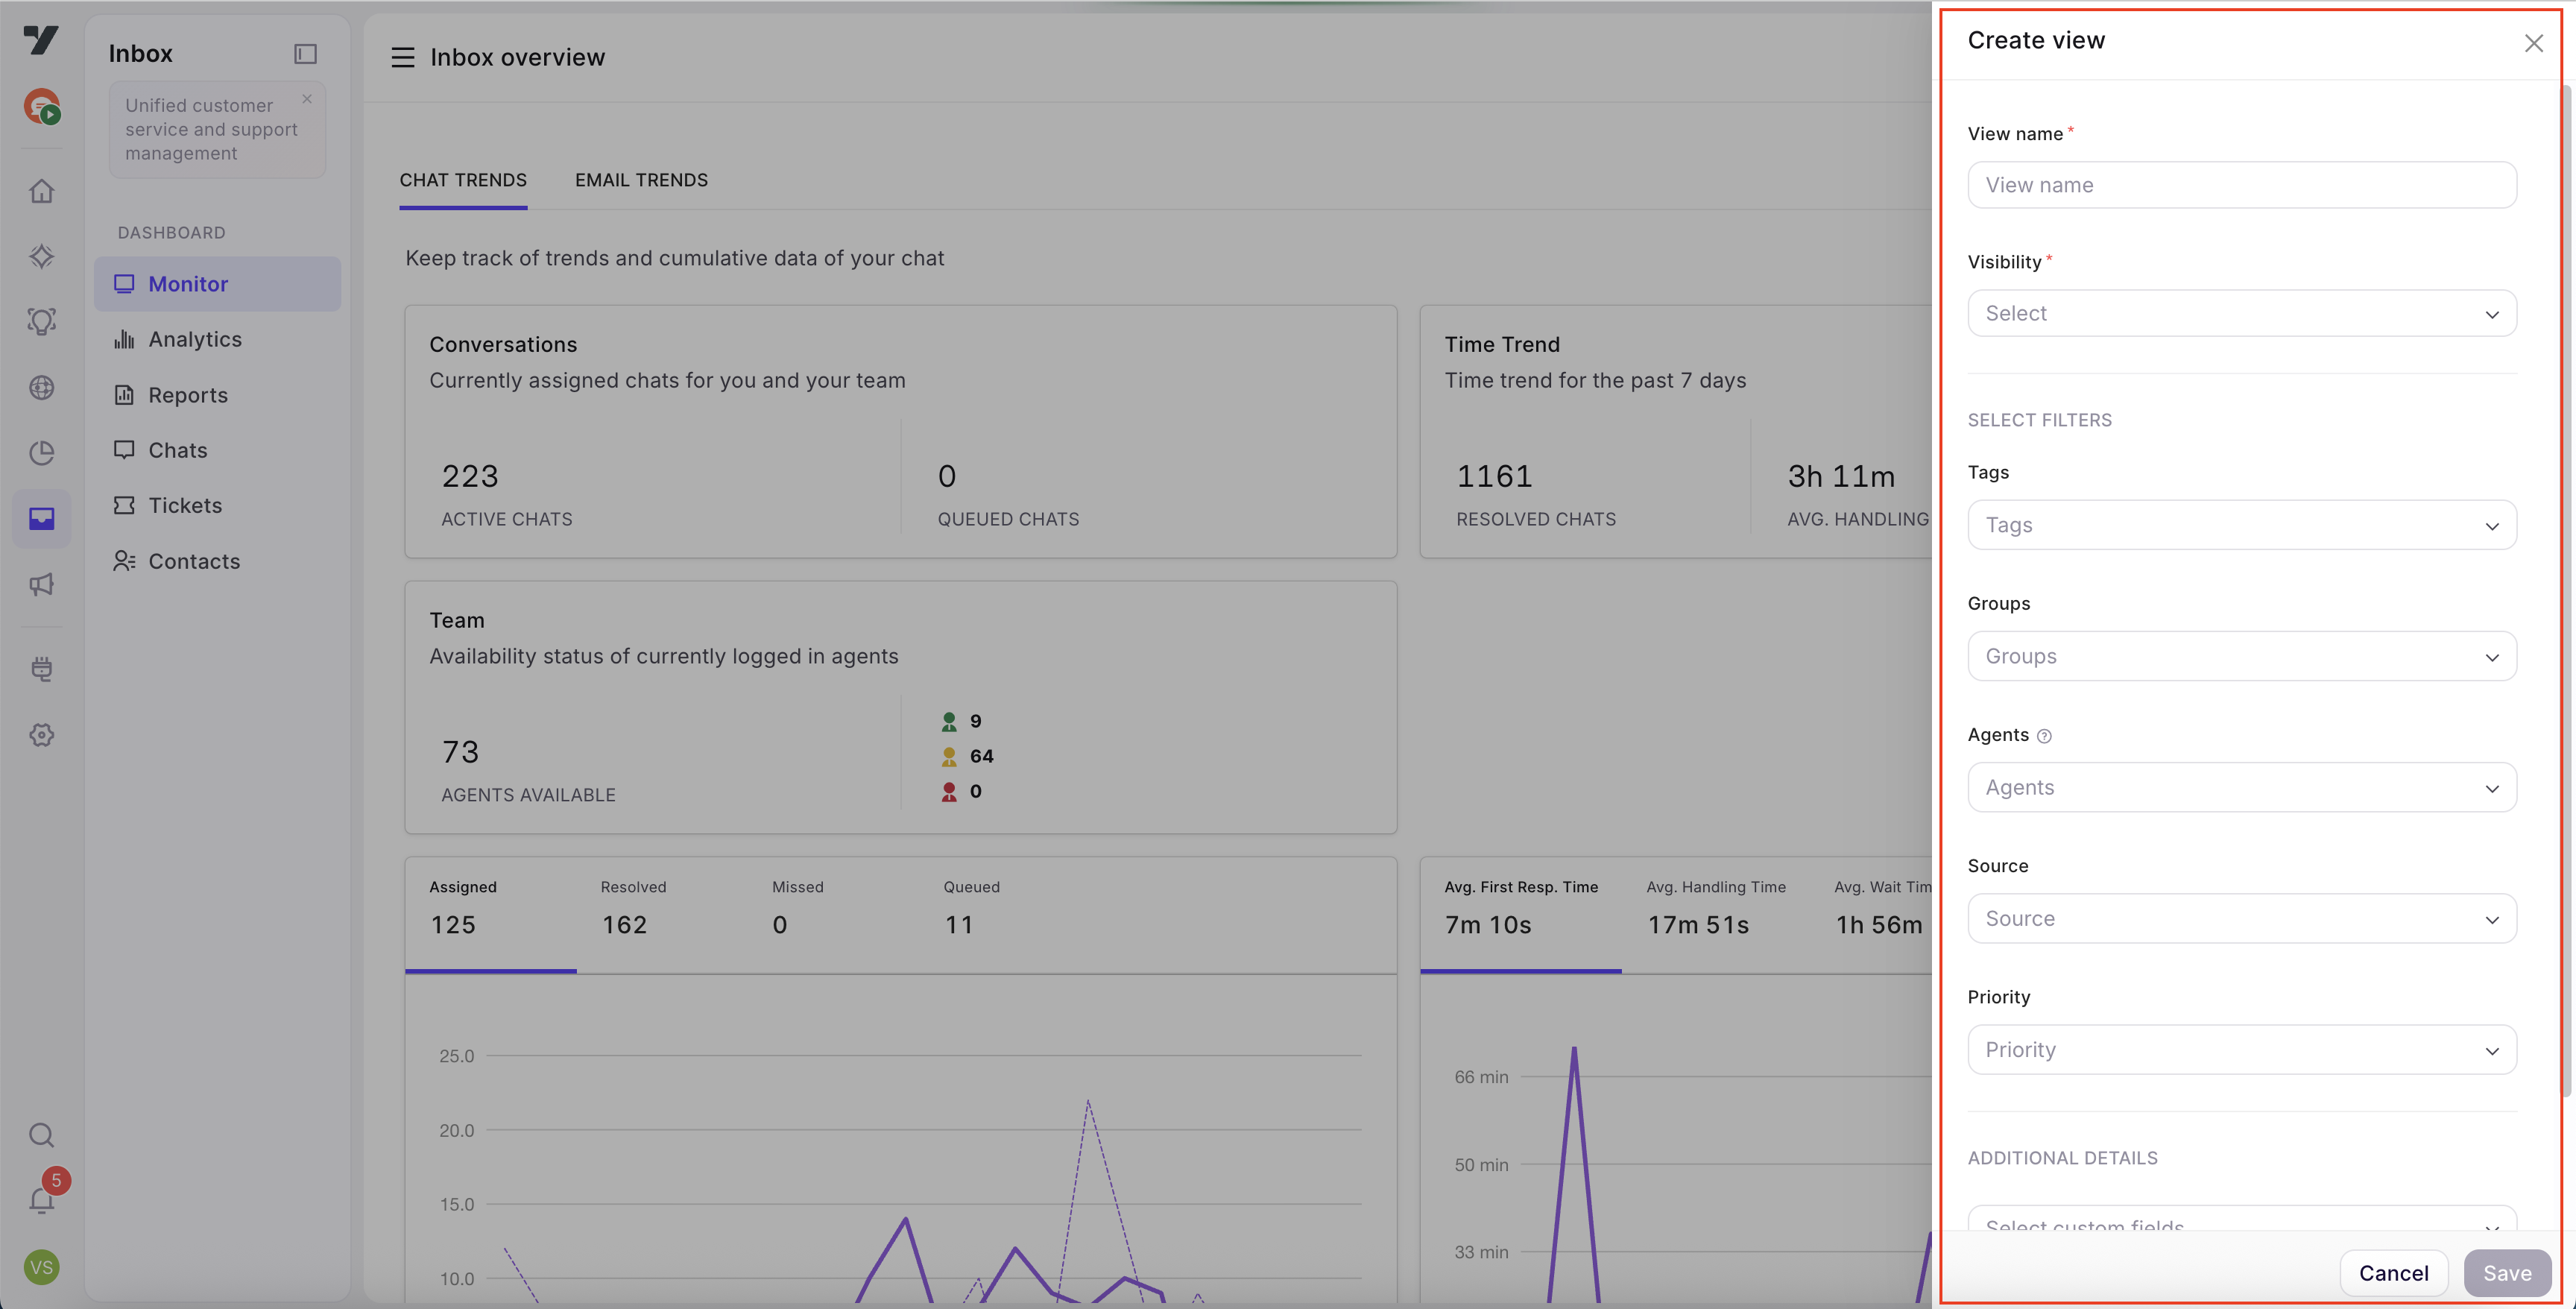
The Create dashboard panel will appear on the right side. Provide the following details:
- Enter a name for your custom dashboard.
- Choose the visibility setting: Only me makes it visible only to you, while All agents shares it with all inbox agents.
- Apply the desired filters — agents, groups, tags, channel, priority, and custom fields.
- Duplicate dashboard names are not permitted.
- Dashboard names should not exceed 30 characters.
- Use only standard letters; avoid special symbols and numbers.
- Click Save. The dashboard appears in the drawer under Custom dashboards.
Method 2: Save current filters as a dashboard
- Navigate to Inbox > Monitor and open a built-in view (e.g. Inbox overview).
- Apply the desired filters using the filter controls in the view.
- After applying filters, a Save as view prompt will appear. Click the checkmark to save.
- The Create dashboard panel will open on the right side with your applied filters pre-filled:
- Enter a name for the dashboard.
- Choose the visibility setting (Only me or All agents).
- Click Save.
Access custom dashboards
Admins have visibility into all custom dashboards.
Agents can access custom dashboards only if the admin created them with All agents visibility.
Regardless of the method used to create them, you can access custom dashboards as follows:
- Click ≡ to open the dashboard drawer.
- Under Custom dashboards, click the dashboard name.
- The view reloads with the saved filters applied and the URL updates to
?view-id=<id>.
To return to a built-in view, click any item in the top section of the drawer (Inbox overview, Live chats dashboard, or Team and groups).
Edit or delete a custom dashboard
The options to edit and delete custom dashboards are exclusively available to Inbox admins.
- Click ≡ to open the dashboard drawer.
- Hover over the custom dashboard name to reveal the edit (pencil) and delete (trash) icons.
- Edit: The dashboard panel opens on the right — update the name, visibility, or filters and click Save.
- Delete: Click the delete icon and confirm the prompt. This action is permanent.
If you delete a custom field from Settings, any custom dashboard using that field will be highlighted with a red dot. Review and update affected dashboards:
- If the deleted field was the only filter, the dashboard will return all data without filtering. Delete the dashboard or add new filters.
- If other filters remain, results may be inaccurate. Update or recreate the dashboard.
Share a custom dashboard
Because the active dashboard is reflected in the URL (?view-id=<id>), you can share it by copying the browser URL. Anyone with the link who has Monitor access will land directly on the same dashboard with its saved filters applied.