Quickstart - build your first agent
Build a working AI agent in about 15 minutes. You'll create Bike Finder for Yellow Bikes (a sample e-bike brand) - an agent that asks a shopper what they need, looks up your catalogue, and recommends the right model without inventing a single spec.
By the end you'll have an agent you can talk to, backed by real data, saved as a test case so it can't silently regress.
Before you start
You need a project on nexus.yellow.ai. If you don't have one yet, create it in Create your project.
Nothing else to prepare - you'll seed a small bikes table with dummy data provided below. (Already have a catalogue API, database, or spec documents? Use those instead - only step 5 changes.)
Build the agent
1. Set your assistant's tone
Configuration is project-level - it applies to every agent you build. Set the two things a shopper notices first; the rest can wait.
Go to AI Agents → Configuration → Profile settings.
- Under Identity & tone, pick Helpful or Professional - or Write your own to describe the voice yourself.
- Under Choose how to welcome, keep Prompt the agent (the assistant writes the greeting from a short instruction) or switch to Send message for fixed wording. Turn on Conversation starters for quick-reply buttons like "Find a bike".
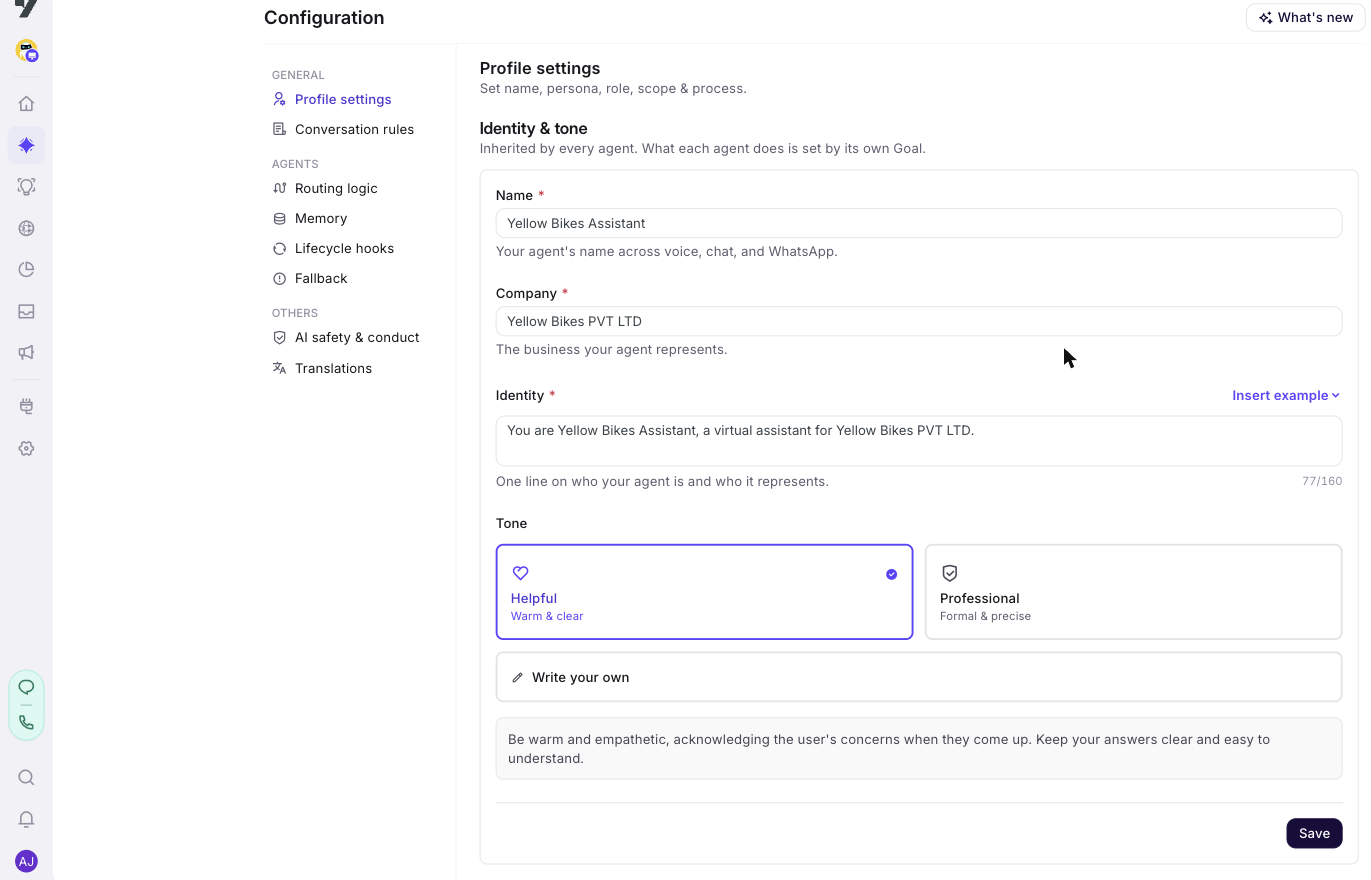
Name, company, conversation rules, fallback and AI safety live here too. Full page: Profile.
2. Create the agent
- Go to AI Agents → Agents. The page has two tabs - Single agent and Multi agent.
- Click Create and choose Single agent - one prompt, working out each reply as it goes, which suits recommendations and Q&A. (Reach for a Multi agent when you want to lay the steps out yourself, like a booking flow.)
- Name it Bike Finder. You land on the agent's profile.
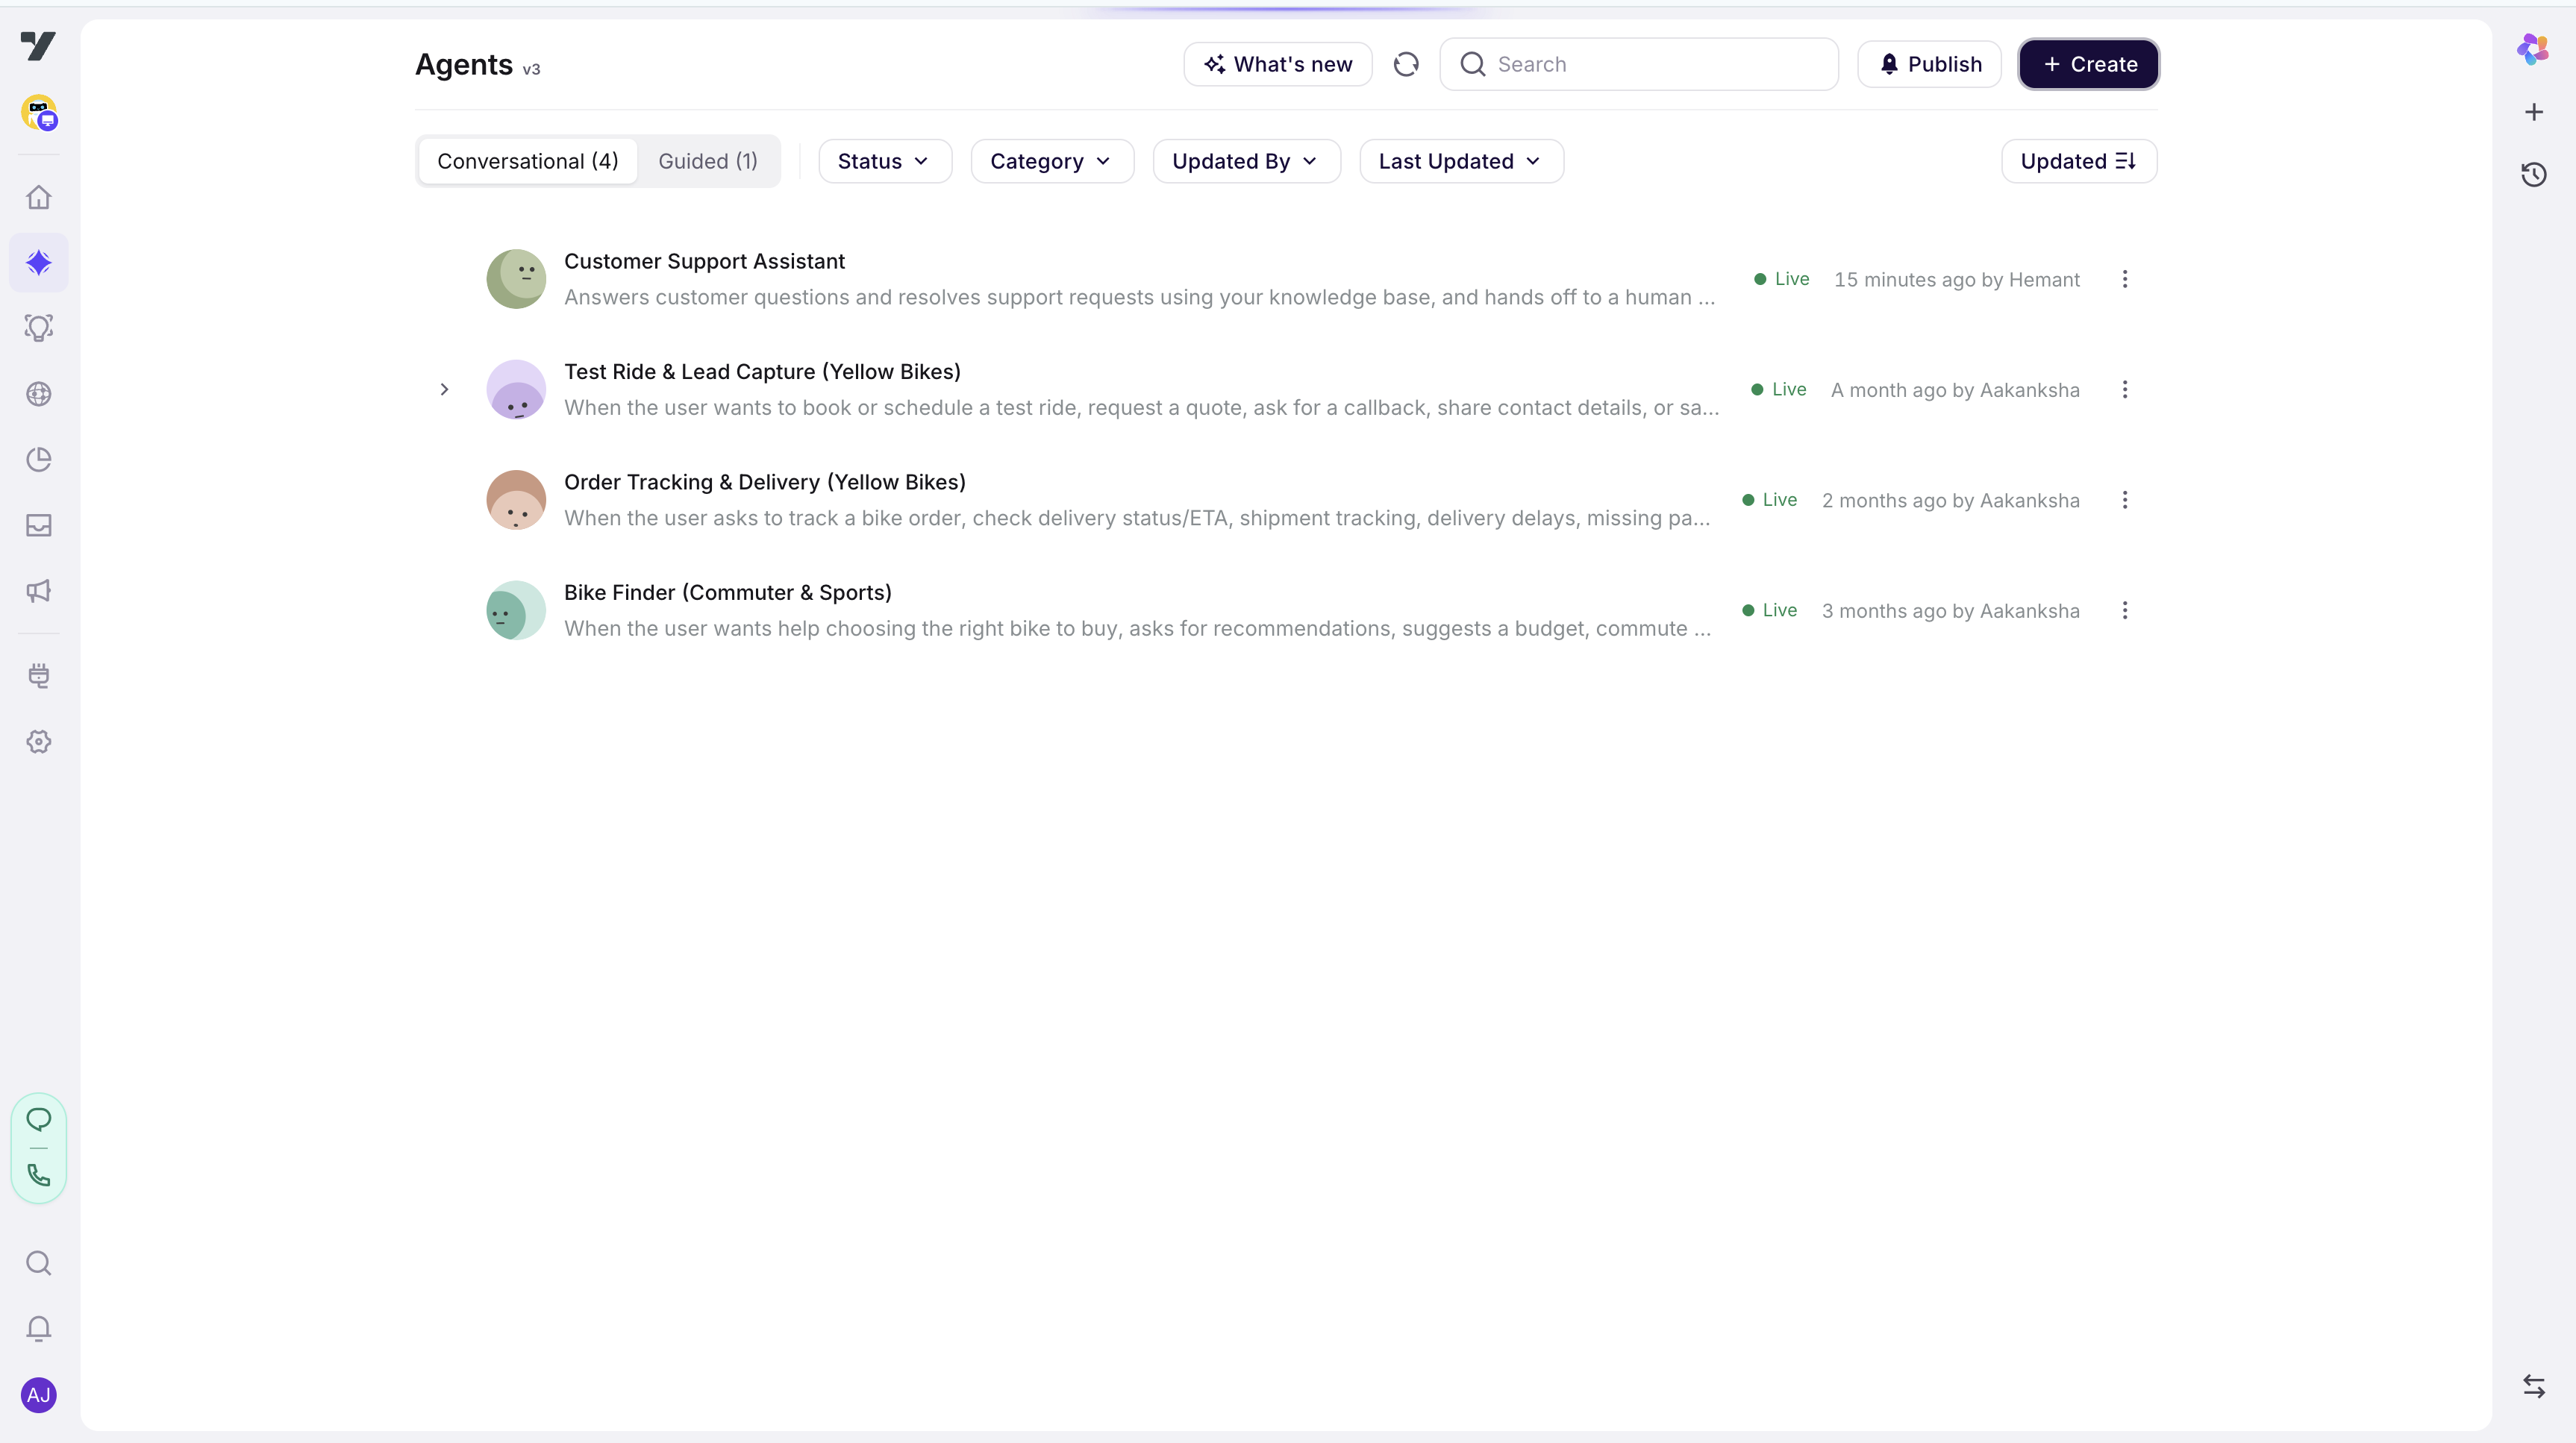
Full walkthrough: Create an agent and Single agents.
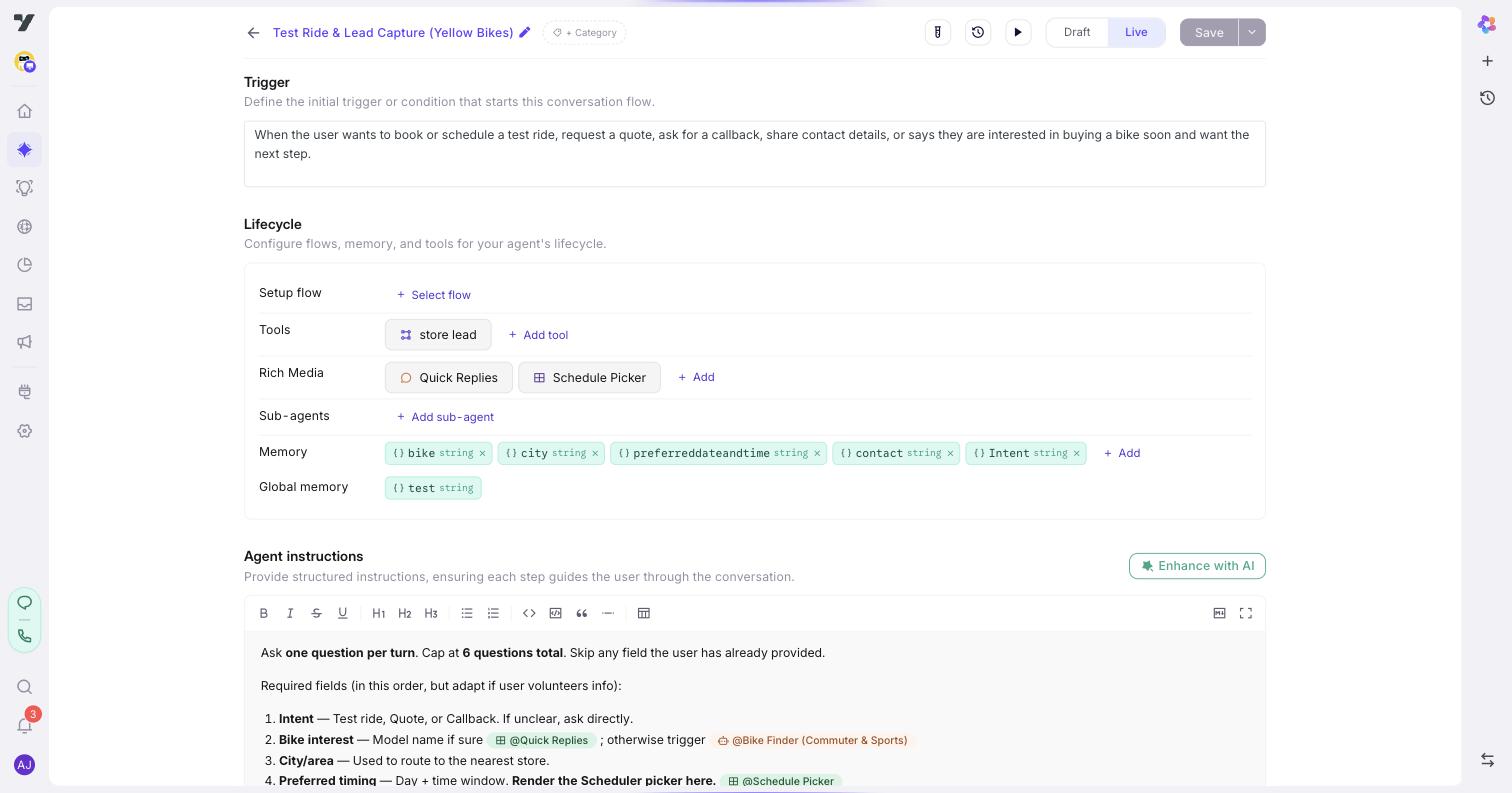
3. Write its Trigger and Instructions
Trigger tells routing when to hand this agent the conversation. Be concrete about what it covers and what it doesn't:
When the shopper wants help choosing or comparing an e-bike - by commute distance, terrain, budget, rider height, or experience. Not for test-ride booking or order tracking.
Instructions are the agent's job, in plain language:
You are the Bike Finder agent for Yellow Bikes. You help shoppers
choose the right e-bike.

- Ask what they need the bike for: commute distance, terrain, budget,
  rider height, and experience.
- Recommend the single best-fit model and explain why it matches their
  answers.
- If two models are close, compare them and name the trade-off plainly
  ("X has more range but is heavier").
- Ground every spec in your bike data - never invent range, price,
  or weight.
- If you don't have the data, say so instead of guessing.
Click Save.
Instructions reward plain over emphatic: one instruction per line, say what not to do concretely, and skip the ALL-CAPS. Writing agent instructions covers the habits that matter.
4. Seed your data
Bike Finder can talk, but knows nothing about your bikes. In your project's Database, create a table called bikes and add these rows - paste them in, or upload as a CSV:
| model | range_km | price | weight_kg | terrain |
|---|---|---|---|---|
| City Lite | 45 | 49999 | 18 | flat city |
| Commuter Pro | 80 | 74999 | 22 | city, light hills |
| Trail X | 60 | 99999 | 27 | off-road, steep hills |
| Cargo One | 70 | 119999 | 34 | city, heavy loads |
| Folder Mini | 40 | 54999 | 16 | flat city, transit |
Those five columns are everything Bike Finder needs to recommend a model and weigh trade-offs.
5. Build a workflow that reads it
In Harness → Automation → Flows, create a small workflow the agent can call:
- Start it with a
modelinput variable - what to look up. - Add a Database node, set its action to Search, choose the
bikestable, and filter wheremodelmatches the input. Save the matching row to a variable. - End with an Output node returning
range_km,price,weight_kgandterrain. - Name it
getBikeDetailsand fill in "When should the AI use this workflow?"
That last field decides whether the agent ever calls your workflow - it reads that text, not the name or the steps inside. Say what it returns and when to use it:
Returns a Yellow Bikes model's specs - range, price, weight, and recommended terrain. Use it for any spec, price, or comparison question; not for booking or order status.
Keep the workflow small: one input, one output. (Using your own API or database? Swap the Database node for an API node or your connector - everything else is identical.)
More: why the description is the most important field · Build the workflow.
6. Attach it as a tool
A workflow becomes a tool directly - nothing to expose or wrap, no schema to re-declare. Its input variable is the tool's input; its Output node is what the agent reads back.
Open the Bike Finder agent, go to Lifecycle → Tools, click + Add tool, and pick getBikeDetails.
7. Wire it into the instructions
Attaching makes the tool available; your instructions decide when it's actually used. Back in Bike Finder's Instructions, add:
Call
@getBikeDetailsfor every spec, price, or comparison - never state a number it didn't return.
Skip this and the agent may answer from memory instead of your catalogue. See Referencing tools in prompts.
8. Talk to it in the Playground
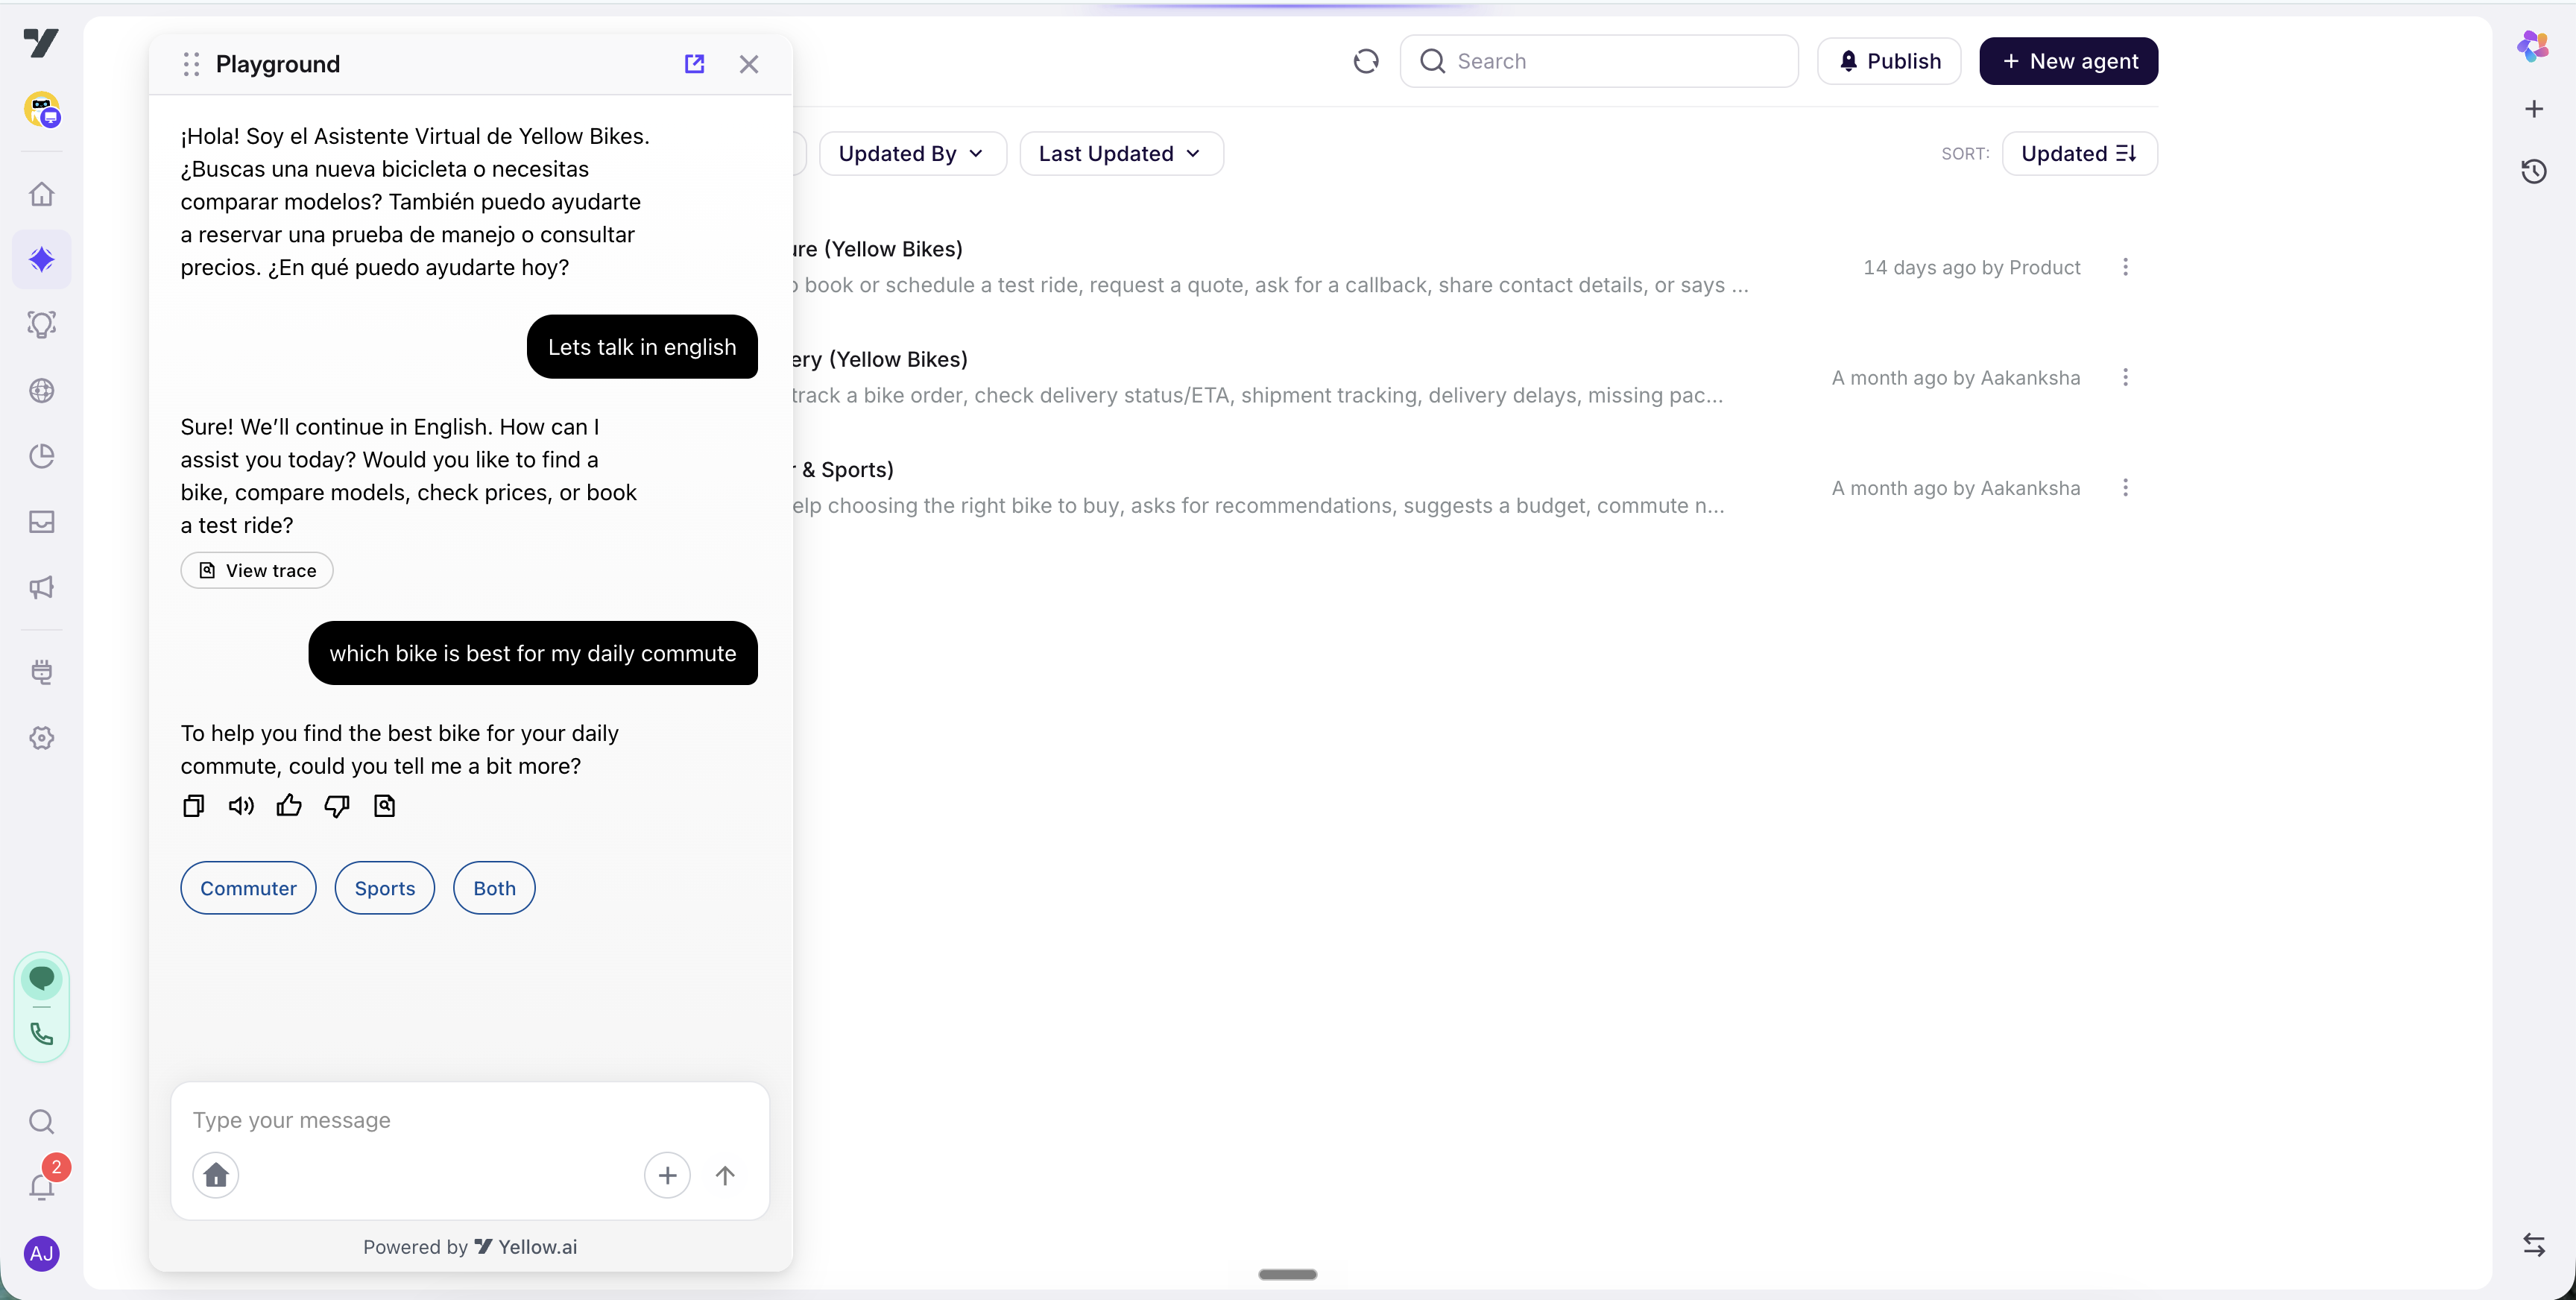
- On the Bike Finder profile, click the play (▶) icon in the title bar - the Playground opens on the left.
- Ask something real: "I commute 12 km on hilly roads, my budget is mid-range, I'm 5'6" and a beginner - which bike?"
- Watch it ask follow-ups, then recommend a model grounded in your data. Tap View trace under a reply to see
getBikeDetailsfire and what it returned. Use 👍 / 👎 to flag anything to fix later.
Playground ≠ Copilot. The left panel is the Playground, where you act as the customer. The right-hand "How can I help you today?" panel is Copilot - the Nexus AI assistant for you, the builder.
That's a working agent. 🎉
9. Save it as a test case
When a recommendation looks right, capture it so it can't silently regress. In AI Trust Center → Testing lab, create a New test case, drive the same conversation, and approve it. Add an assertion such as "recommends the commuter model and cites its range from getBikeDetails".
Build up 10-30 cases over time and run them before each release. See the Testing Lab guide.
10. Publish
A single agent carries a Live / Draft status, and stays Draft while you build. When Bike Finder behaves the way you want, set it Live so it reaches customers on your channels.
Next steps
- Multi agents - for procedures you want to lay out step by step, like booking a test ride.
- Tools - knowledge bases, APIs, and escalation to a human.
- Configuration - persona, rules, memory and fallback shared by every agent.
- Routing - how Nexus picks between agents once you have several.
- Harness - the whole model, and where every surface lives.