The guided flow canvas
A guided agent runs the exact steps you design, in the same order every time. You author those steps on the flow canvas - a visual node graph where each node does one job and the lines between them decide what happens next. Open a guided agent from the Guided tab on the Agents page, or create a new one from the Create picker, and the canvas opens at /build/flows/<slug>?from=guided-agents.
This page is a tour of the canvas: the tabs and toolbar, the Start node, the node types you wire together, how branches connect them, and the journey variables that carry data across the flow. The Conversational Agent node - the workhorse node where most of your logic lives - is documented in depth on its own page.
The canvas tour
When you open a guided agent, the header carries the flow's name plus a few actions, and the body is a scrollable, zoomable node graph.
A guided flow is a graph of nodes wired by each node's exits. A typical order-return flow looks like this:
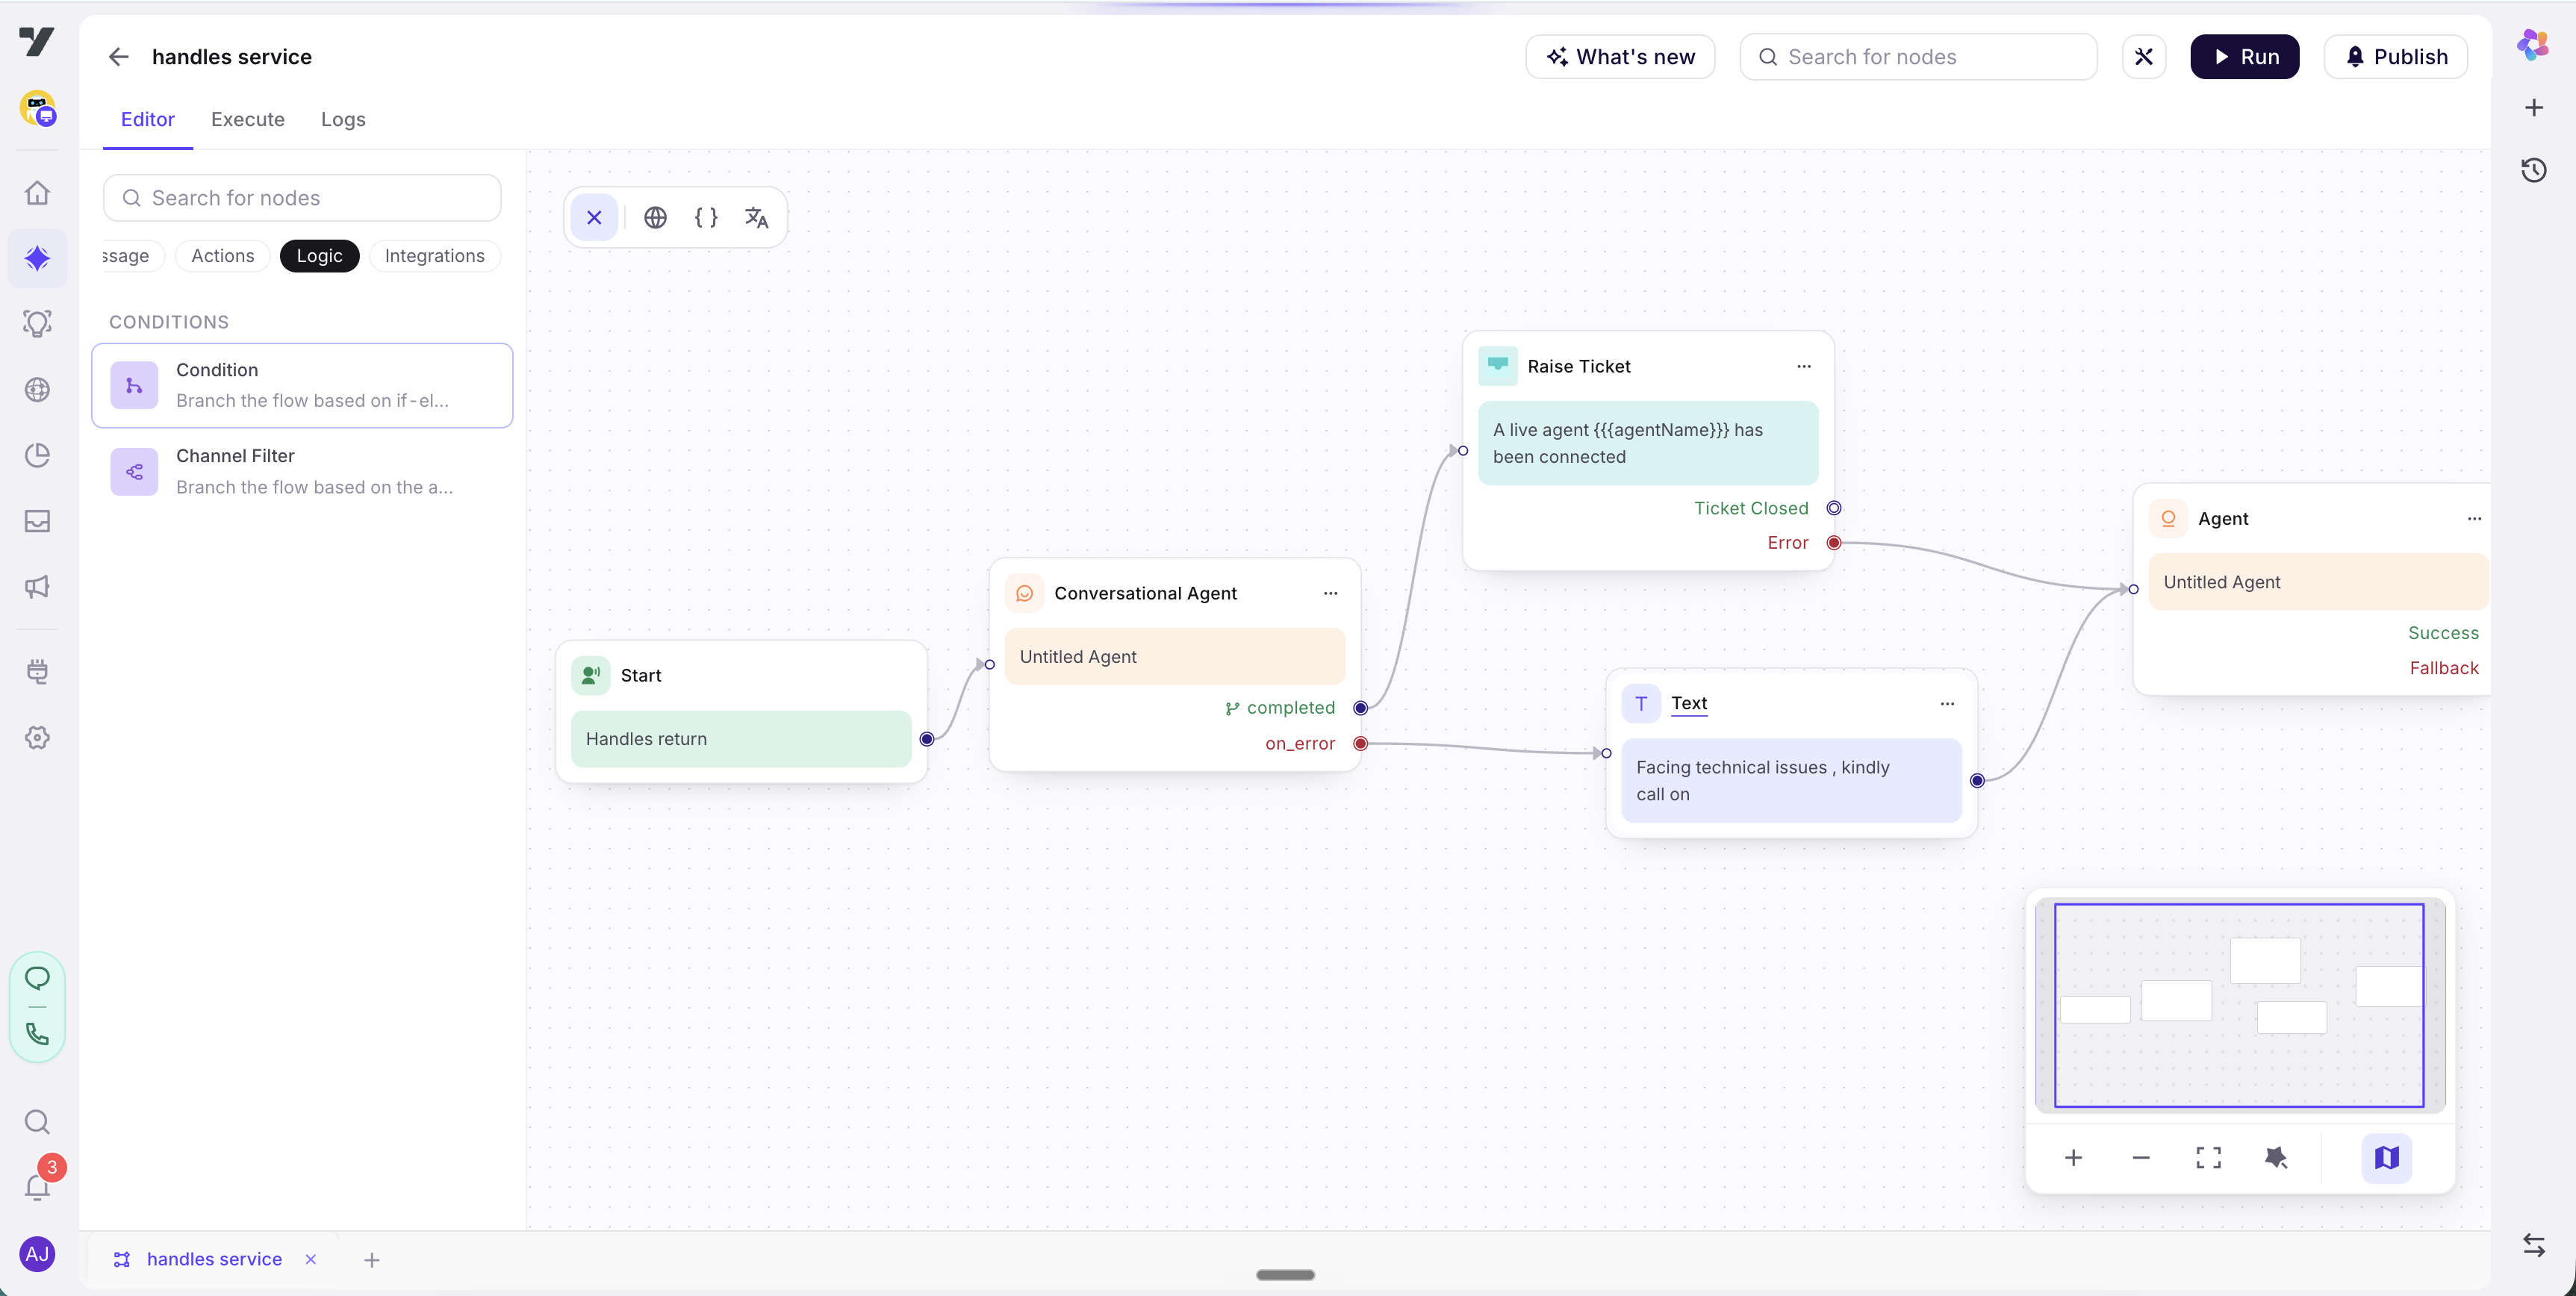
Tabs
The canvas has three tabs:
| Tab | What it's for |
|---|---|
| Editor | Build the flow - add nodes, write their instructions, and wire branches. This is where you spend most of your time. |
| Execute | Run the flow end to end and watch it step through your nodes, so you can confirm the path a given input takes. |
| Logs | Inspect past runs - which nodes fired, which exit each one took, and the variables along the way. Use this to debug a run that didn't go where you expected. |
Toolbar actions
- Run - start a test conversation against the current draft of the flow, without publishing. Use it constantly as you build.
- Publish - make your edits live. Unlike conversational agents, a guided agent has no Live/Draft status badge in the list - publishing is how your canvas changes reach customers.
- What's new - release notes for the canvas itself.
- Search for nodes - a search box that finds a node by name and jumps to it. On a large flow with a dozen nodes, this is faster than panning the canvas.
Navigating the graph
The canvas is a node graph built on React Flow. To find your way around:
- Minimap - a small overview of the whole graph in the corner; click or drag within it to jump to a region.
- Zoom and fit - zoom in/out and a fit-to-screen control to frame the entire flow.
- Auto-layout - re-tidies the nodes into a clean top-to-bottom arrangement after you've added or rewired several. Reach for it when the graph starts to look tangled.
Tip - let auto-layout do the tidying. Don't fuss over pixel-perfect node placement while you build. Wire the logic first, then run auto-layout to make the flow readable. Position is cosmetic; the branches are what matter.
The Start node
Every guided flow begins at a single Start node. It is the entry point of the graph and it carries the trigger - the natural-language description of when this guided agent should run.
The trigger plays the same role here that an agent's Trigger plays for a conversational agent: it's how the bot decides this guided agent is the right thing to run for an incoming request. Write it the same way - concrete about the situations it covers, and explicit about what it does not handle.
Example trigger. "When the customer wants to return or exchange an item they've already received - start a return. Do not handle order tracking or delivery-status questions; those have their own agent."
The Start node has exactly one outgoing edge: it hands control to the first real node in your flow (usually a Conversational Agent node). From there, the path is decided by each node's exits.
Note: Guided agents are automatically available as tools to your conversational agents. A conversational agent can hand a multi-step task to a guided agent the same way it would call any other tool - you don't need to flip a separate "use as tool" toggle. See the Agents page overview for how the two agent types relate.
Node types you wire together
A guided flow is built from nodes, each with a focused job. You drop a node onto the canvas, configure it, and connect it to the next node by its exits. The most common node types:
| Node | What it does |
|---|---|
| Start | The flow's single entry point. Carries the trigger that decides when the guided agent runs. One per flow. |
| Conversational Agent | A focused agent that owns one step of the conversation - collect details, confirm a choice, answer a scoped question. It has its own instructions, tools, variables, and exits (the outcomes it can finish on). This is where most of your logic lives. See The Conversational Agent node. |
| Execute Workflow | Calls a workflow - a callable, deterministic skill (an API call, a lookup, a record update). Use it when a step is pure business logic with no conversation, e.g. check return eligibility or book a pickup slot. |
| Transfer to Agent | Hands the conversation off to a human agent (or routes it onward). Use it as the exit path when the flow can't or shouldn't continue automatically - for example, an item outside the return window, or an explicit "talk to a person" request. |
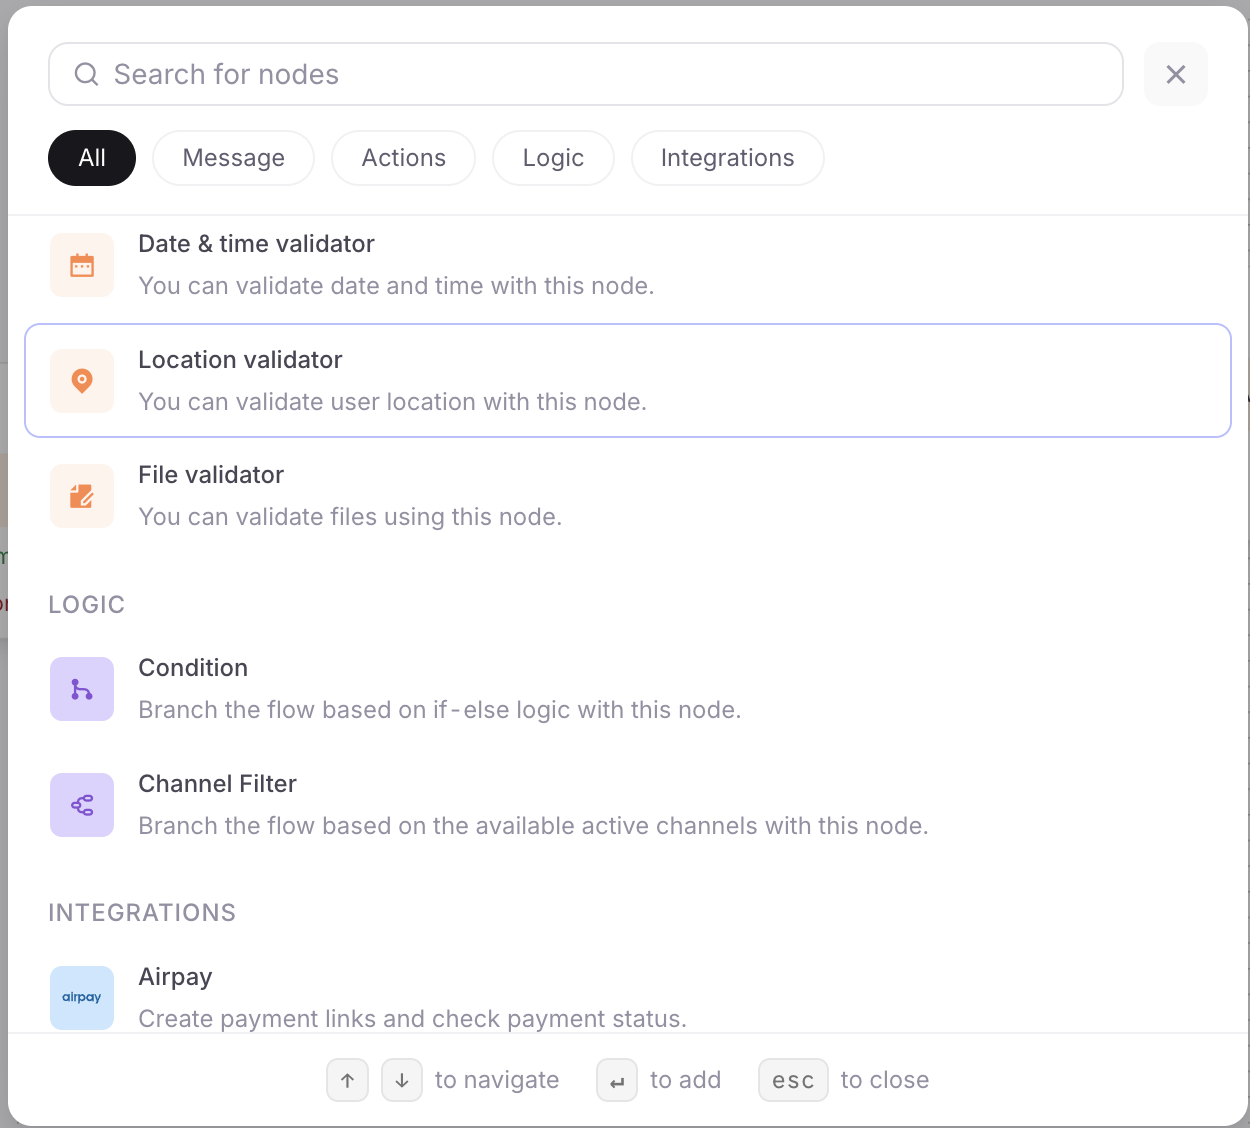
The node search/palette offers more node types than the four above - open it from the canvas to see everything available for your bot. Build the backbone of your flow with Conversational Agent nodes, and reach for Execute Workflow and Transfer to Agent at the points where the journey leaves the conversation (to run logic) or leaves the bot (to reach a human).
A guided agent is never a "workflow." "Workflow" is a reserved, distinct term - a callable scheduler skill you build in the workflow editor and invoke from an Execute Workflow node (or as a Workflow tool). The guided agent is the conversation; a workflow is a subroutine it can call. Don't conflate the two.
Branches and edges
Nodes connect to each other through exits. Each node finishes on one of its named exits, and each exit is an output handle that you wire - with a branch (the line on the canvas, an edge) - to the next node that should run.
How it works:
- A Conversational Agent node declares a list of exits, each a label plus a short natural-language description of when it applies. For example, an order-return node might exit on
eligible,not_eligible, ormax_retry(the user couldn't decide after a few attempts). Every node also has anon_errorexit for the failure path. - You connect each exit to a target node by dragging a branch from the exit's handle to the next node's input. That branch is the routing: when the node finishes on an exit, control follows that exit's branch.
- An exit that isn't wired anywhere ends the flow after that node. Wire the exits you want to continue; leave terminal outcomes (e.g. a successful completion) unwired to finish.
- Branches can point forward (collect → confirm) or back to an earlier node (e.g. confirm → collect to re-collect a changed detail), letting you build loops and retries.
Because every path is an explicit branch you drew, a guided agent's behaviour is deterministic and auditable: there's no path through the flow that you didn't wire. That predictability is the whole point of choosing a guided agent over a conversational one for multi-step, must-not-miss-a-step journeys.
Note: An exit's description is for the Conversational Agent node - it's how that node's agent decides which outcome it has reached (e.g. "if the intent is a return", "when the user can't decide after 3 attempts"). The branch is how the canvas turns that outcome into the next node. You author exits and their descriptions inside the node; you draw branches on the canvas. See The Conversational Agent node for authoring exits.
Journey variables
A guided flow has its own journey variables - flow-local memory shared across every node in the flow. Use them to carry data from one step to the next: an order_id collected by an early node, a return_eligible flag set by an Execute Workflow node, a pickup_slot chosen later on.
- Scope. Journey variables are local to the flow. They're the flow's working memory, separate from the bot-wide global memory that every agent shares. A Conversational Agent node reads and writes them through its Variables capability; an Execute Workflow node can read inputs from them and write its results back.
- They persist across nodes within a run. A value written in step one is available in step five - that's what lets a guided agent "remember" what it has collected as it walks the journey.
- Global memory still works. If a value needs to be visible to the rest of the bot (not just this flow), use a global memory variable instead. Reach for a journey variable when the data only matters inside this flow.
See Memory in Nexus agents for the full memory model and when to choose local (journey) vs global.
Step 1: Add a node
In the Editor tab, open the node search/palette and pick the node type you want - for an order-return flow, you might add a Conversational Agent node to collect the order ID. Drop it onto the canvas. (You can also let the AI layer scaffold the node from a description.)
Step 2: Configure the node
Click the node to open its configuration drawer and give it a clear job. For a Conversational Agent node that means a Name, its Instructions (the goal/prompt), any Tools, Variables, and its Exits - the outcomes it can finish on. The full walkthrough is on The Conversational Agent node. For an Execute Workflow node, pick the workflow to call and map its inputs from your journey variables.
Step 3: Wire its exits
Drag a branch from each exit handle to the node that should run next:
- Wire the success exit (e.g.
eligible) to the next step in the journey. - Wire fallback exits (e.g.
not_eligible,max_retry,on_error) to a Transfer to Agent node, or back to an earlier node to retry. - Leave any terminal exit unwired so the flow ends cleanly there.
Step 4: Run and refine
Click Run to start a test conversation and walk the path your input takes. If a run goes somewhere unexpected, open the Logs tab to see which node fired and which exit it took, then adjust the node's instructions, its exit descriptions, or the branch wiring. When the flow behaves the way you want, click Publish to make it live.
Tip - test the unhappy paths first. It's easy to get the success path right. The value of a guided agent is that the edge cases also stay consistent. Run the flow with inputs that should hit
not_eligible,max_retry, andon_error, and confirm each lands somewhere sensible (usually a Transfer to Agent or a graceful end). See Testing a guided agent.
Continue to: The Conversational Agent node - the node where each step's goal, tools, variables, and exits live.