Gupshup (WhatsApp) integration
Integrating Gupshup with the Yellow.ai platform allows businesses to connect their WhatsApp channel through Gupshup and enable two-way communication between the bot and WhatsApp users. This integration ensures that the Yellow.ai bot can send and receive messages to and from WhatsApp users using Gupshup's webhook.
What this integration does
- Incoming messages — When someone writes to your WhatsApp business number, Gupshup notifies Yellow.ai. Your bot can then run its flows, AI, or agent handoff as usual.
- Outgoing messages — When your bot sends a reply, Yellow.ai sends it to Gupshup so it is delivered on WhatsApp. The User ID and Password you save in Yellow.ai are what allow those sends to work.
How it works, in order:
- A customer sends a WhatsApp message → Gupshup receives it.
- Gupshup calls the Webhook URL from Yellow.ai and includes the Authorization value Yellow.ai gave you.
- Yellow.ai matches that request to your bot (the URL contains your bot identifier).
- When your bot replies, Yellow.ai uses your saved User ID and Password so Gupshup can deliver the reply on WhatsApp.
You save User ID and Password in Yellow.ai; you register the Webhook URL and Authorization value in Gupshup so steps 2 and 4 above work.
Before you begin (checklist)
Go through this list once before you start:
| You need | Why |
|---|---|
| A Gupshup account with WhatsApp set up for your business number | Gupshup must already be able to send and receive WhatsApp for that number. |
| Your Gupshup User ID and Password for WhatsApp | These are the same kind of credentials Gupshup provides for API-based messaging. If you are unsure where to find them, use Gupshup’s documentation or your Gupshup account manager. |
| Your Yellow.ai bot is ready and published. | A live, published bot can receive traffic and run your flows when WhatsApp is connected. |
Gupshup help for webhooks (optional reading): Webhooks overview · Set webhook callback URL
Steps to connect Gupshup in Yellow.ai
Follow these steps in order:
-
Log in to Yellow.ai platform.
-
Open the bot that should use this WhatsApp number.
-
In the left navigation, go to Extensions → Channels, then use the search bar to search for Gupshup.
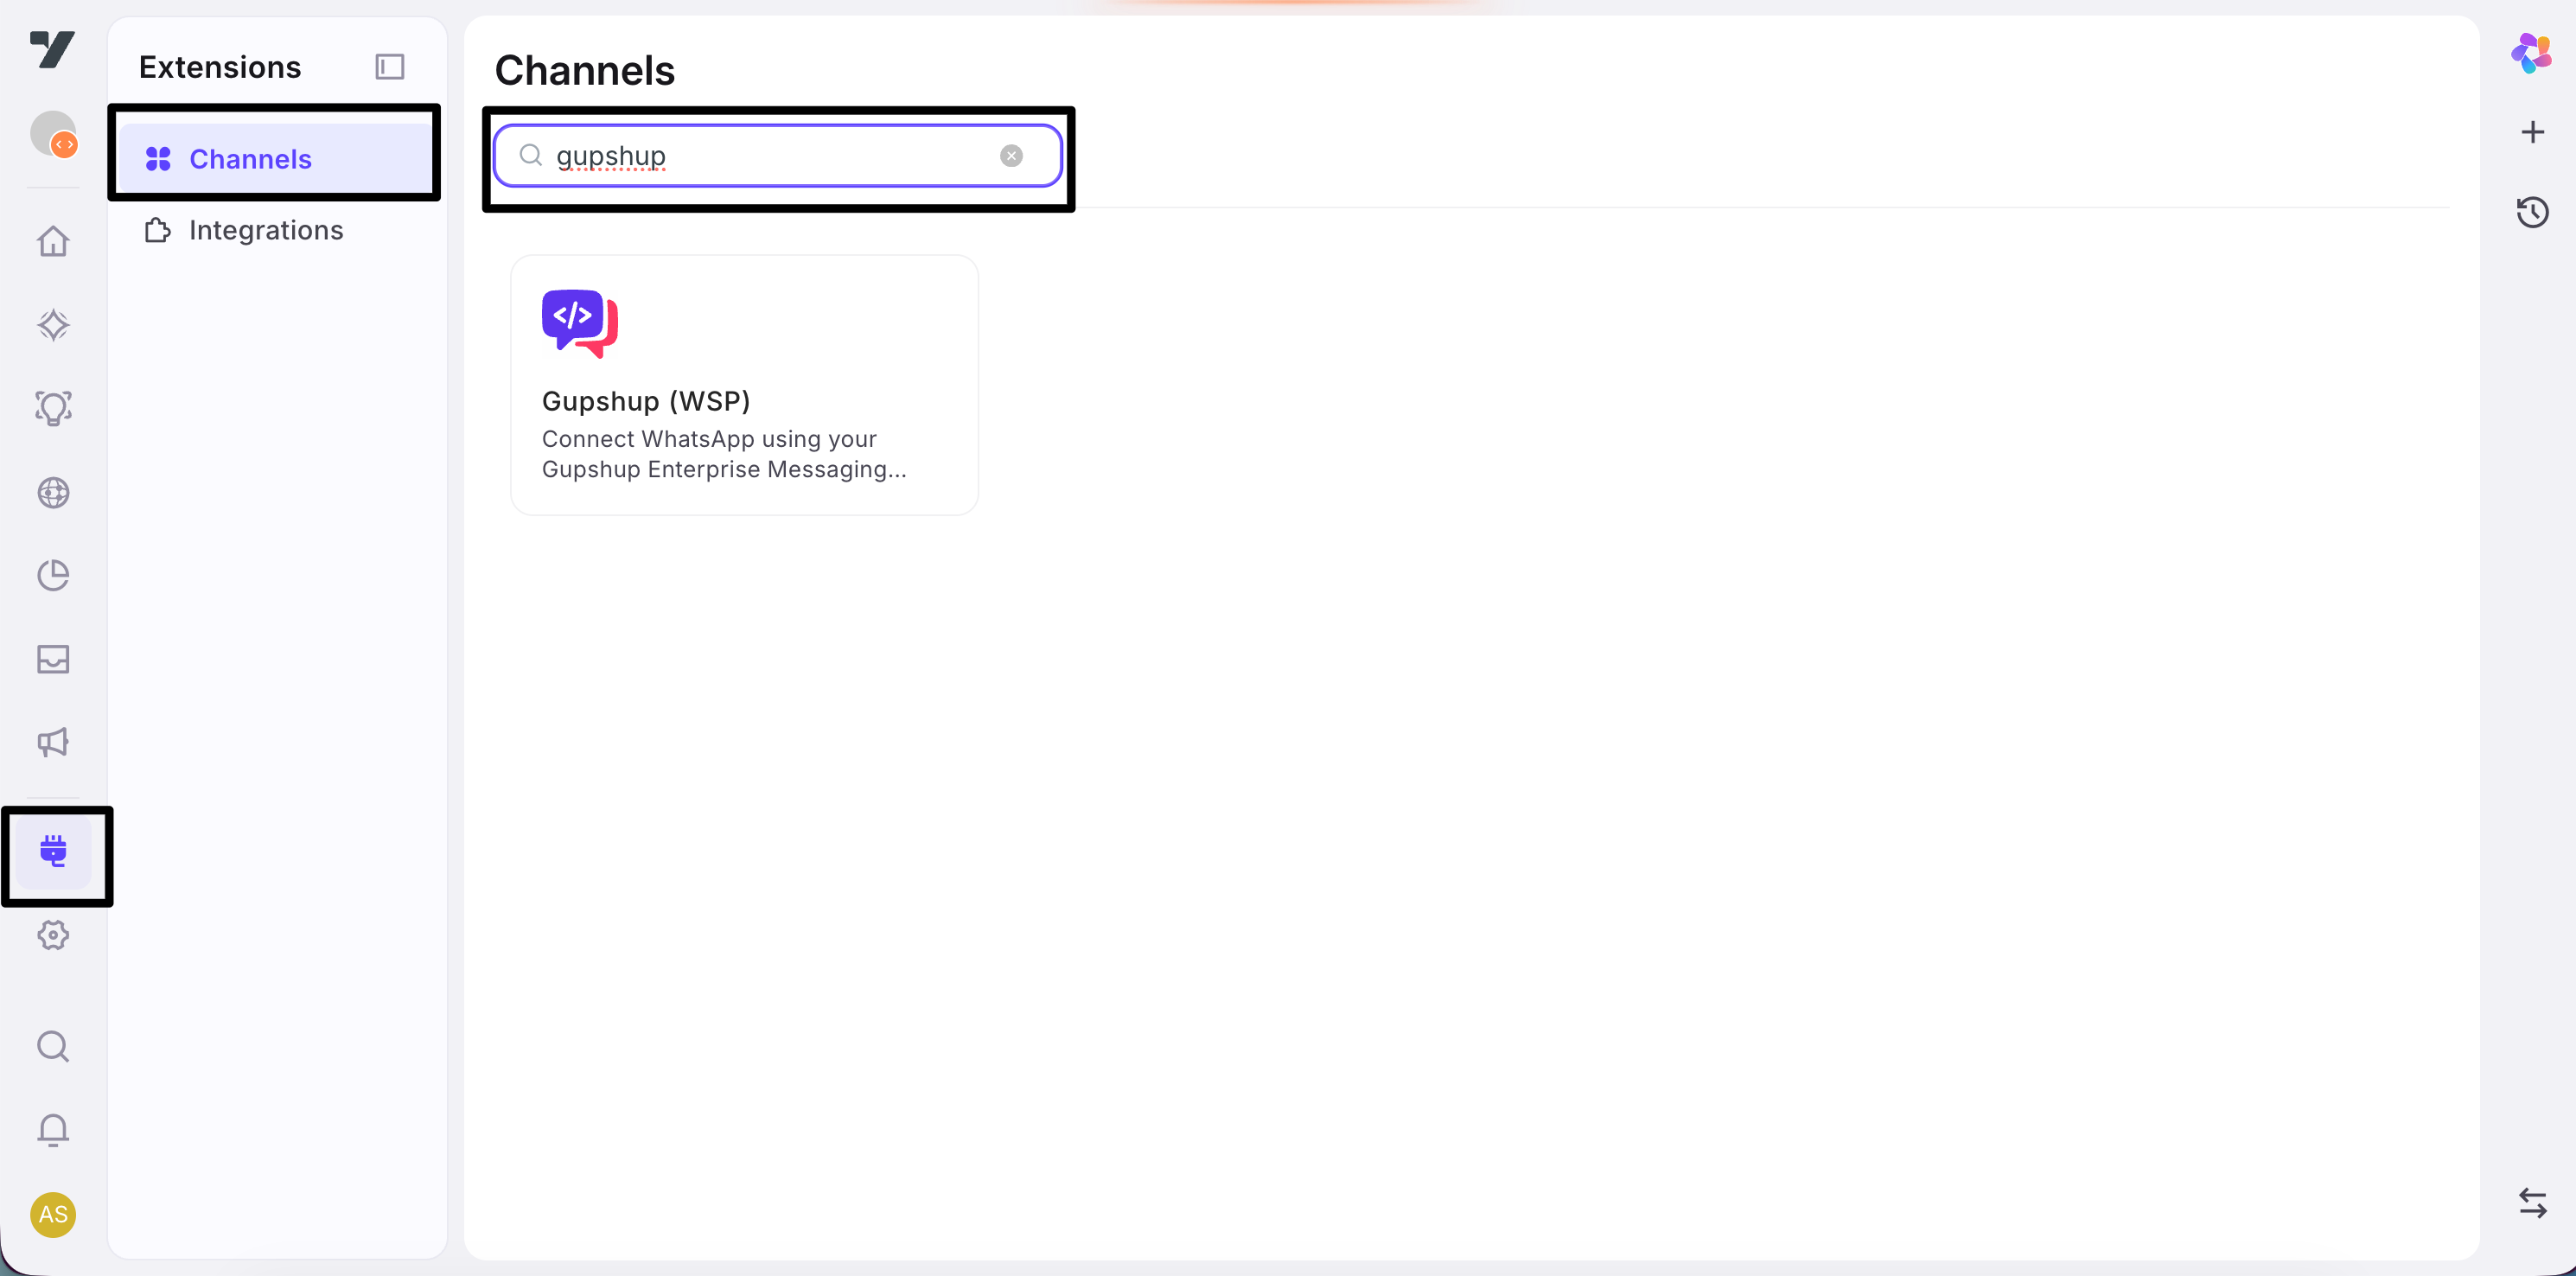
-
Click Gupshup (WSP) in the results to open the channel setup page.
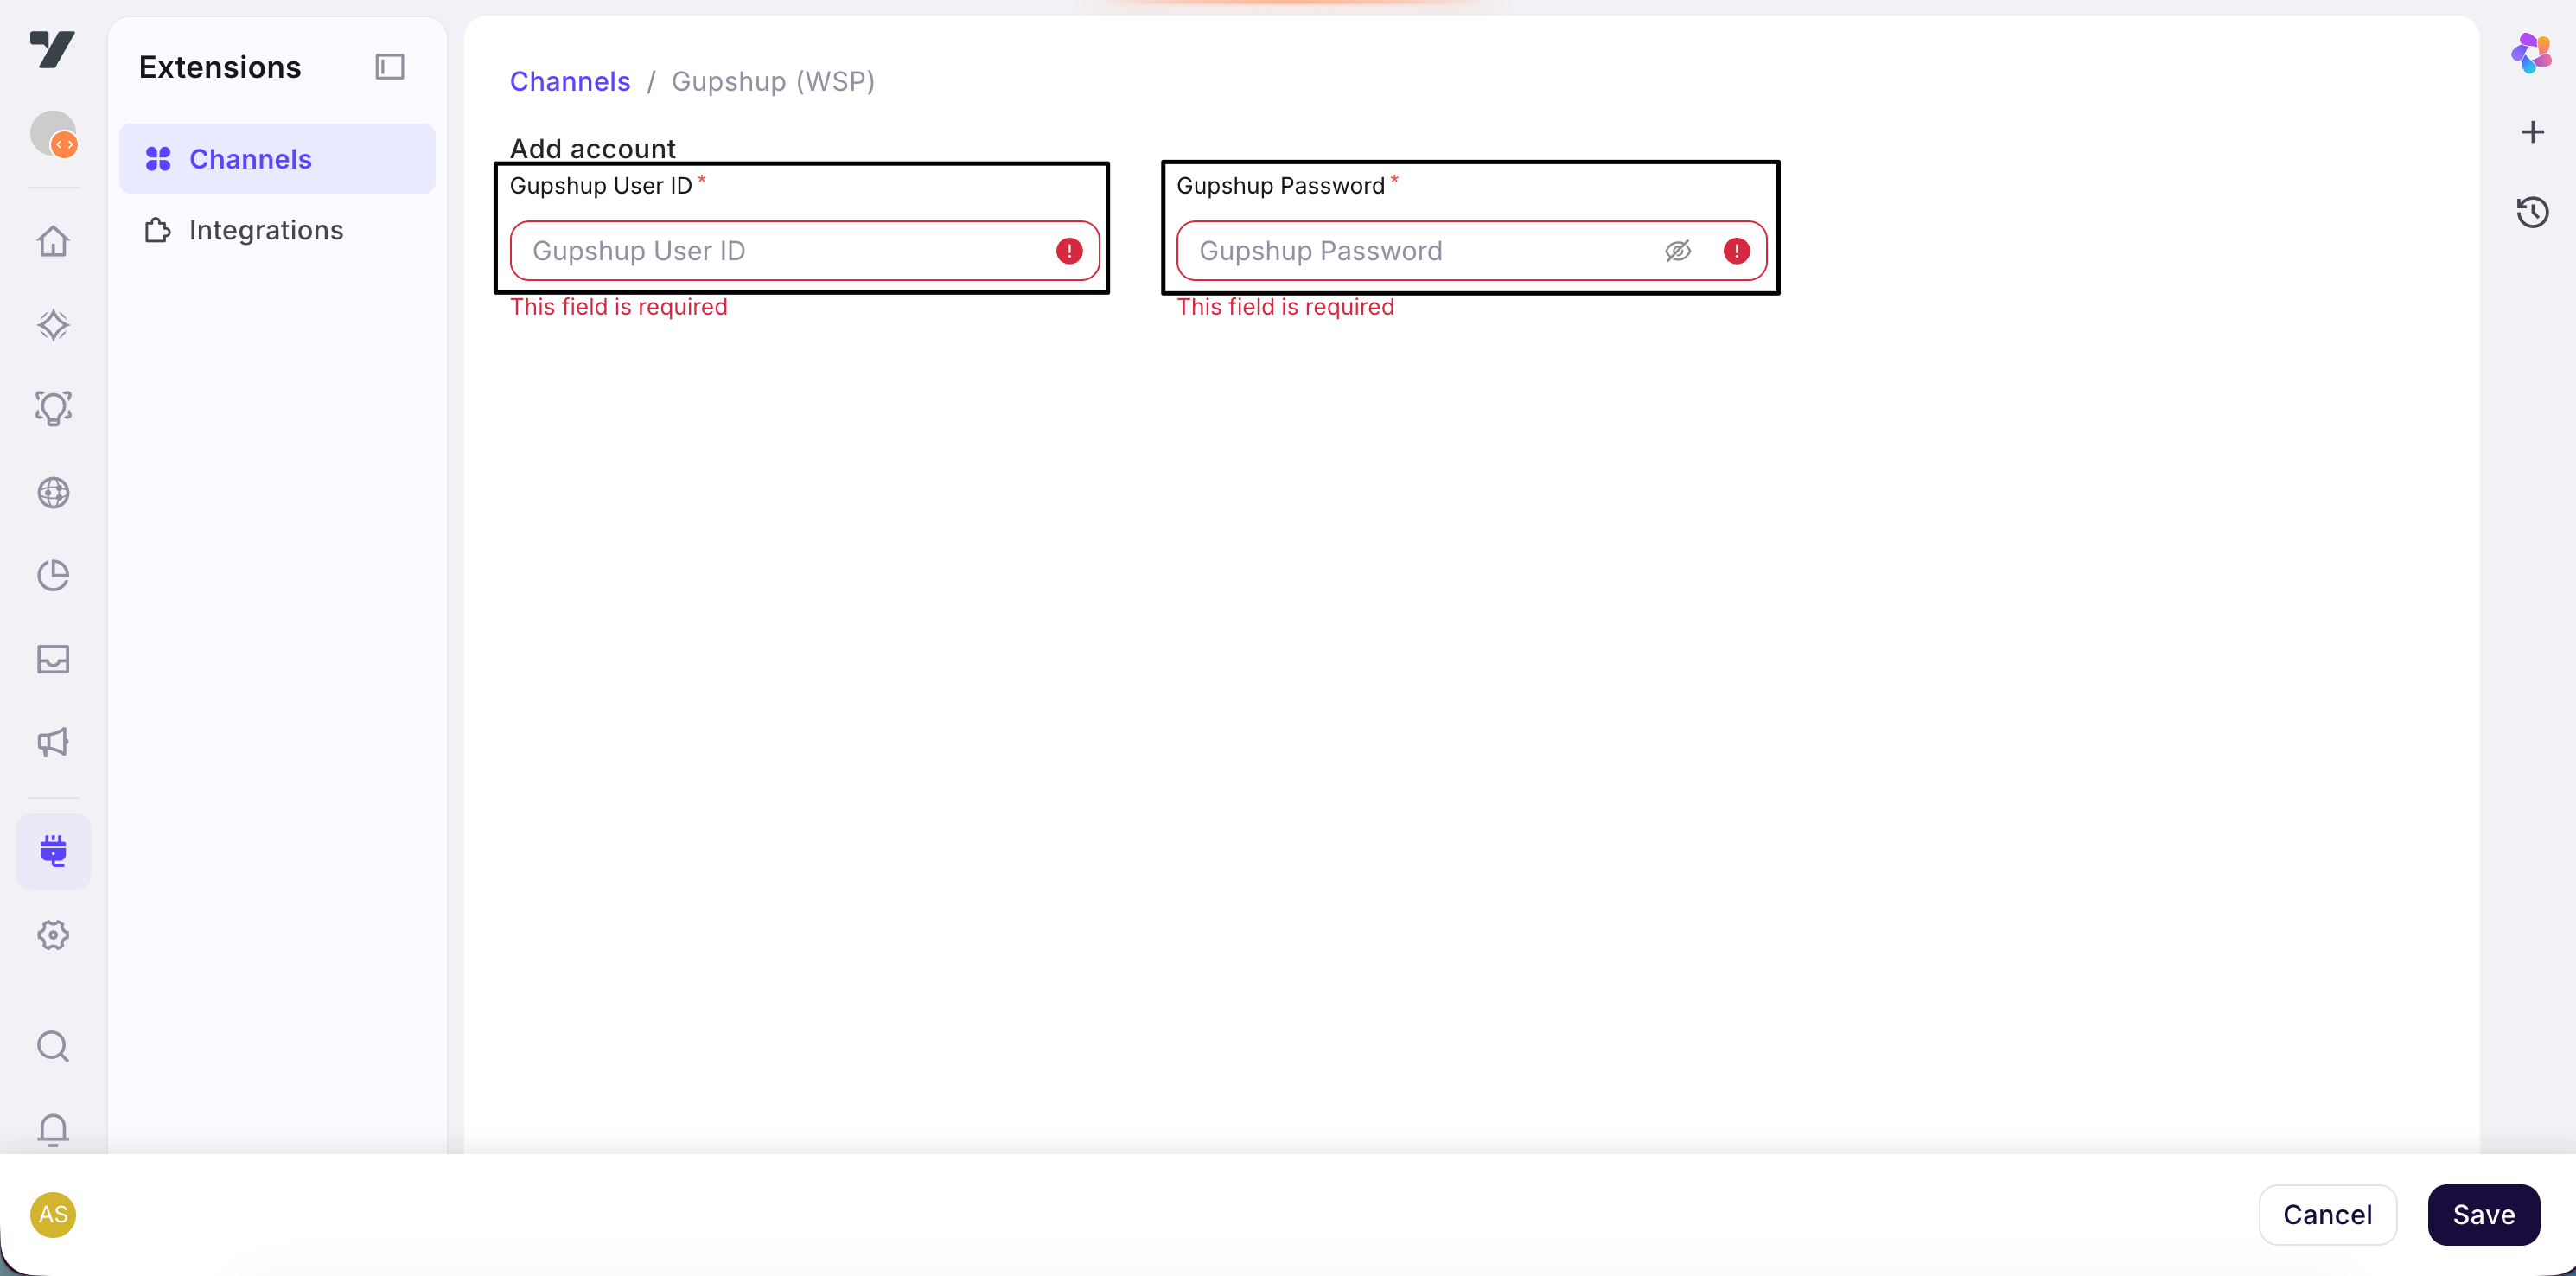
-
On the form you will see:
- Gupshup User ID — enter the User ID from your Gupshup account (Customer Care / WhatsApp API credentials).
- Gupshup Password — enter the matching password from your Gupshup account.
-
Click Save.

Keep your Gupshup Password private.
After you save: Webhook URL and Authorization
After the channel saves successfully, the same page shows two values you will use in Gupshup when you configure the webhook there. You can copy each value using the Copy control next to it:
| What you copy | What it is for |
|---|---|
| Webhook URL | This is the web address Gupshup must call every time there is incoming WhatsApp activity for this bot. It will look like a normal https:// link and will include your bot’s identifier in the path. |
| Authorization header value | Gupshup must send this exact value in the Authorization HTTP header when it calls the Webhook URL. That way Yellow.ai knows the traffic belongs to this bot. |
Always use Copy from the Yellow.ai screen. Pasting by hand often causes 401 errors (access denied) because of a missing character or a wrong header.
What Gupshup’s request should look like (conceptually):
- Method: POST
- Address: your copied Webhook URL
- Header:
Authorization= the copied value (no extra word like “Bearer” unless Gupshup’s own screen asks for that format—follow what Yellow.ai shows you as the full value to send)
Edit or disconnect later
- Edit — Repeat the steps above and choose Edit account when you need a new User ID or Password.
- Disconnect — Removes this Gupshup connection from the bot until you connect again.