Setup your Knowledge base
You can set up a Knowledge base if:
- You have content on websites or in files (PDF, DO CX, CSV, TXT).
- You use platforms like ServiceNow to manage knowledge articles.
- You want the AI agent to deliver consistent, context-aware responses.
What you can do
With the Knowledge Base, you can:
- Connect to content sources like URLs, sitemaps, file uploads, or ServiceNow.
- Configure metadata to improve search accuracy.
- Schedule automatic syncs to keep content updated.
- Organize documents using folders and subfolders.
What you need
Before setting up, ensure:
-
You have Admin or Developer access.
-
For ServiceNow integration, you have:
- Instance URL
- Client ID
- Client Secret
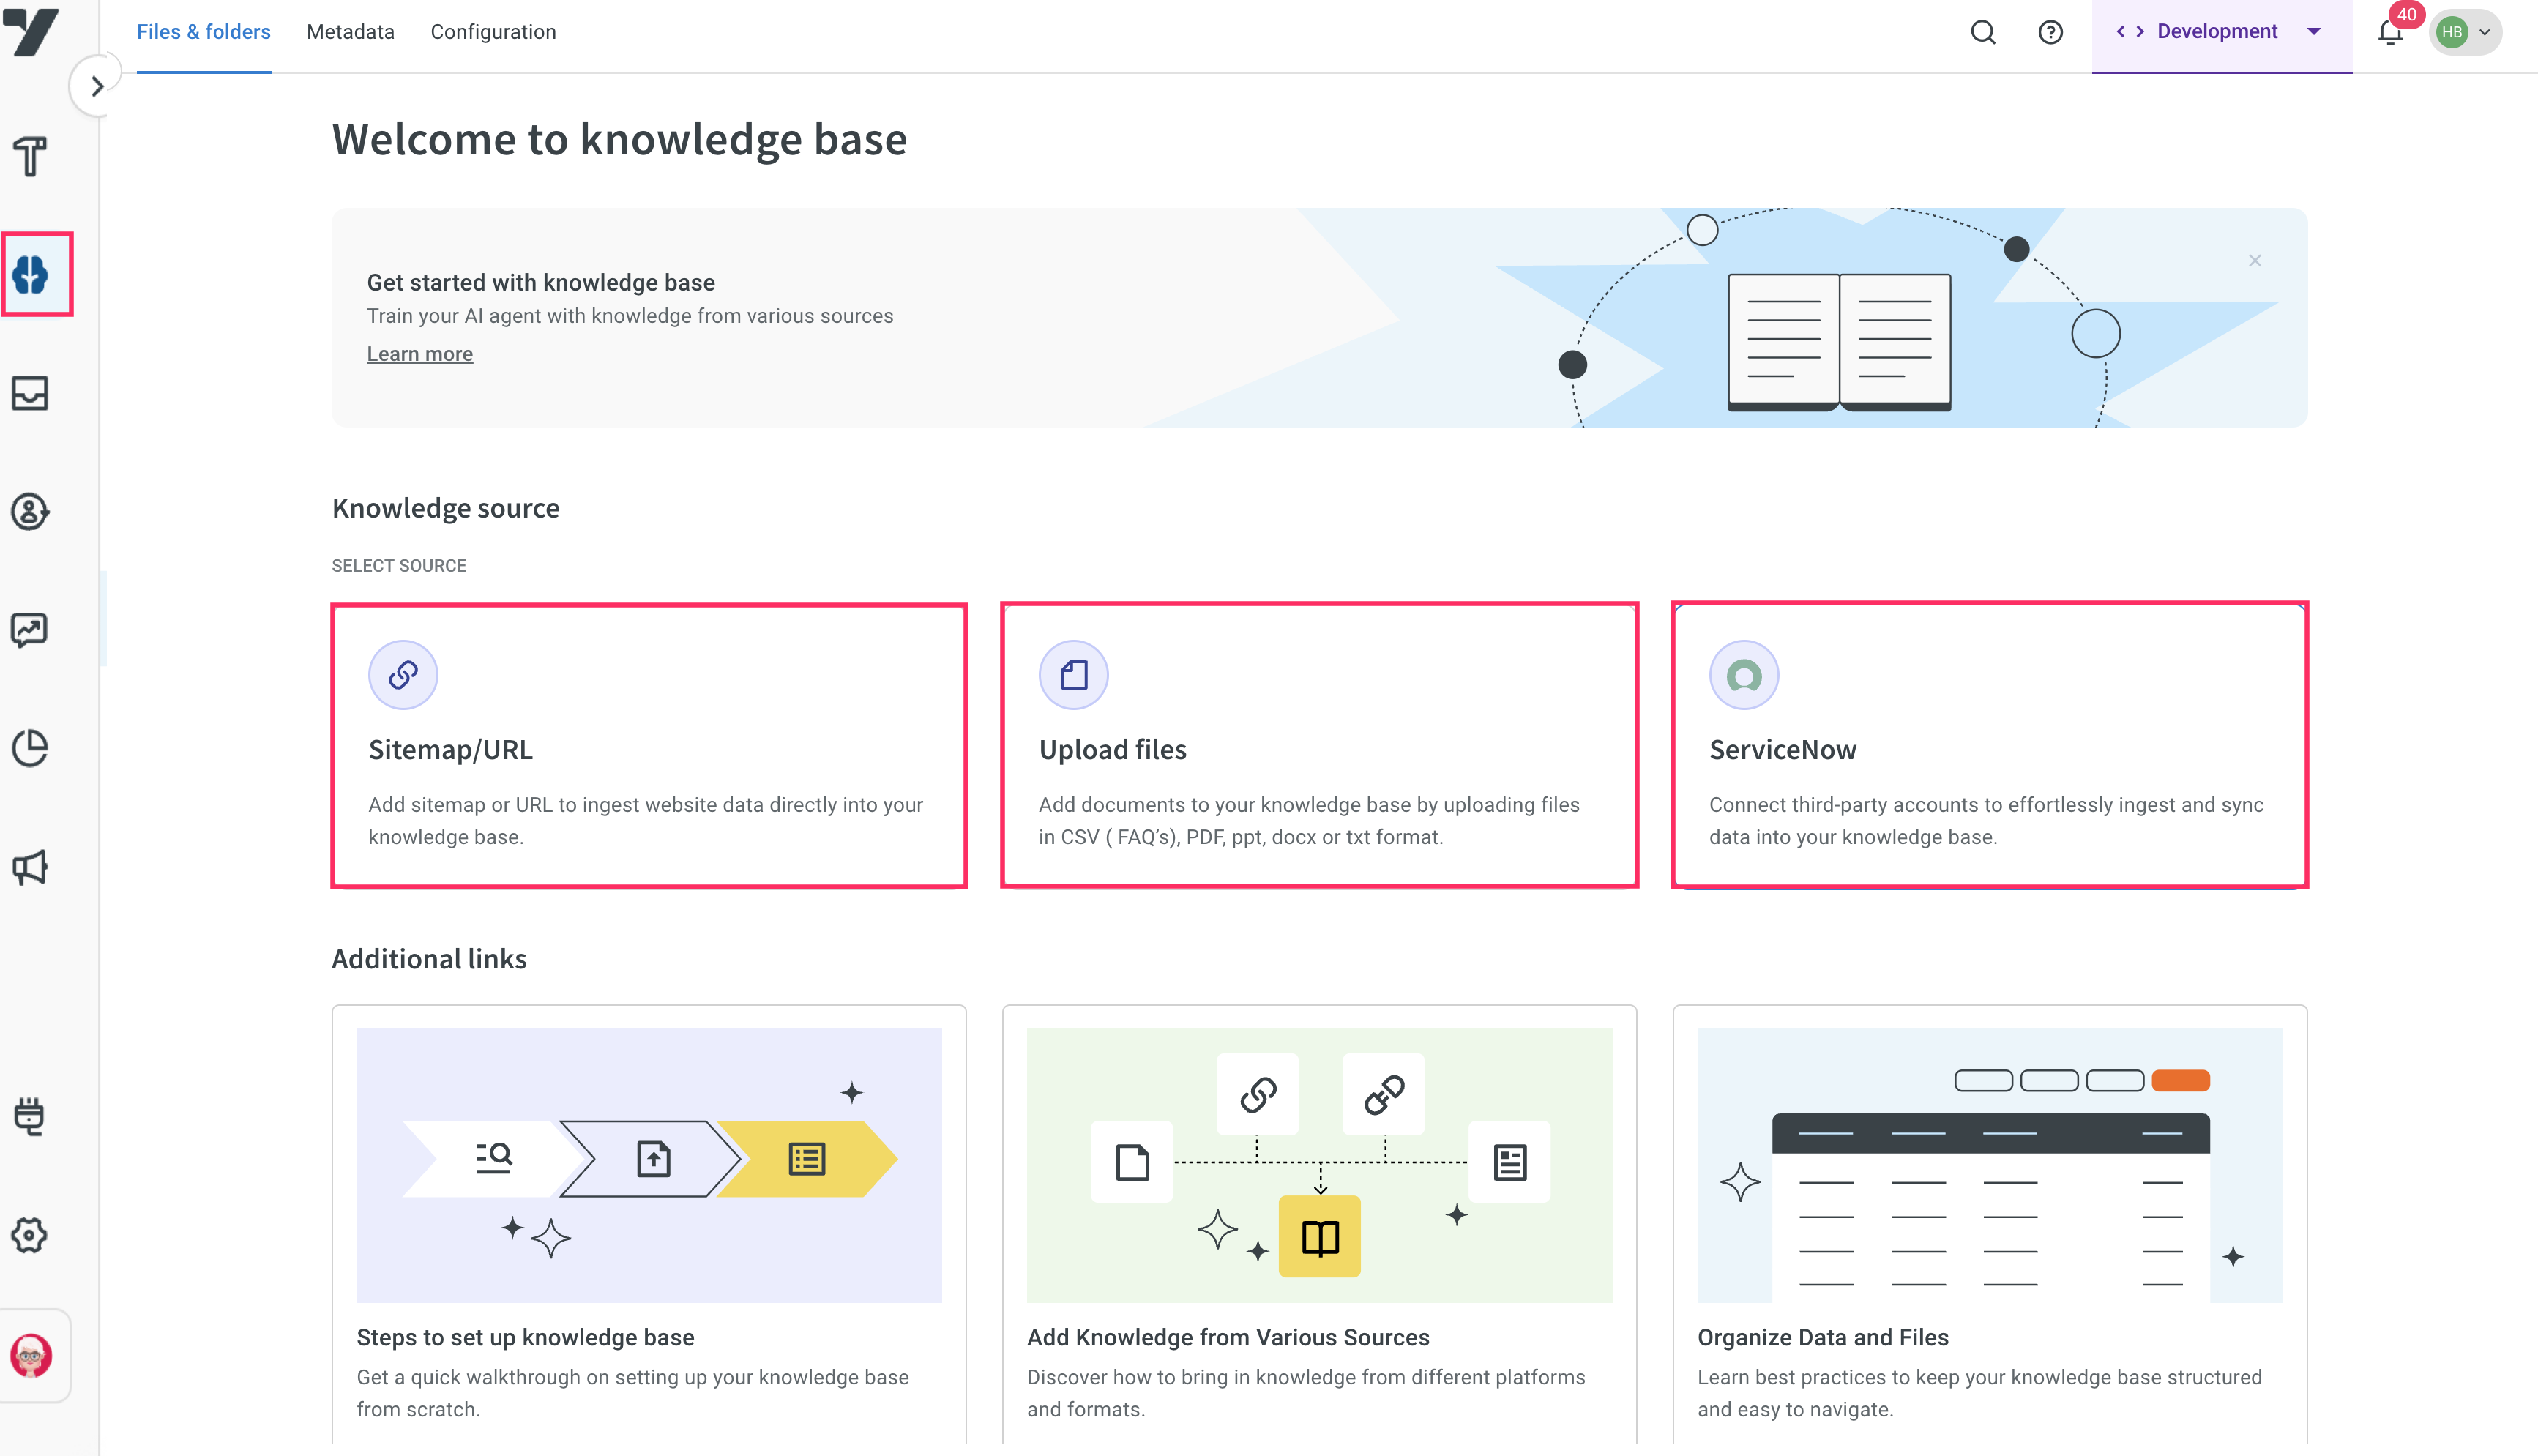
How to access the Knowledge Base
-
In the left navigation menu, click Knowledge Base.
-
Select a content source to begin setup:
- Sitemaps / URLs
- Upload files
- ServiceNow
You should set up a Knowledge Base if:
- You want the AI agent to refer to detailed documents like FAQs, help articles, or product manuals.
- You already have relevant content on a website or in documents (PDF, DOCX, CSV, and TXT).
- You use platforms like ServiceNow for managing knowledge articles and want to integrate them into your AI agent.
The setup process is designed to be user-friendly, which allows you to:
- Connect various content sources such as website sitemaps, specific URLs, uploaded documents, or third-party knowledge platforms like ServiceNow.
- Configure metadata to search the relevant files.
- Schedule automatic syncs to ensure your Knowledge Base remains up to date with the latest information.
- Organize content using folders and subfolders for easier file management.
Prerequisites
Before setting up the knowledge base consider the below prerequisites:
- You should have the appropriate user role either Admin, or Developer to access and configure the KB.
- If you wish to integrate with external platforms like ServiceNow, ensure you have the required credentials such as the instance URL, client ID, and client secret.
Access Knowledge base
To access the Knowledge base, follow these steps:
-
On the navigation menu, click Knowledge Base.
- You will be guided through a simple setup process where you can choose content sources such as Sitemaps/URLs, Upload files, and ServiceNow.
This guide walks you through each step on how to set up and manage your Knowledge Base.
Steps to setup Knowledge base
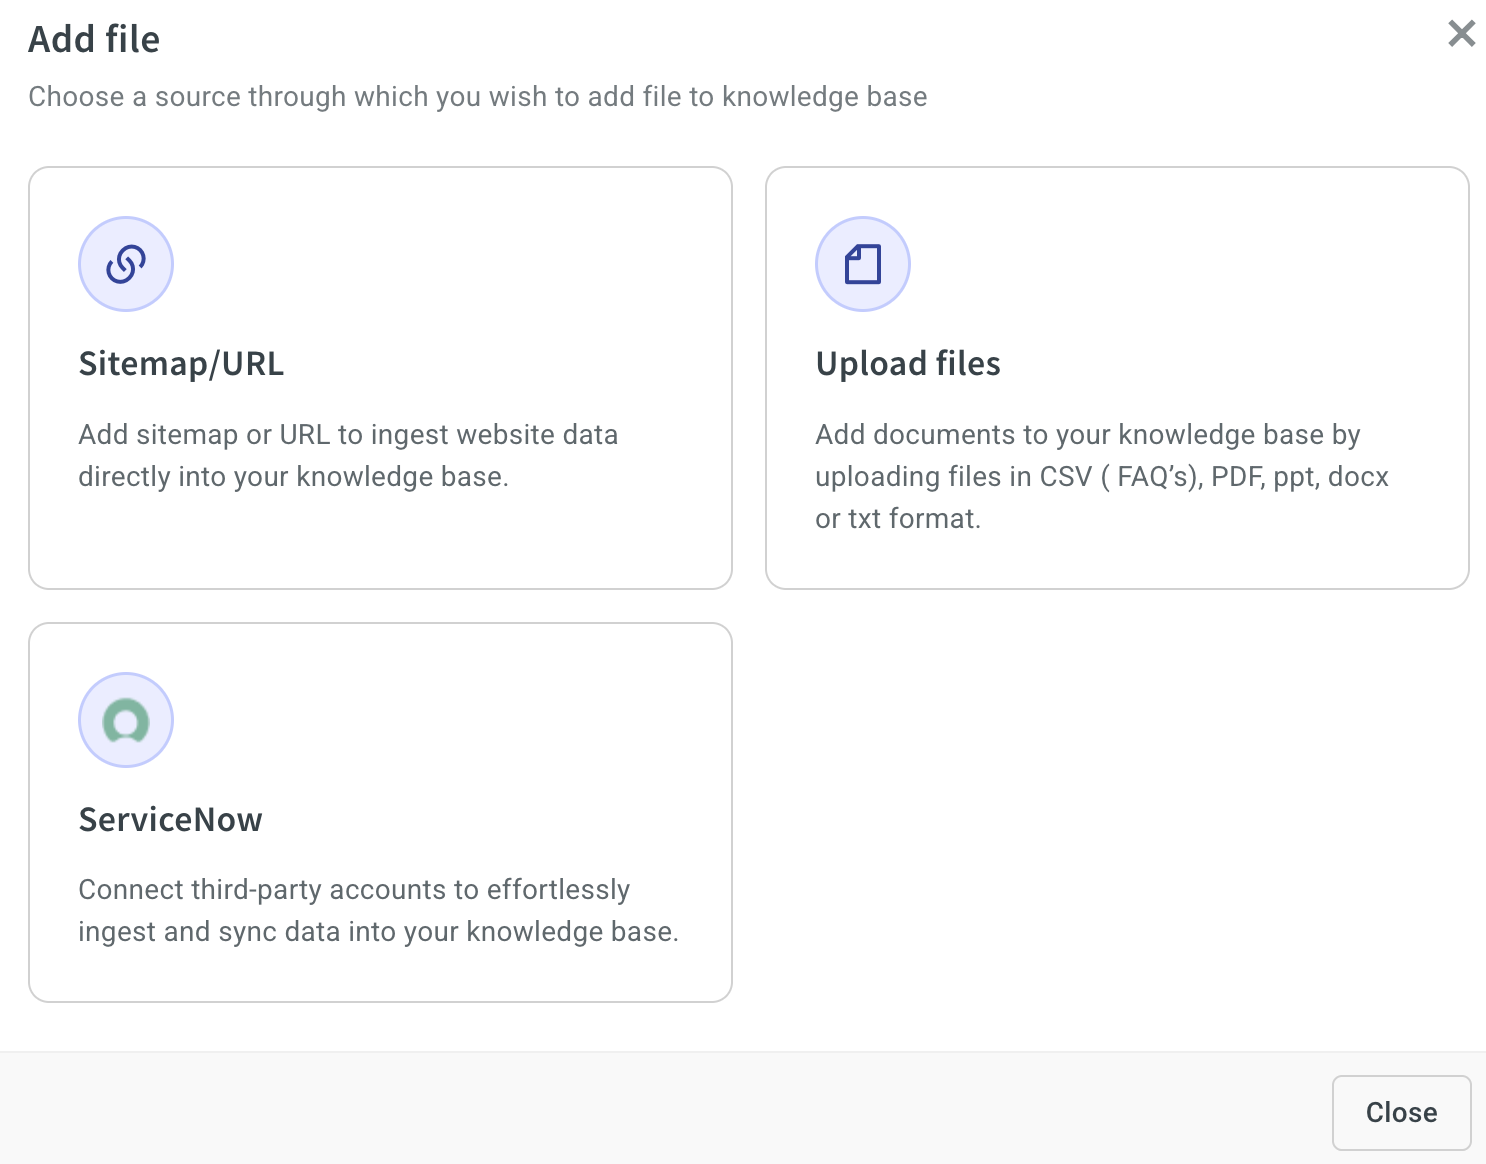
Step 1: Import content from Knowledge Source
The first step is to choose the content source you want to integrate into the Knowledge Base.
Supported source types
Your Knowledge Base can ingest content from various source types:
- Sitemaps/URLs: Add a sitemap or multiple webpage URLs to automatically sync content from your website.
- Upload files: Upload document files such as PDF, DOCX, TXT, or CSV to manually add information.
- ServiceNow: Integrate your ServiceNow knowledge base by syncing articles directly into the platform.
Step 2: Configure Metadata (optional)
Metadata helps your AI agent filter and locate the files during Knowledge search.
You can choose either:
-
System Metadata is automatically fetched from third-party sources (example, ServiceNow) and cannot be edited except for the description.
-
Custom Metadata can be created and managed by users directly within the platform. Users can define custom metadata fields such as Department, Document Type, or Publish Date using various data types like strings, integers, picklists, multiselects, booleans, and date/time.

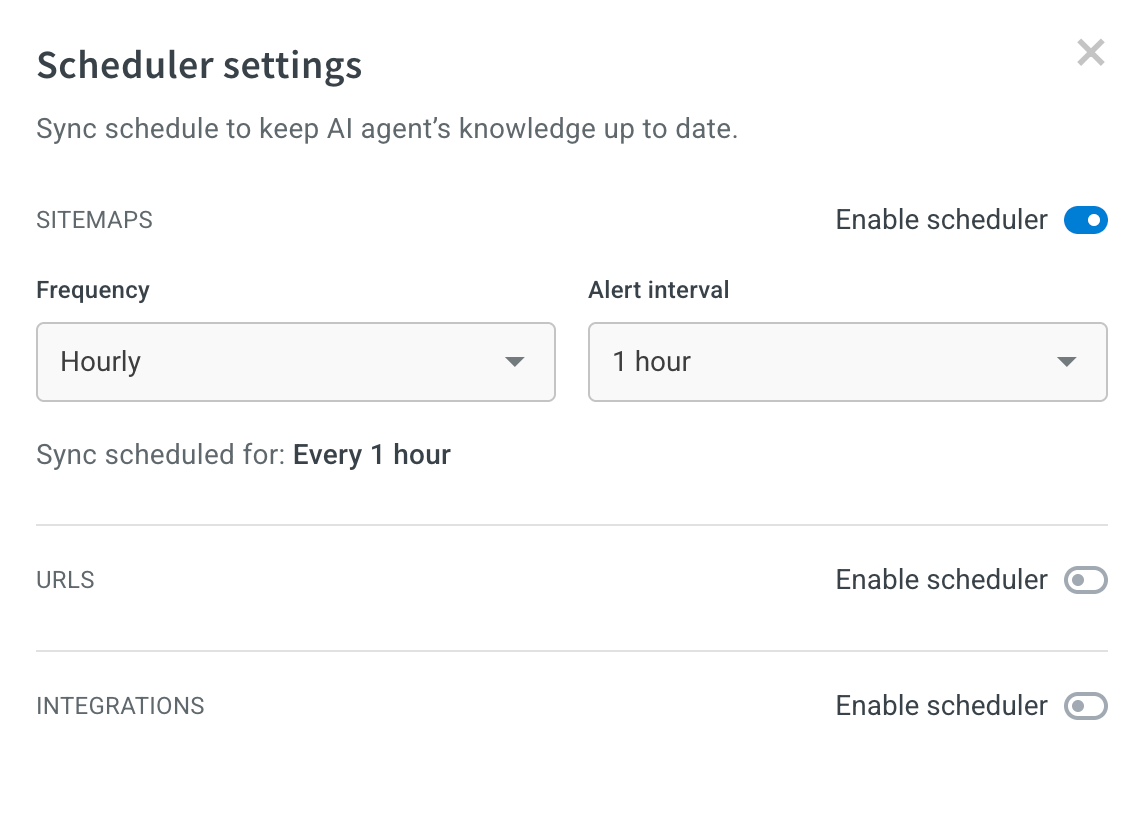
Step 3: Set up a Scheduler (optional)
To keep your Knowledge Base content up to date, you can configure automatic synchronization. This is useful for content sources that change frequently, like websites or dynamic knowledge platforms. Scheduled syncs ensure your AI agent always references the most current information.
Sync Frequencies supported:
-
Hourly: Choose from 1, 3, 6, or 12-hour intervals
-
Daily: Set a specific time for the daily sync
-
Weekly: Choose the day and time for updates
Step 4: Organize files into folders and subfolders (optional)
To manage large volumes of content, you can organize files using a folder hierarchy:
-
Create folders and subfolders to group files by topic, department, source, or project.
-
For some sources like ServiceNow, folders may be auto-generated and non-editable, reflecting the external platform's structure.
-
For all user-created folders, files can be freely moved between folders to support custom organization strategies.
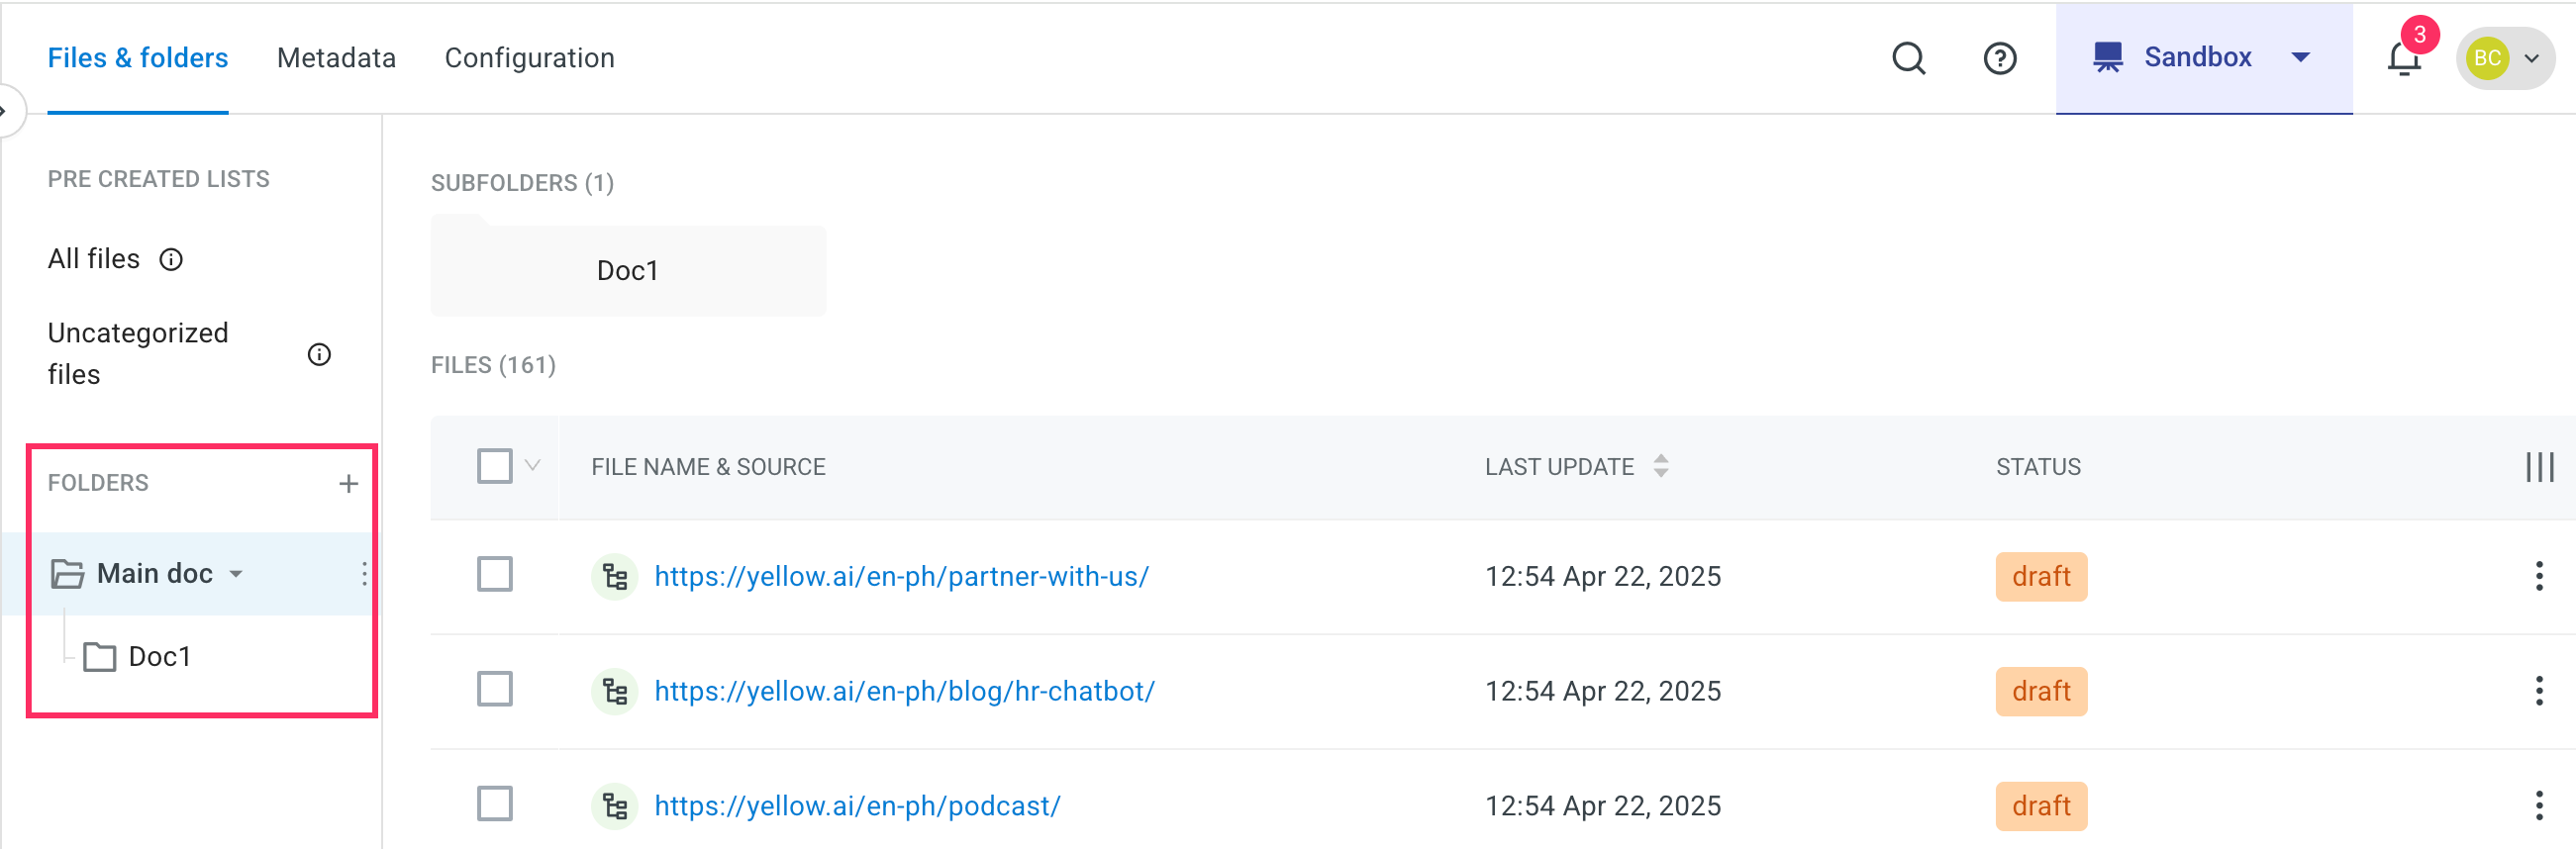
Step 5: Manage file status
Instead of a separate publishing step, file availability is now controlled through a Status column, which determines where the file can be accessed:
- Published: The file is available to the AI agent in Production, Staging, and Sandbox environments.
- Draft: The file is only available in Staging and Sandbox environments, ideal for testing and review before going live.
Only users with the roles of Approver or Super admin can change a file’s status.
